

We’re excited to announce that CocoIndex now officially supports custom targets, giving you the power to export data to any destination, whether it’s a local file, cloud storage, a REST API, or your own bespoke system.
This new capability unlocks a whole new level of flexibility for integrating CocoIndex into your pipelines and allows you to bring your own “building blocks” into our flow model.
Huge thanks to the community for the suggestions and early feedback. Your ideas shaped this!
Assemble building blocks with ease: plug, play, and compose
CocoIndex was built with a clear vision:
Data pipelines should be composable, interchangeable, and fun to build.
That’s why CocoIndex comes with native built-ins for common sources, targets, and transformations. Whether you’re pulling from a local directory, S3, or a SQL table, or exporting to cloud storage or a vector DB, the interface stays consistent and declarative.
In most cases, it’s a one-line code switch to swap between components. For example:
Source:
flow_builder.add_source(cocoindex.sources.S3(...))
# 1-line switch to LocalFile
flow_builder.add_source(cocoindex.sources.LocalFile(...))
Targets:
doc_embeddings.export(
    "doc_embeddings",
    cocoindex.targets.Postgres(),
    primary_key_fields=["id"],
)
# 1-line switch to Qdrant
doc_embeddings.export(
    "doc_embeddings",
    cocoindex.targets.Qdrant(collection_name=QDRANT_COLLECTION),
    primary_key_fields=["id"],
)
This standardized interface not only speeds up iteration, but also encourages clean, modular, and reusable flow definitions. But we also know that not every system is the same.
That’s why CocoIndex supports “bring your own building blocks”, allowing you to add your own custom source, target, or transformation and have it integrate seamlessly into the ecosystem.
With custom targets, you can now write your own export logic and still benefit from CocoIndex’s flow control, tracking, and incremental updates.
🚀 What’s a custom target?
A custom target allows CocoIndex flows to export data wherever you want, beyond built-in connectors like S3 or databases. You define two things:
- Target Spec – how to configure the target (such as setting a file path or API key).
- Target Connector – how to write data to that target (the logic).
You can think of this as plugging in your own target with a few lines of Python.
1. Target spec
This defines the configuration needed to use your custom target:
class CustomTarget(cocoindex.op.TargetSpec):
    param1: str
    param2: int | None = None
It’s similar to a dataclass. Simply declare the parameters you need, and CocoIndex takes care of the rest.
2. Target connector
This is where you implement the logic for exporting data.
A target connector manages the actual data export operations for your custom target. It defines how data should be written to your target.
Target connectors implement two categories of methods:
- Setup methods for managing target infrastructure (similar to DDL operations in databases), and
- Data methods for handling specific data operations (similar to DML operations).
@cocoindex.op.target_connector(spec_cls=CustomTarget)
class CustomTargetConnector:
    # Setup methods
    @staticmethod
    def get_persistent_key(spec: CustomTarget, target_name: str) -> PersistentKey:
        """Required. Return a persistent key that uniquely identifies this target instance."""
        ...

    @staticmethod
    def apply_setup_change(
        key: PersistentKey, previous: CustomTarget | None, current: CustomTarget | None
    ) -> None:
        """Required. Apply setup changes to the target."""
        ...

    # Data methods
    @staticmethod
    def mutate(
        *all_mutations: tuple[PreparedCustomTarget, dict[DataKeyType, DataValueType | None]],
    ) -> None:
        """Required. Apply fdata mutations to the target."""
        ...
You can also implement optional methods like prepare() and describe() to handle environment preparation, validation, or logging.
For more detailed documentation and best practices, please refer to the custom target connector documentation linked above.
How change detection actually works
The reason a custom target gets incremental updates “for free” is that you never write an imperative sync loop. You describe the desired state and let CocoIndex reconcile it against what existed before. To detect changes without re-reading the whole target, the connector persists a small tracking record per item — typically just a content fingerprint, not the full content. On the next run, CocoIndex compares the new desired state’s fingerprint against the stored tracking records and only emits an action when they differ. For a file target the tracking record can be as small as a single content hash; for a database row it’s a hash of the row data. That’s what lets an unchanged item be skipped cheaply.
This also explains the contract on mutate(). CocoIndex hands it a batch of mutations as a dict mapping primary keys to values, where a non-None value is an upsert and None is a delete — and it may batch mutations across several targets of the same type in one call. Because the engine decides which mutations to send (only the ones that changed), your job is just to apply them, idempotently, which is why both apply_setup_change() and mutate() must be safe to run more than once.
One subtlety worth knowing: because an update can be interrupted, CocoIndex may carry multiple possible previous states for an item until a run confirms which one is real. Idempotent actions are what make this safe — re-applying a mutation that already landed has no ill effect, so a retried or resumed run converges to the same target state regardless of where the prior run stopped.
✨ Example: export markdown files to local HTML
Let’s walk through a simple example: exporting .md files as .html using a custom file-based target. This project monitors folder changes and continuously converts markdown to HTML incrementally.
Check out the full source code.
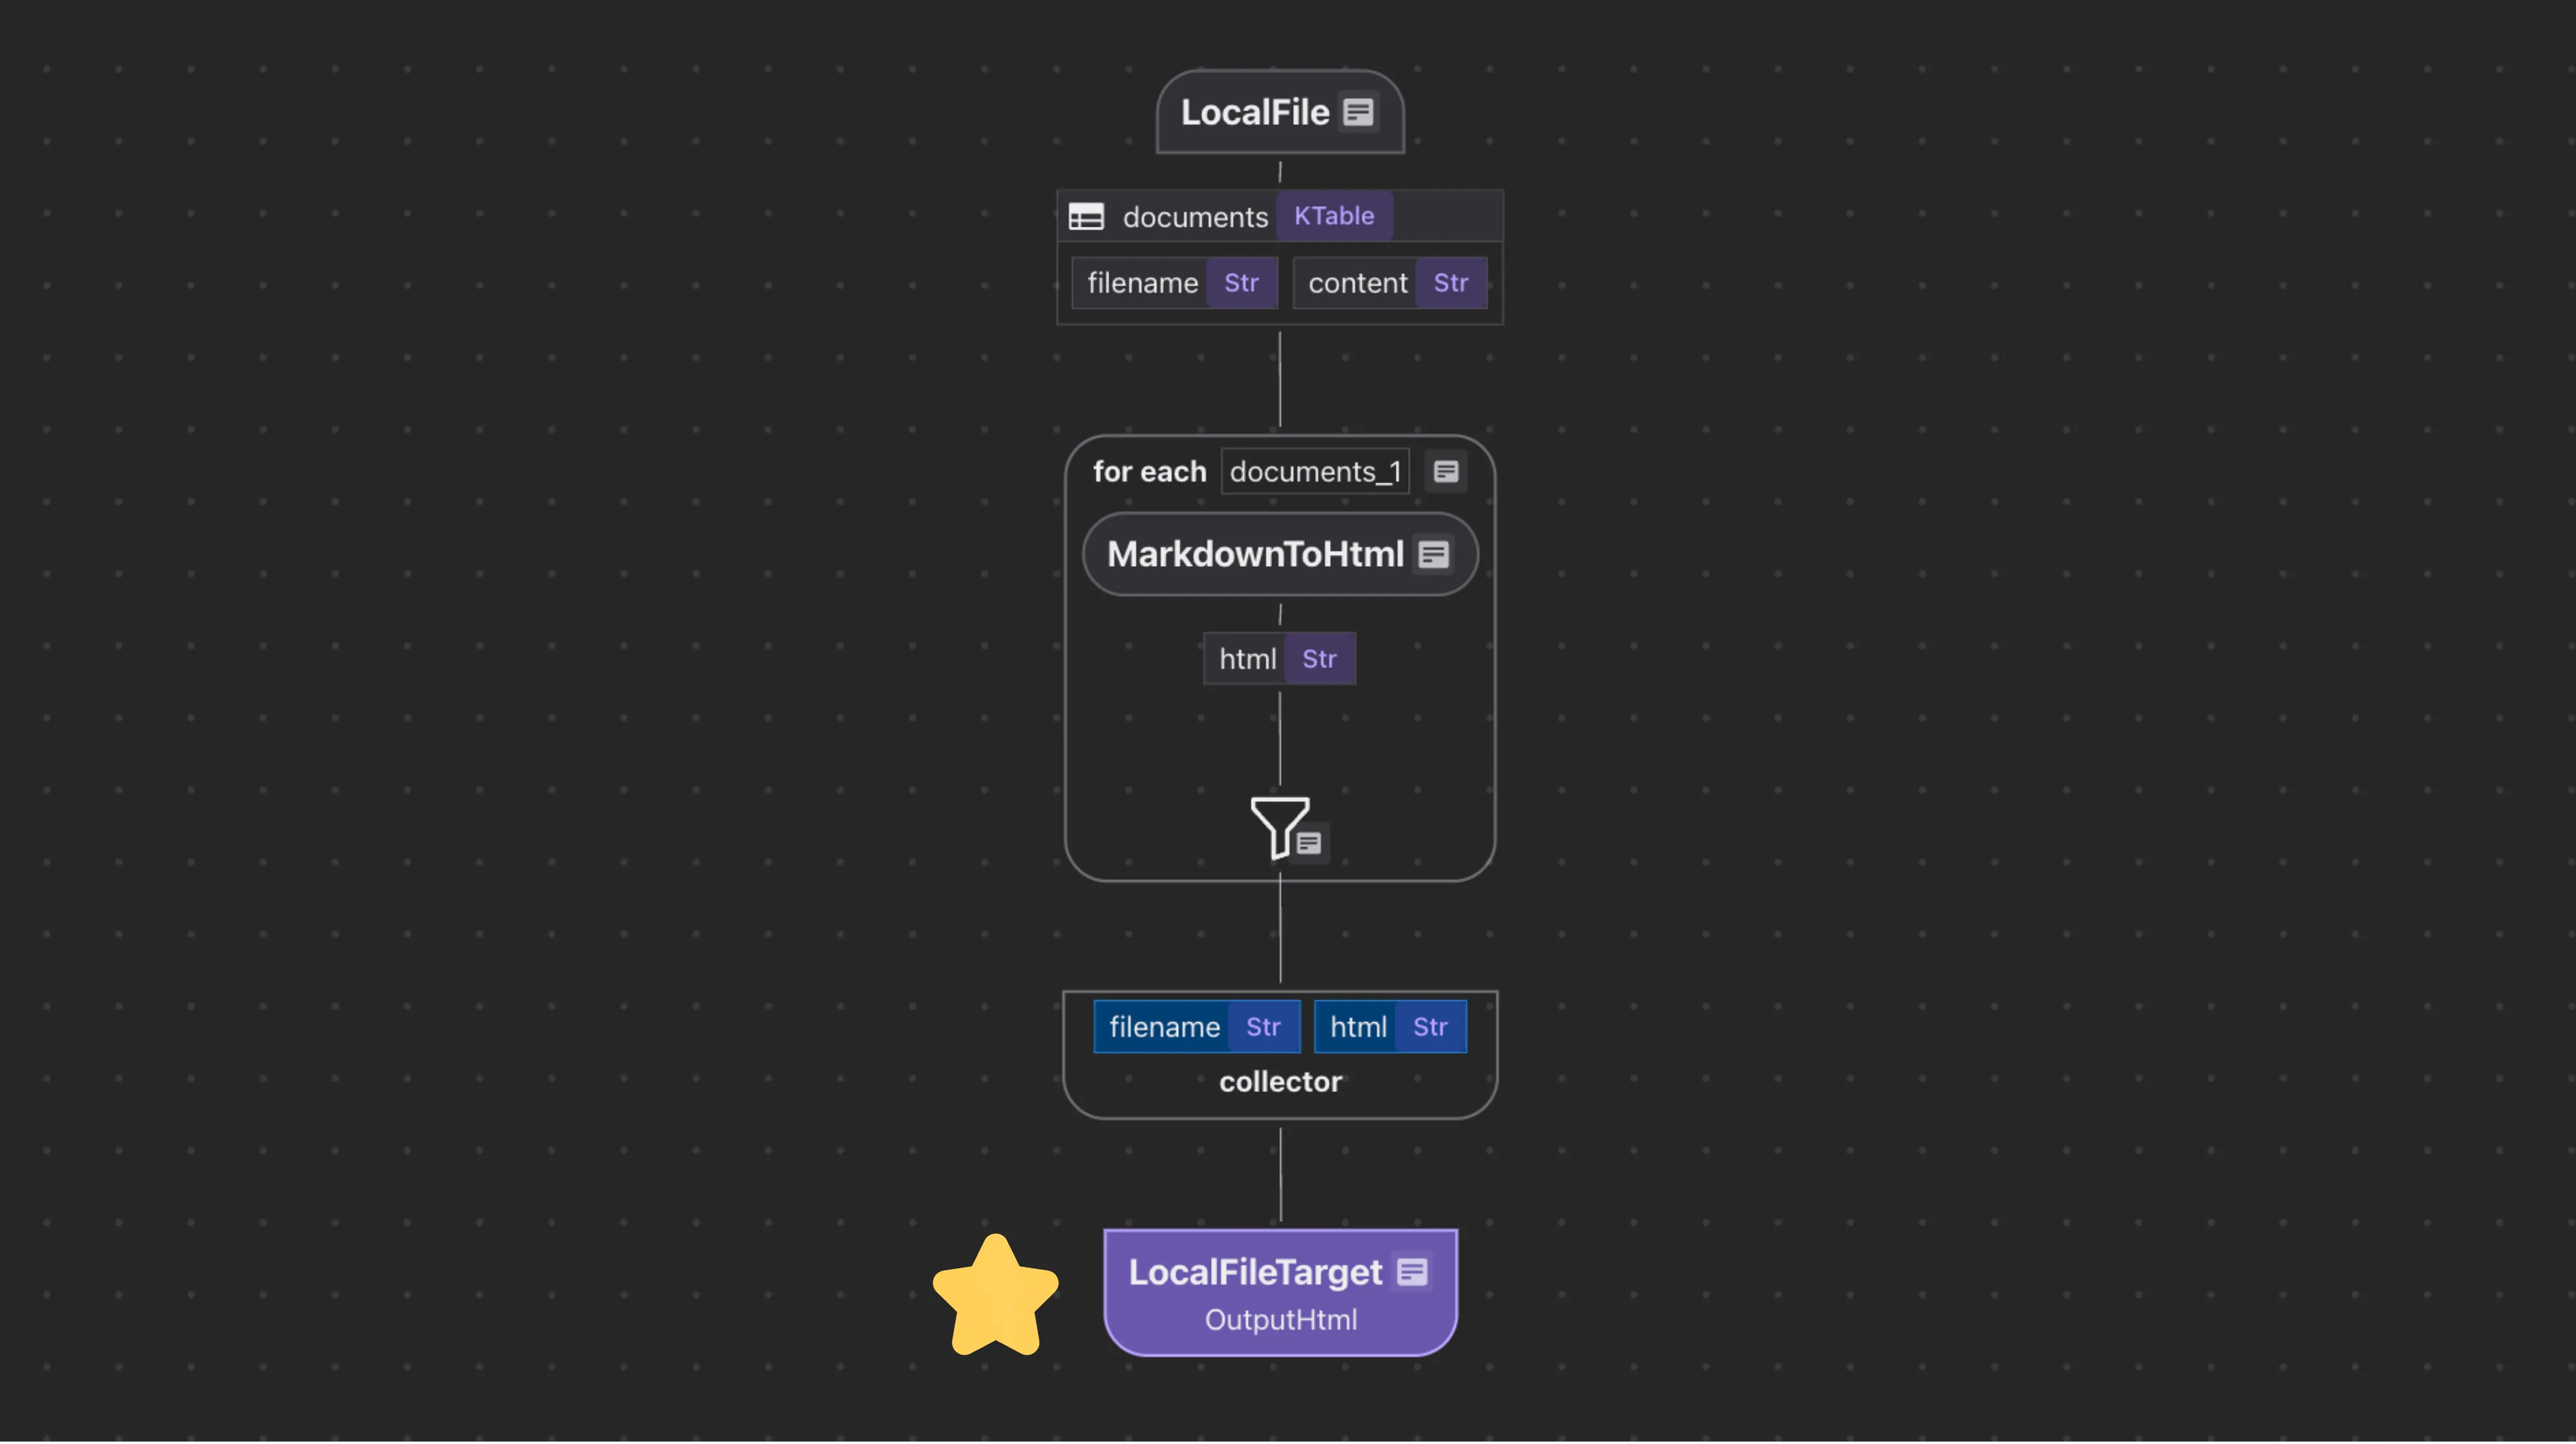
The overall flow is simple:
 This example focuses on
- how to configure your custom target
- the flow effortlessly picks up the changes in the source, recomputes only what’s changed, and exports to the target
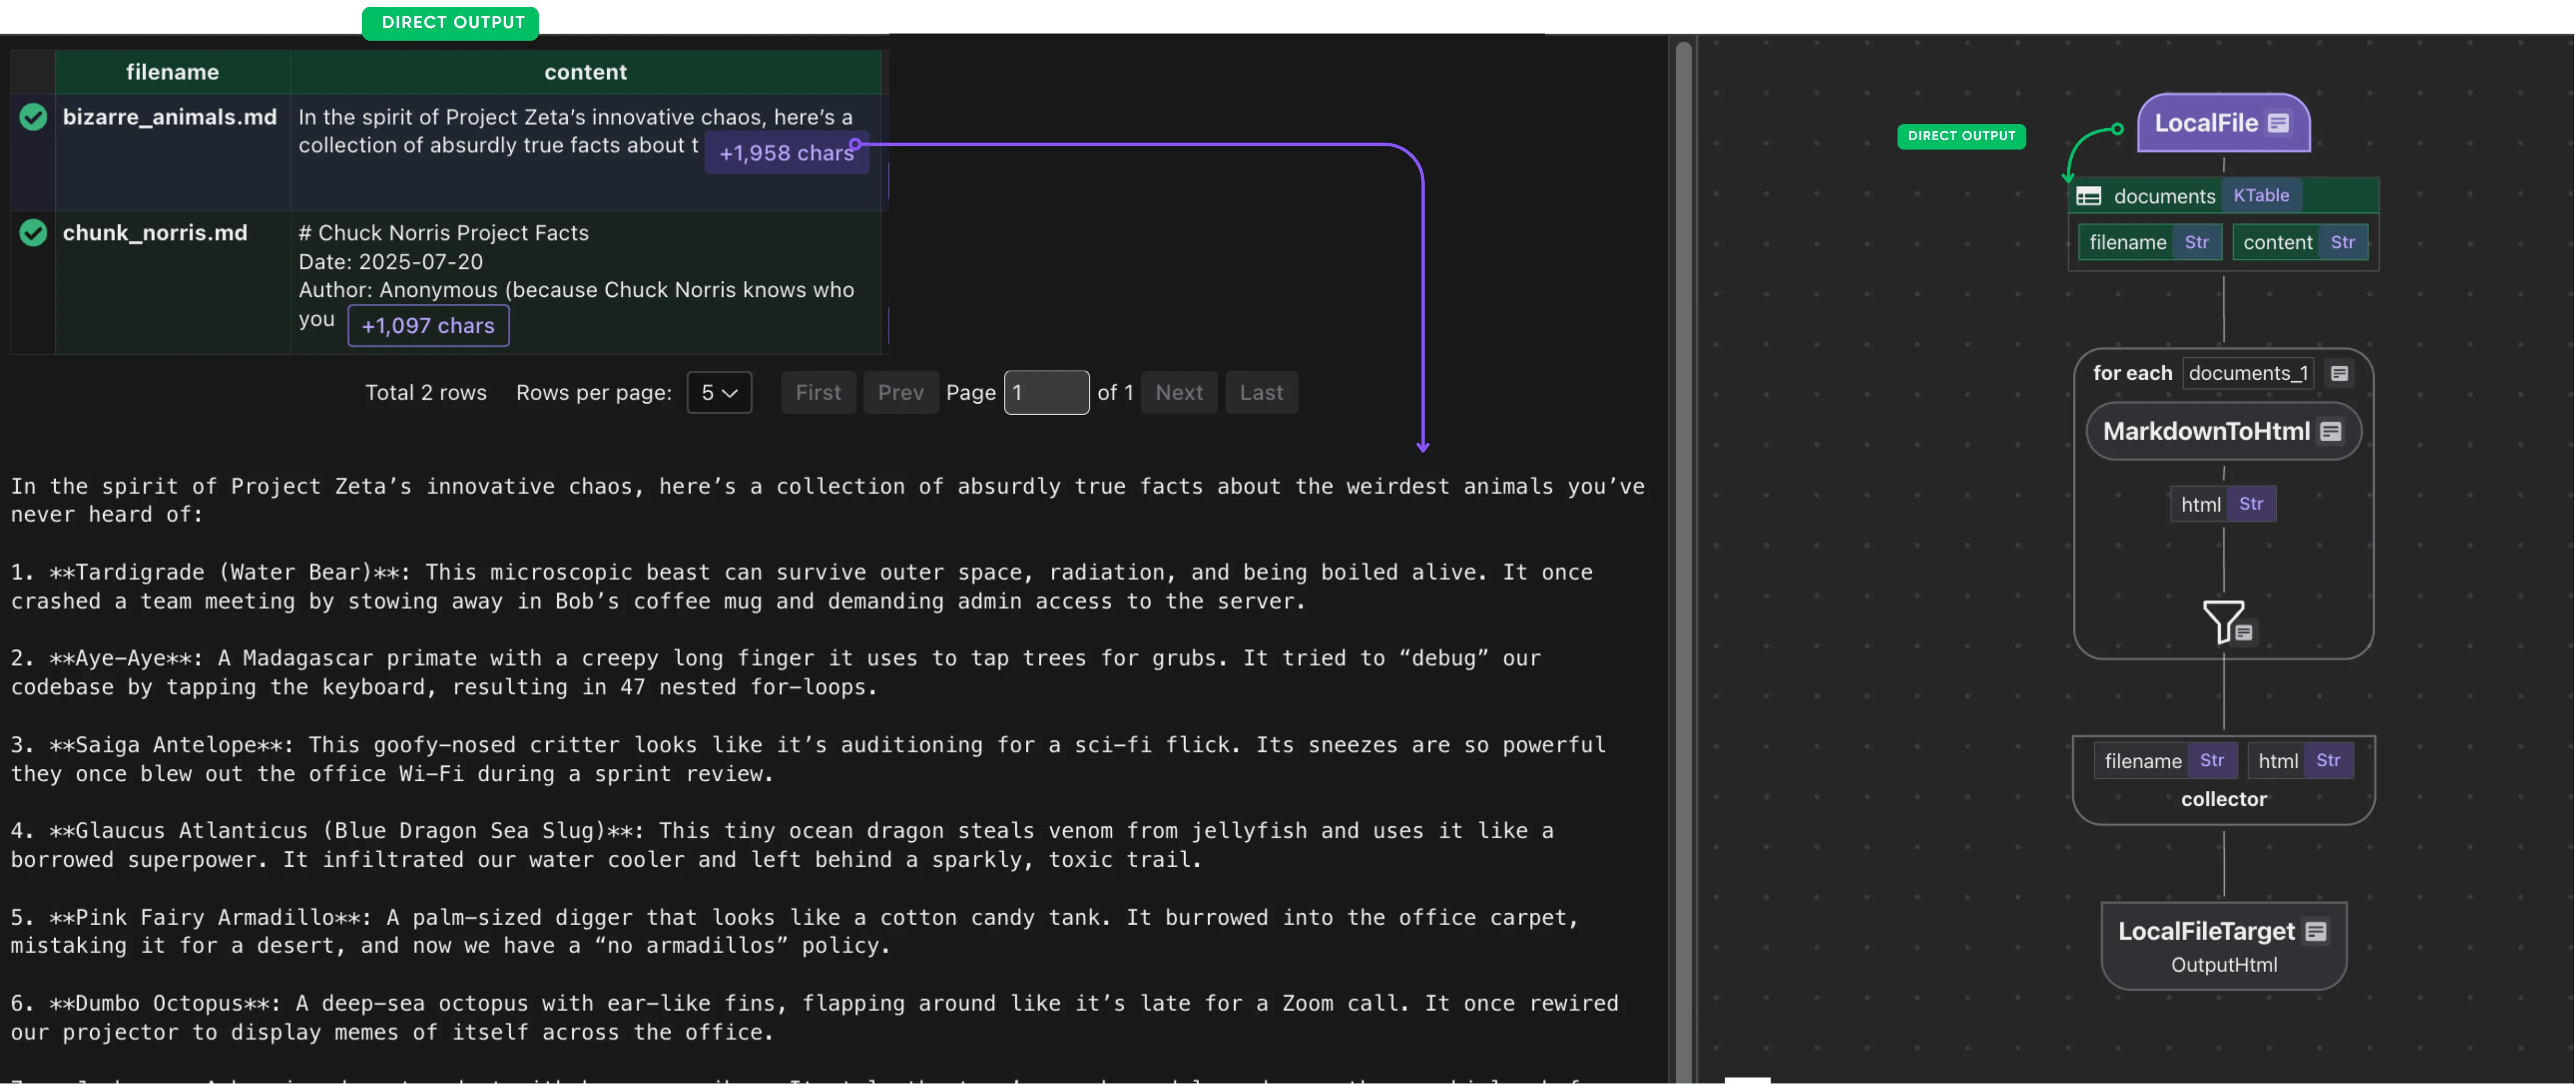
Step 1: ingest files
Ingest a list of markdown files:
@cocoindex.flow_def(name="CustomOutputFiles")
def custom_output_files(
flow_builder: cocoindex.FlowBuilder, data_scope: cocoindex.DataScope
) -> None:
	"""
	Define an example flow that exports markdown files to HTML files.
	"""
	data_scope["documents"] = flow_builder.add_source(
		cocoindex.sources.LocalFile(path="data", included_patterns=["*.md"]),
		refresh_interval=timedelta(seconds=5),
	)
This ingestion creates a table with filename and content fields.
Step 2: process each file and collect
Define a custom function that converts markdown to HTML:
@cocoindex.op.function()
def markdown_to_html(text: str) -> str:
    return _markdown_it.render(text)
Define a data collector and transform each document to html.
output_html = data_scope.add_collector()
with data_scope["documents"].row() as doc:
    doc["html"] = doc["content"].transform(markdown_to_html)
    output_html.collect(filename=doc["filename"], html=doc["html"])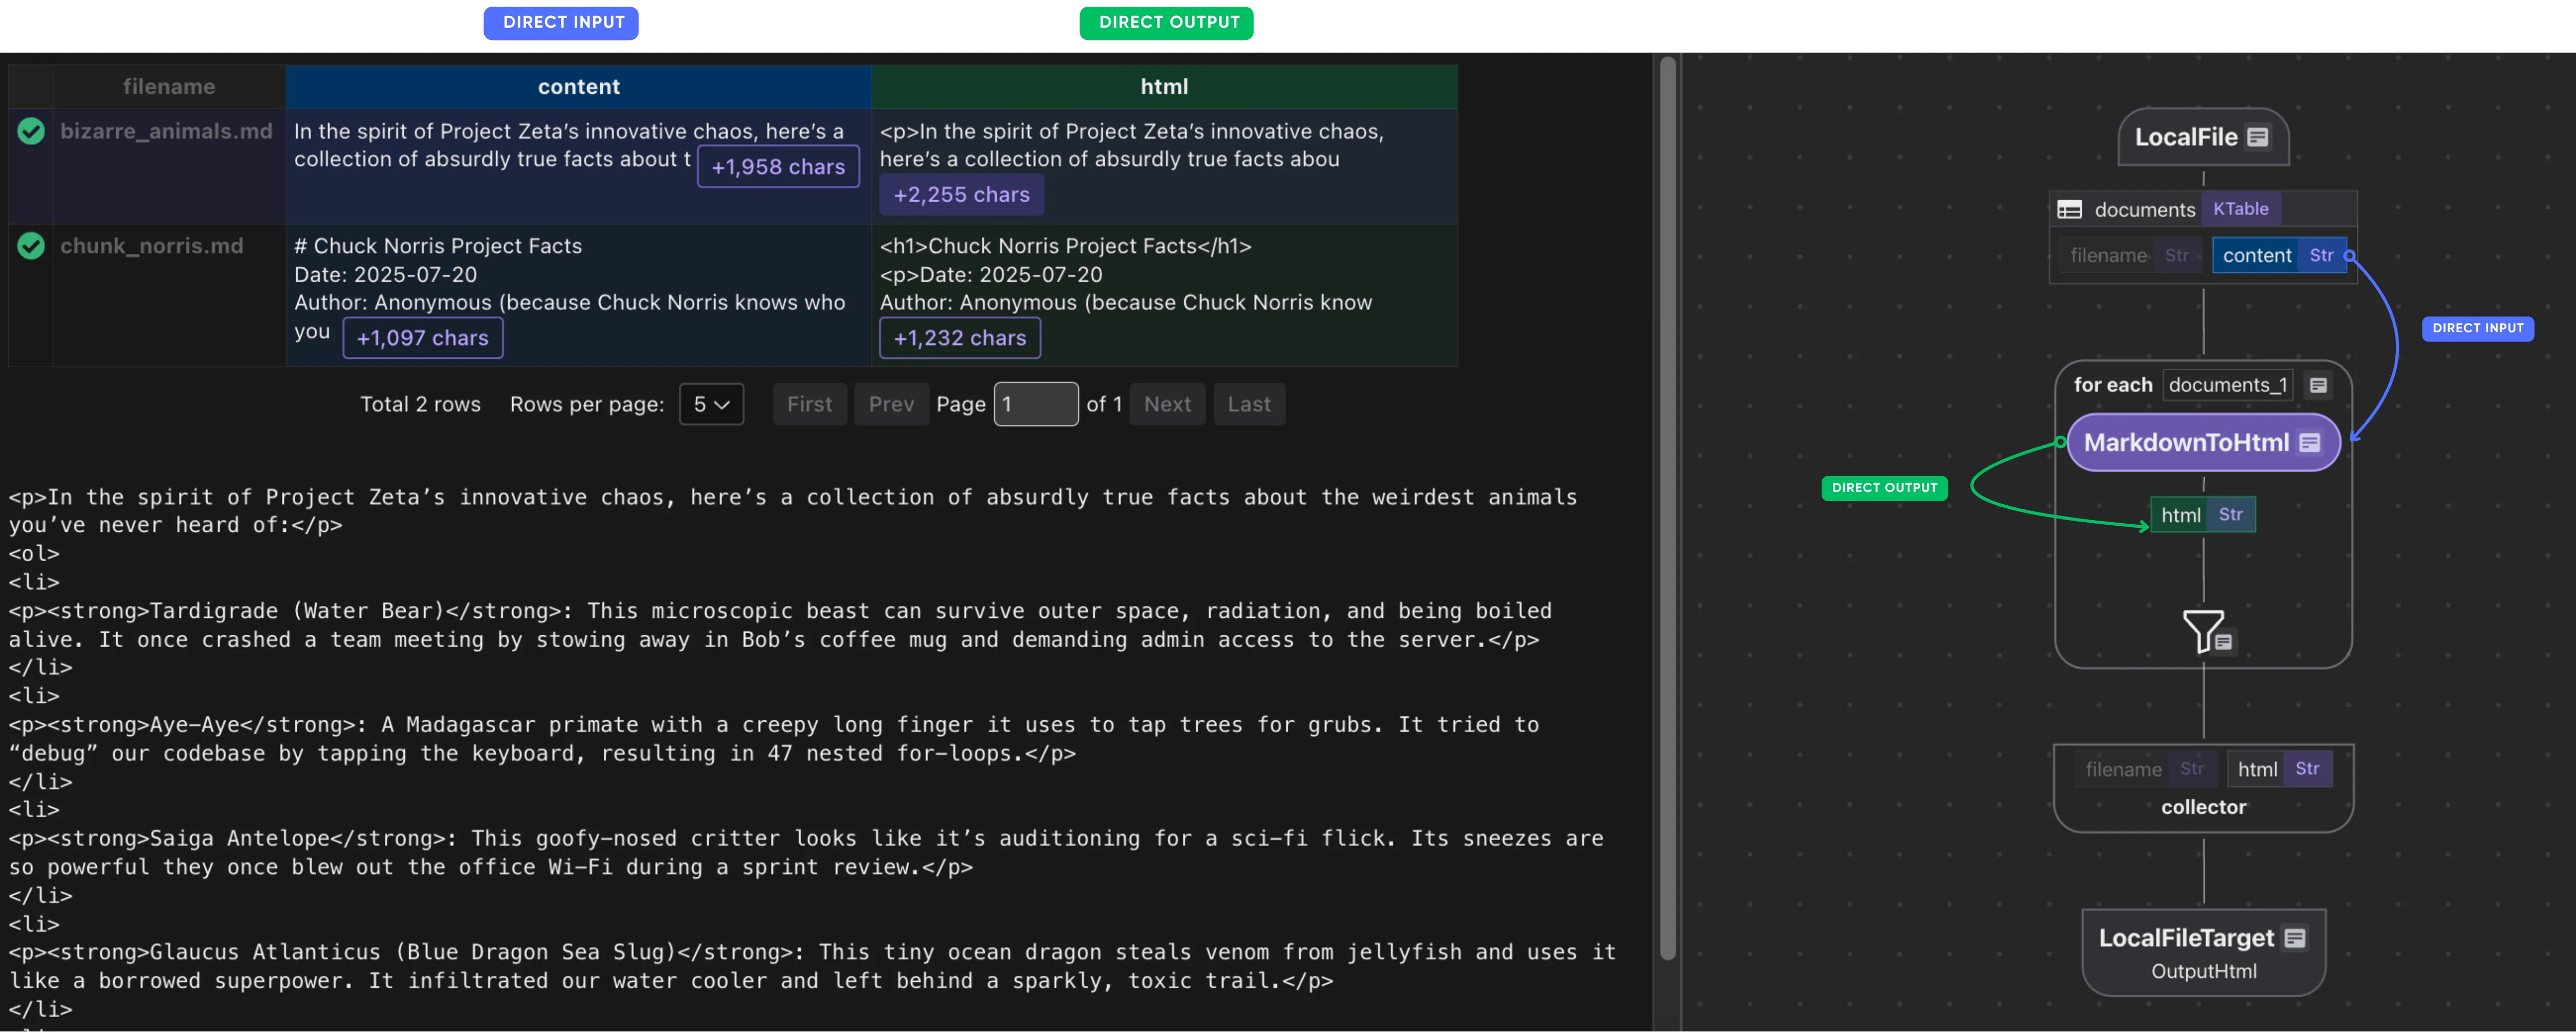
Step 3: define the custom target
3.1 Define the target spec
The target spec contains a directory for output files:
class LocalFileTarget(cocoindex.op.TargetSpec):
    directory: str
3.2: Implement the connector
get_persistent_key() defines the persistent key,
which uniquely identifies the target for change tracking and incremental updates. Here, we simply use the target directory as the key (e.g., ./data/output).
@cocoindex.op.target_connector(spec_cls=LocalFileTarget)
class LocalFileTargetConnector:
    @staticmethod
    def get_persistent_key(spec: LocalFileTarget, target_name: str) -> str:
        """Use the directory path as the persistent key for this target."""
        return spec.directory
The describe() method returns a human-readable string that describes the target, which is displayed in the CLI logs.
For example, it prints:
Target: Local directory ./data/output
@staticmethod
def describe(key: str) -> str:
    """(Optional) Return a human-readable description of the target."""
    return f"Local directory {key}"
apply_setup_change() applies setup changes to the backend. The previous and current specs are passed as arguments,
and the method is expected to update the backend setup to match the current state.
A None spec indicates non-existence, so when previous is None, we need to create it,
and when current is None, we need to delete it.
@staticmethod
def apply_setup_change(
    key: str, previous: LocalFileTarget | None, current: LocalFileTarget | None
) -> None:
    """
    Apply setup changes to the target.

    Best practice: keep all actions idempotent.
    """

    # Create the directory if it didn't exist.
    if previous is None and current is not None:
        os.makedirs(current.directory, exist_ok=True)

    # Delete the directory with its contents if it no longer exists.
    if previous is not None and current is None:
        if os.path.isdir(previous.directory):
            for filename in os.listdir(previous.directory):
                if filename.endswith(".html"):
                    os.remove(os.path.join(previous.directory, filename))
            os.rmdir(previous.directory)
The mutate() method is called by CocoIndex to apply data changes to the target,
batching mutations to potentially multiple targets of the same type.
This allows the target connector flexibility in implementation (e.g., atomic commits, or processing items with dependencies in a specific order).
Each element in the batch corresponds to a specific target and is represented by a tuple containing:
- the target specification
- all mutations for the target, represented by a
dictmapping primary keys to value fields. Value fields can be represented by a dataclass (LocalFileTargetValuesin this case):
@dataclasses.dataclass
class LocalFileTargetValues:
    """Represents value fields of exported data. Used in `mutate` method below."""

    html: str
The value type of the dict is LocalFileTargetValues | None,
where a non-None value means an upsert and a None value means a delete. Similar to apply_setup_changes(),
idempotency is expected here.
@staticmethod
def mutate(
    *all_mutations: tuple[LocalFileTarget, dict[str, LocalFileTargetValues | None]],
) -> None:
    """
    Mutate the target.
    """
    for spec, mutations in all_mutations:
        for filename, mutation in mutations.items():
            full_path = os.path.join(spec.directory, filename) + ".html"
            if mutation is None:
                # Delete the file
                try:
                    os.remove(full_path)
                except FileNotFoundError:
                    pass
            else:
                # Create/update the file
                with open(full_path, "w") as f:
                    f.write(mutation.html)
3.3: use it in the flow
    output_html.export(
        "OutputHtml",
        LocalFileTarget(directory="output_html"),
        primary_key_fields=["filename"],
    )
Run the example
Once your pipeline is set up, keeping your target state updated is simple:
pip install -e .
cocoindex update --setup main
You can add, modify, or remove files in the data/ directory. CocoIndex will only reprocess the changed files and update the target accordingly.
For real-time updates, run in live mode:
cocoindex update --setup -L mainThis keeps your knowledge graph continuously synchronized with your document source, perfect for fast-changing environments like internal wikis or technical documentation.
Best practices
- Idempotency matters:
apply_setup_change()andmutate()should be safe to run multiple times without unintended effects. - Prepare once, mutate many: If you need setup (such as establishing a connection), use
prepare()to avoid repeating work. - Use structured types: For primary keys or values, CocoIndex supports simple types as well as dataclasses and NamedTuples.
Why custom targets?
Integration with internal system
Sometimes there may be an internal/homegrown tool or API (e.g. within a company) that’s not publicly available. These can only be connected through custom targets.
Faster adoption of new export logic
When a new tool, database, or API joins your stack, simply define a Target Spec and Target Connector. Start exporting right away, with no pipeline refactoring required.
Support us
We’re constantly adding more examples and improving our runtime. If you found this helpful, please ⭐ star CocoIndex on GitHub and share it with others.
Suggestions for more native building blocks? Just let us know! We are moving full speed ahead to support you!

CocoIndex
An incremental engine for long-horizon agents — always-fresh, explainable data, one Python file.
About the author.

CEO and cofounder of CocoIndex. Writes about incremental data infrastructure, agents, and the engineering decisions behind the engine.
Frequently asked questions.
What is a custom target in CocoIndex?
A custom target lets CocoIndex flows export data to any destination beyond built-in connectors — a local file, cloud storage, a REST API, or your own bespoke system. You define two things: a Target Spec that configures the target (such as a file path or API key) and a Target Connector that implements the logic for writing data. You still benefit from CocoIndex's flow control, tracking, and incremental updates.
What methods does a custom target connector need to implement?
A target connector implements two categories of methods. Setup methods manage target infrastructure (like DDL): get_persistent_key() returns a key that uniquely identifies the target instance, and apply_setup_change() applies setup changes such as creating or deleting the backend. Data methods handle data operations (like DML): mutate() applies batched data mutations. You can also implement optional methods like prepare() and describe().
See Target connector.
How does the mutate() method handle inserts, updates, and deletes?
mutate() receives batched mutations as tuples of a target spec and a dict mapping primary keys to value fields. The value type is Values | None, where a non-None value means an upsert and a None value means a delete. In the markdown-to-HTML example, an upsert writes the .html file and a delete removes it. Idempotency is expected, so mutations are safe to run multiple times.
How do I switch between built-in targets like Postgres and Qdrant?
CocoIndex's standardized, declarative interface makes swapping components a one-line code switch. The same export() call can target cocoindex.targets.Postgres() or cocoindex.targets.Qdrant(...) just by changing the target argument while keeping the rest of the flow identical. The same pattern applies to sources, e.g. switching S3 for LocalFile.
See Assemble building blocks with ease: plug, play, and compose.
What are best practices for writing a custom target connector?
Keep idempotency in mind: both apply_setup_change() and mutate() should be safe to run multiple times without unintended effects. Prepare once, mutate many: if you need setup such as establishing a connection, use prepare() to avoid repeating work. And use structured types — for primary keys or values, CocoIndex supports simple types as well as dataclasses and NamedTuples.
See Best practices.
Why would I use a custom target instead of a built-in connector?
Two main reasons. Integration with internal systems: an internal or homegrown tool or API that isn't publicly available can only be connected through a custom target. Faster adoption of new export logic: when a new tool, database, or API joins your stack, you just define a Target Spec and Target Connector and start exporting right away, with no pipeline refactoring required.
See Why custom targets?.