Indexing Faces for Scalable Visual Search - Build your own Google Photo Search

CocoIndex supports multi-modal processing natively - it could process both text and image with the same programming model and observe in the same user flow (in CocoInsight).
In this blog, we’ll walk through a comprehensive example of building a scalable face recognition pipeline using CocoIndex. We’ll show how to extract and embed faces from images, structure the data relationally, and export everything into a vector database for real-time querying.
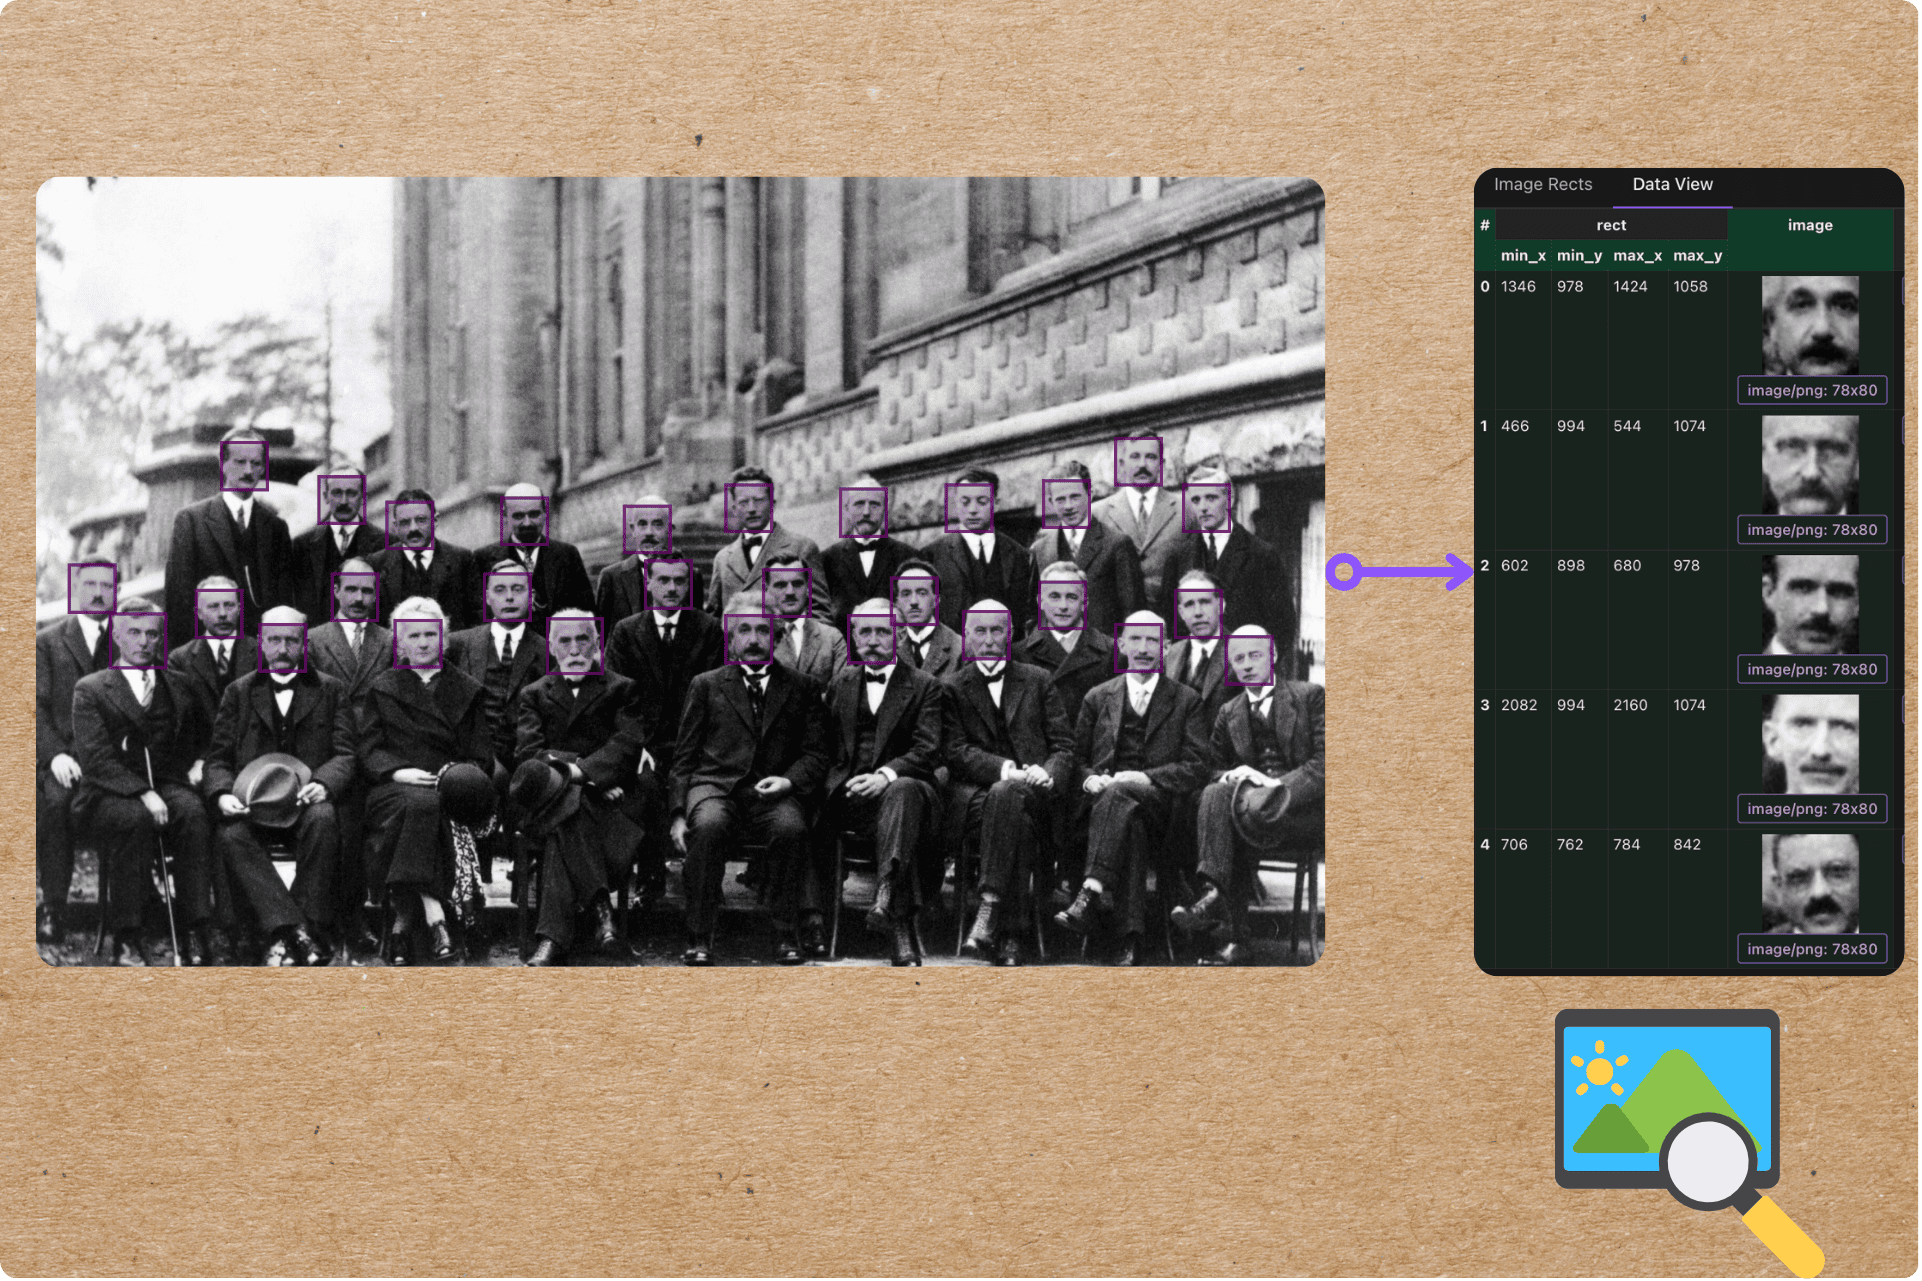
CocoInsight can now visualize identified sections of an image based on the bounding boxes and makes it easier to understand and evaluate AI extractions - seamlessly attaching computed features in the context of unstructured visual data.
If you find this tutorial helpful, we’d greatly appreciate it if you could ⭐ star CocoIndex on GitHub.
Use cases
- Photo search
- Face-based access control and surveillance
- Visual deduplication and identity detection
- Multimodal search involving people or facial identity
- Social graph analysis from photos
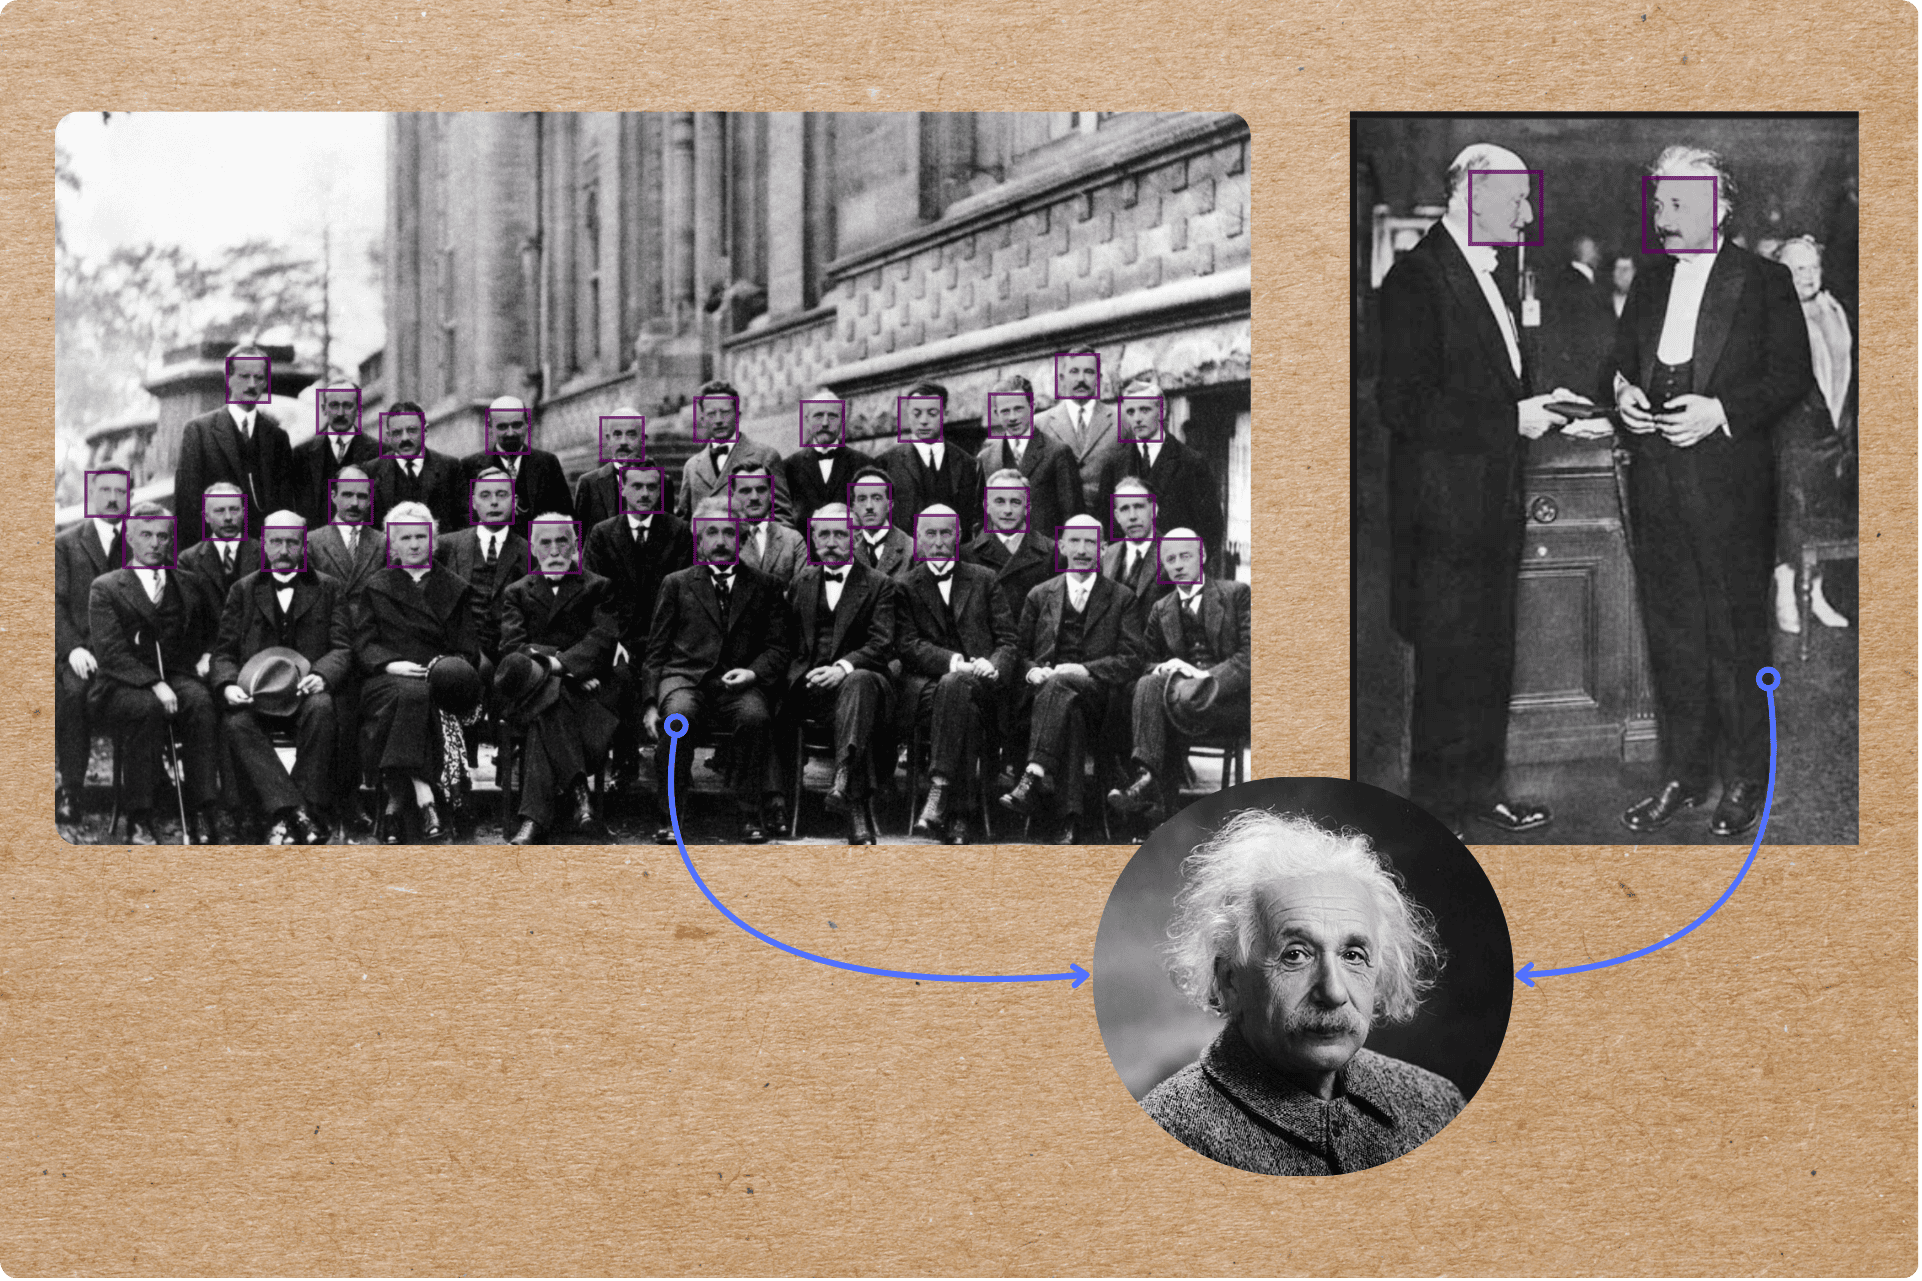
What we will achieve
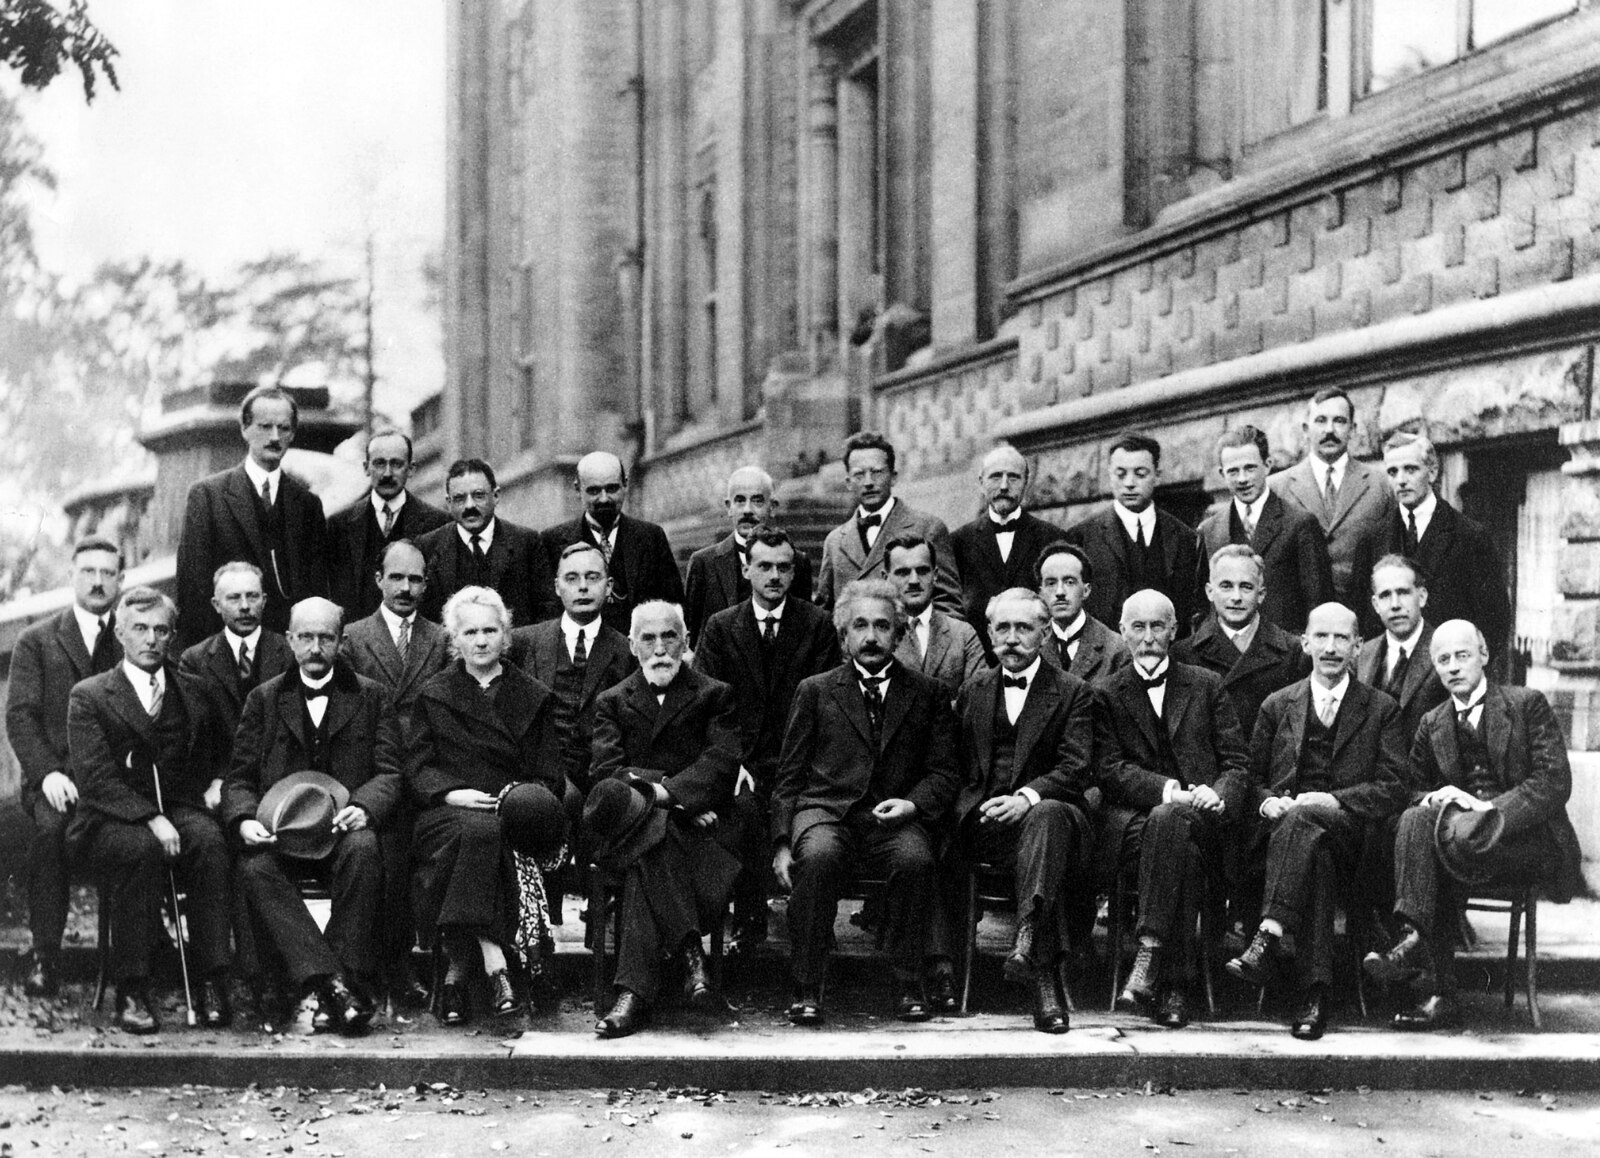
The photo taken of this conference's participants is sometimes entitled "The Most Intelligent Picture Ever Taken", for its depiction of the world's leading physicists gathered together in one shot (Wikipedia)
Here’s what we want to accomplish:
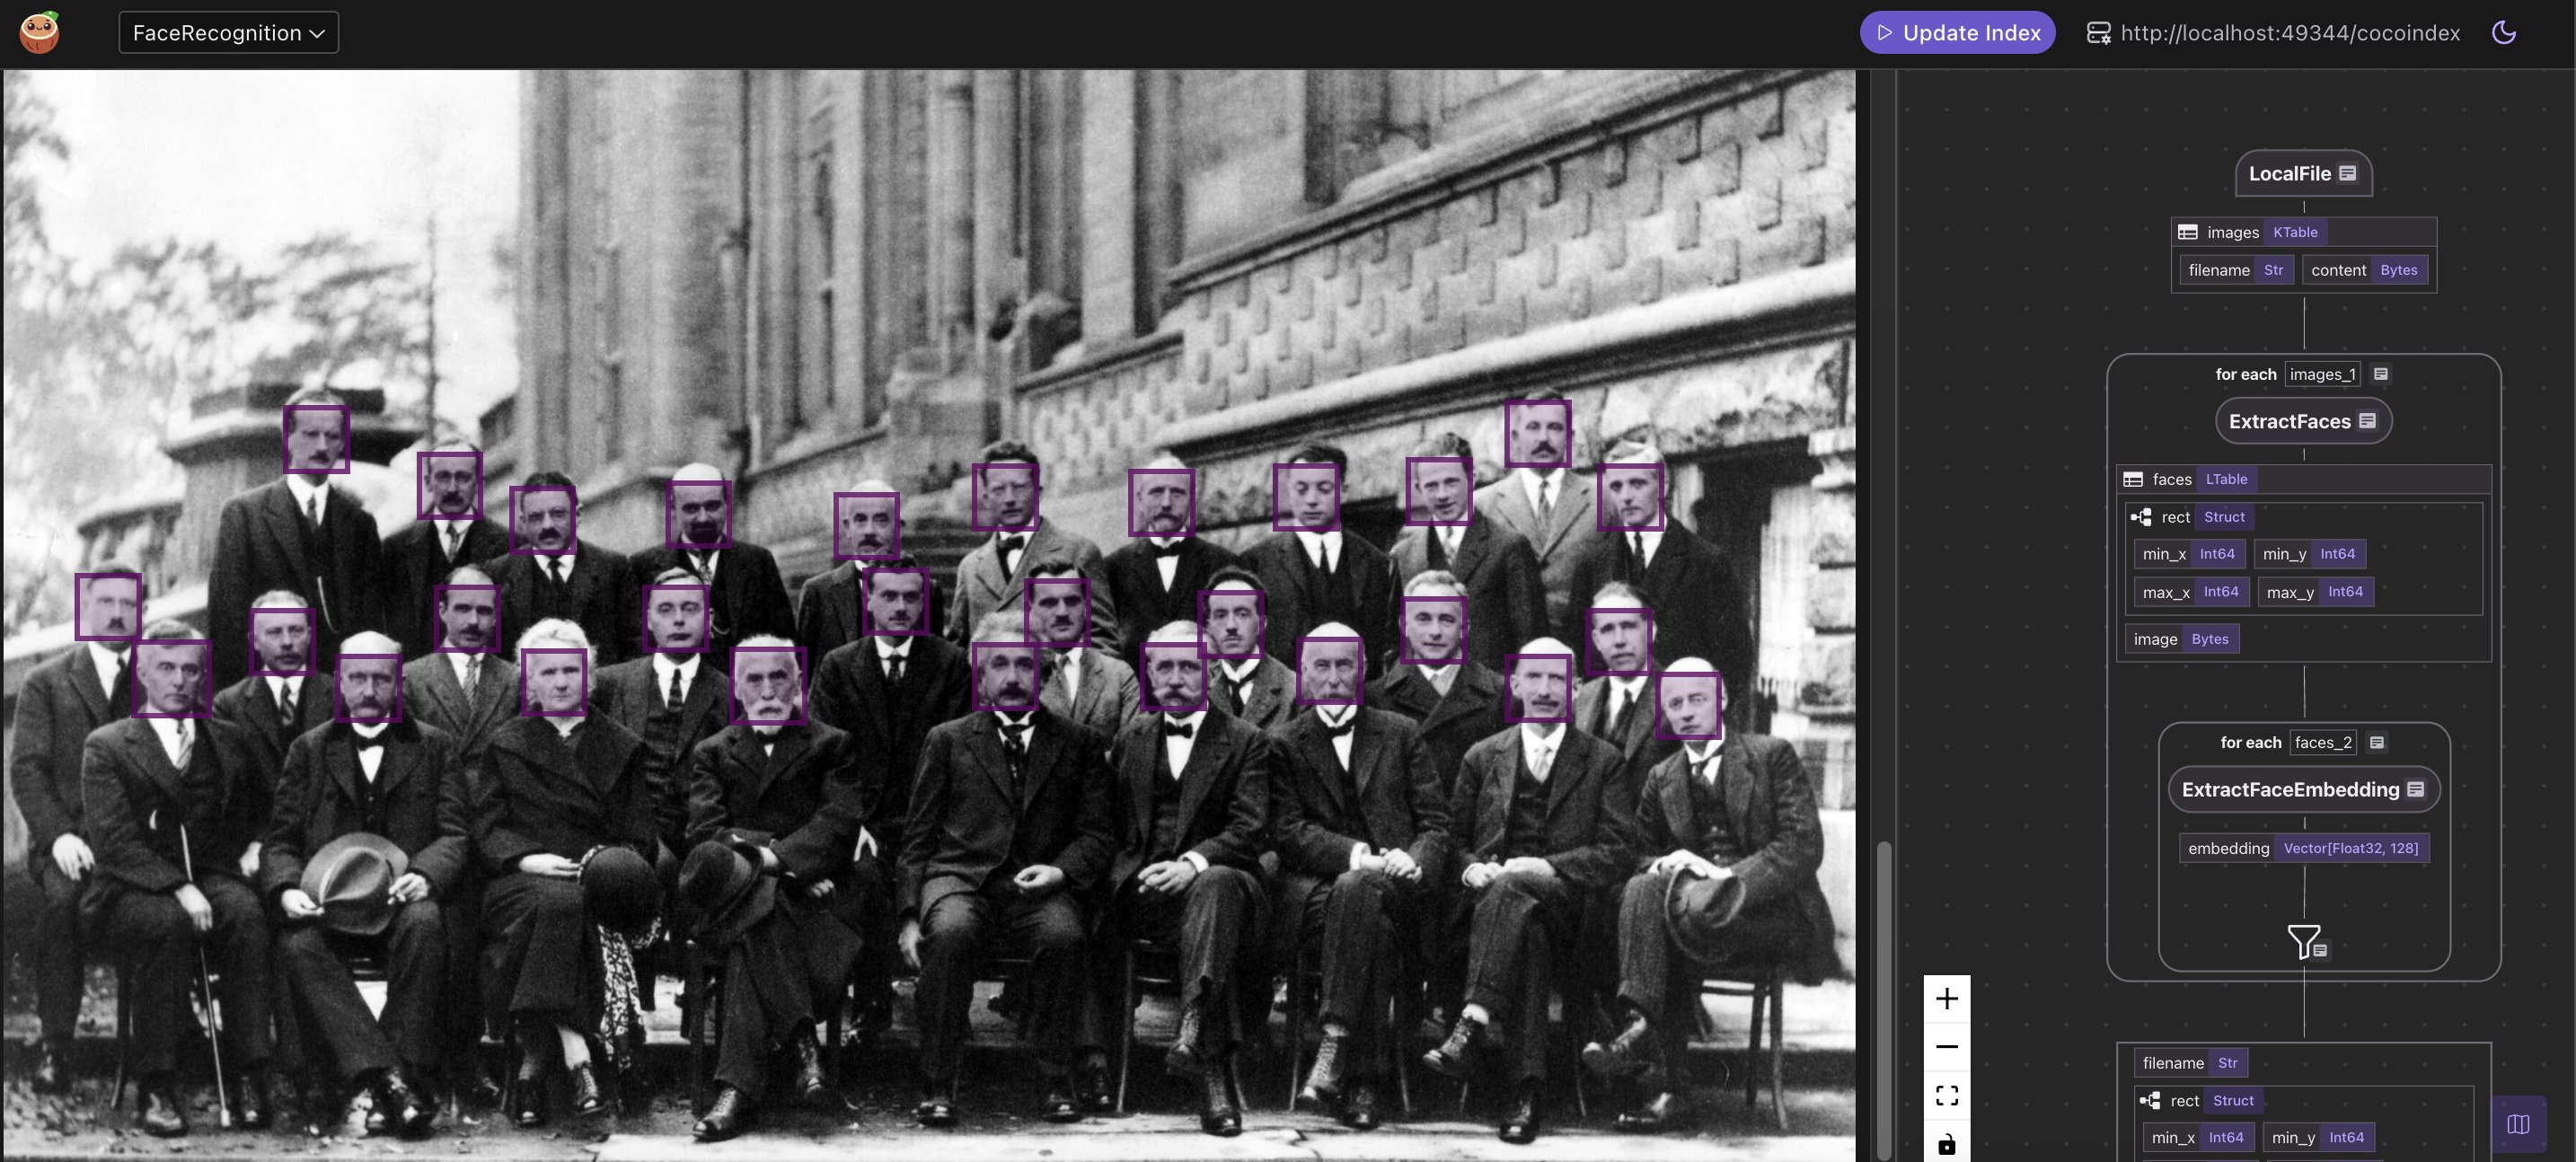
- Detect all faces in the image and extract their bounding boxes
- Crop and encode each face image into a 128-dimensional face embedding
- Store metadata and vectors in a structured index to support queries like: “Find all similar faces to this one” or “Search images that include this person”
⭐ You can find the full code here.
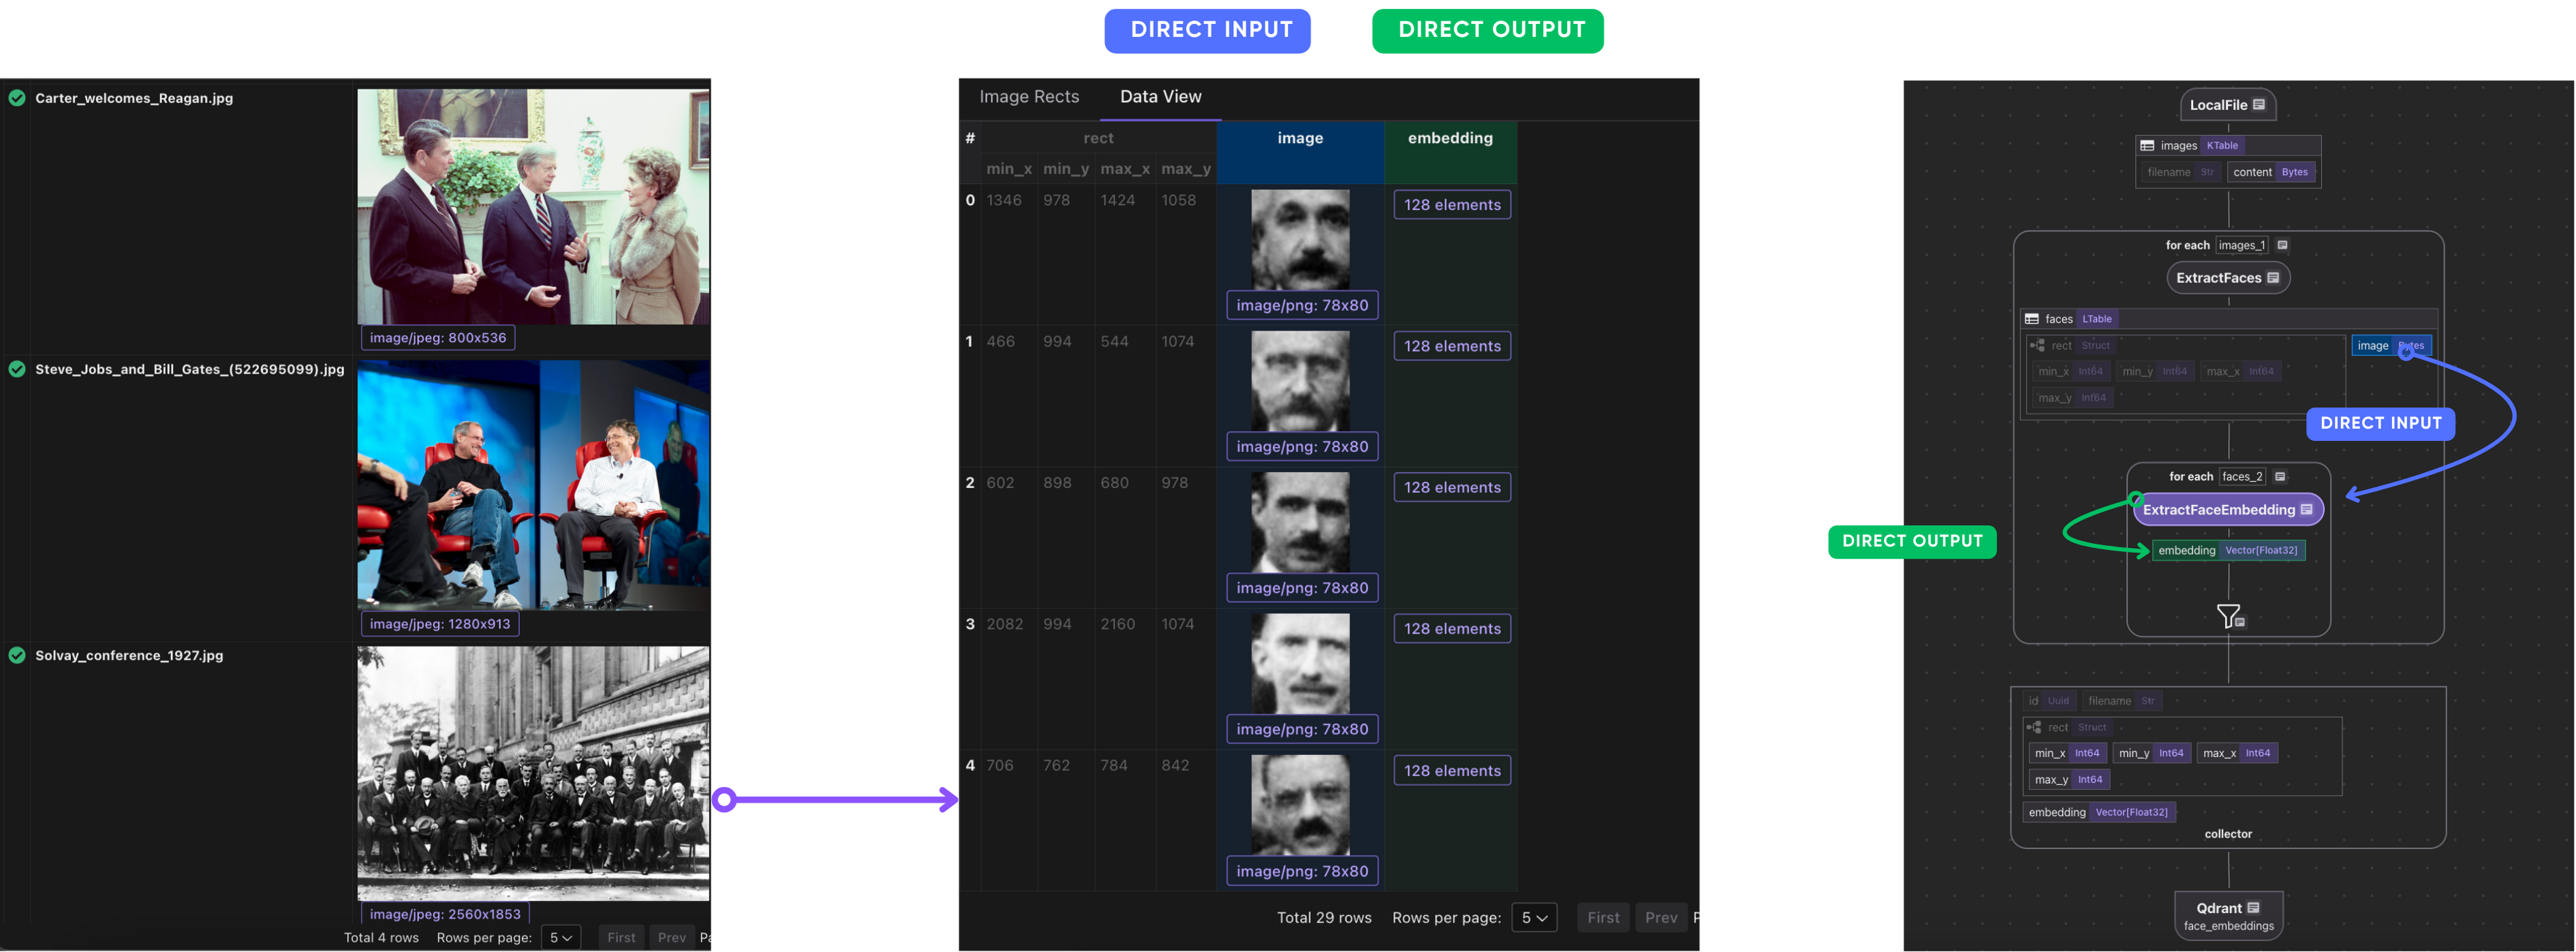
Indexing Flow
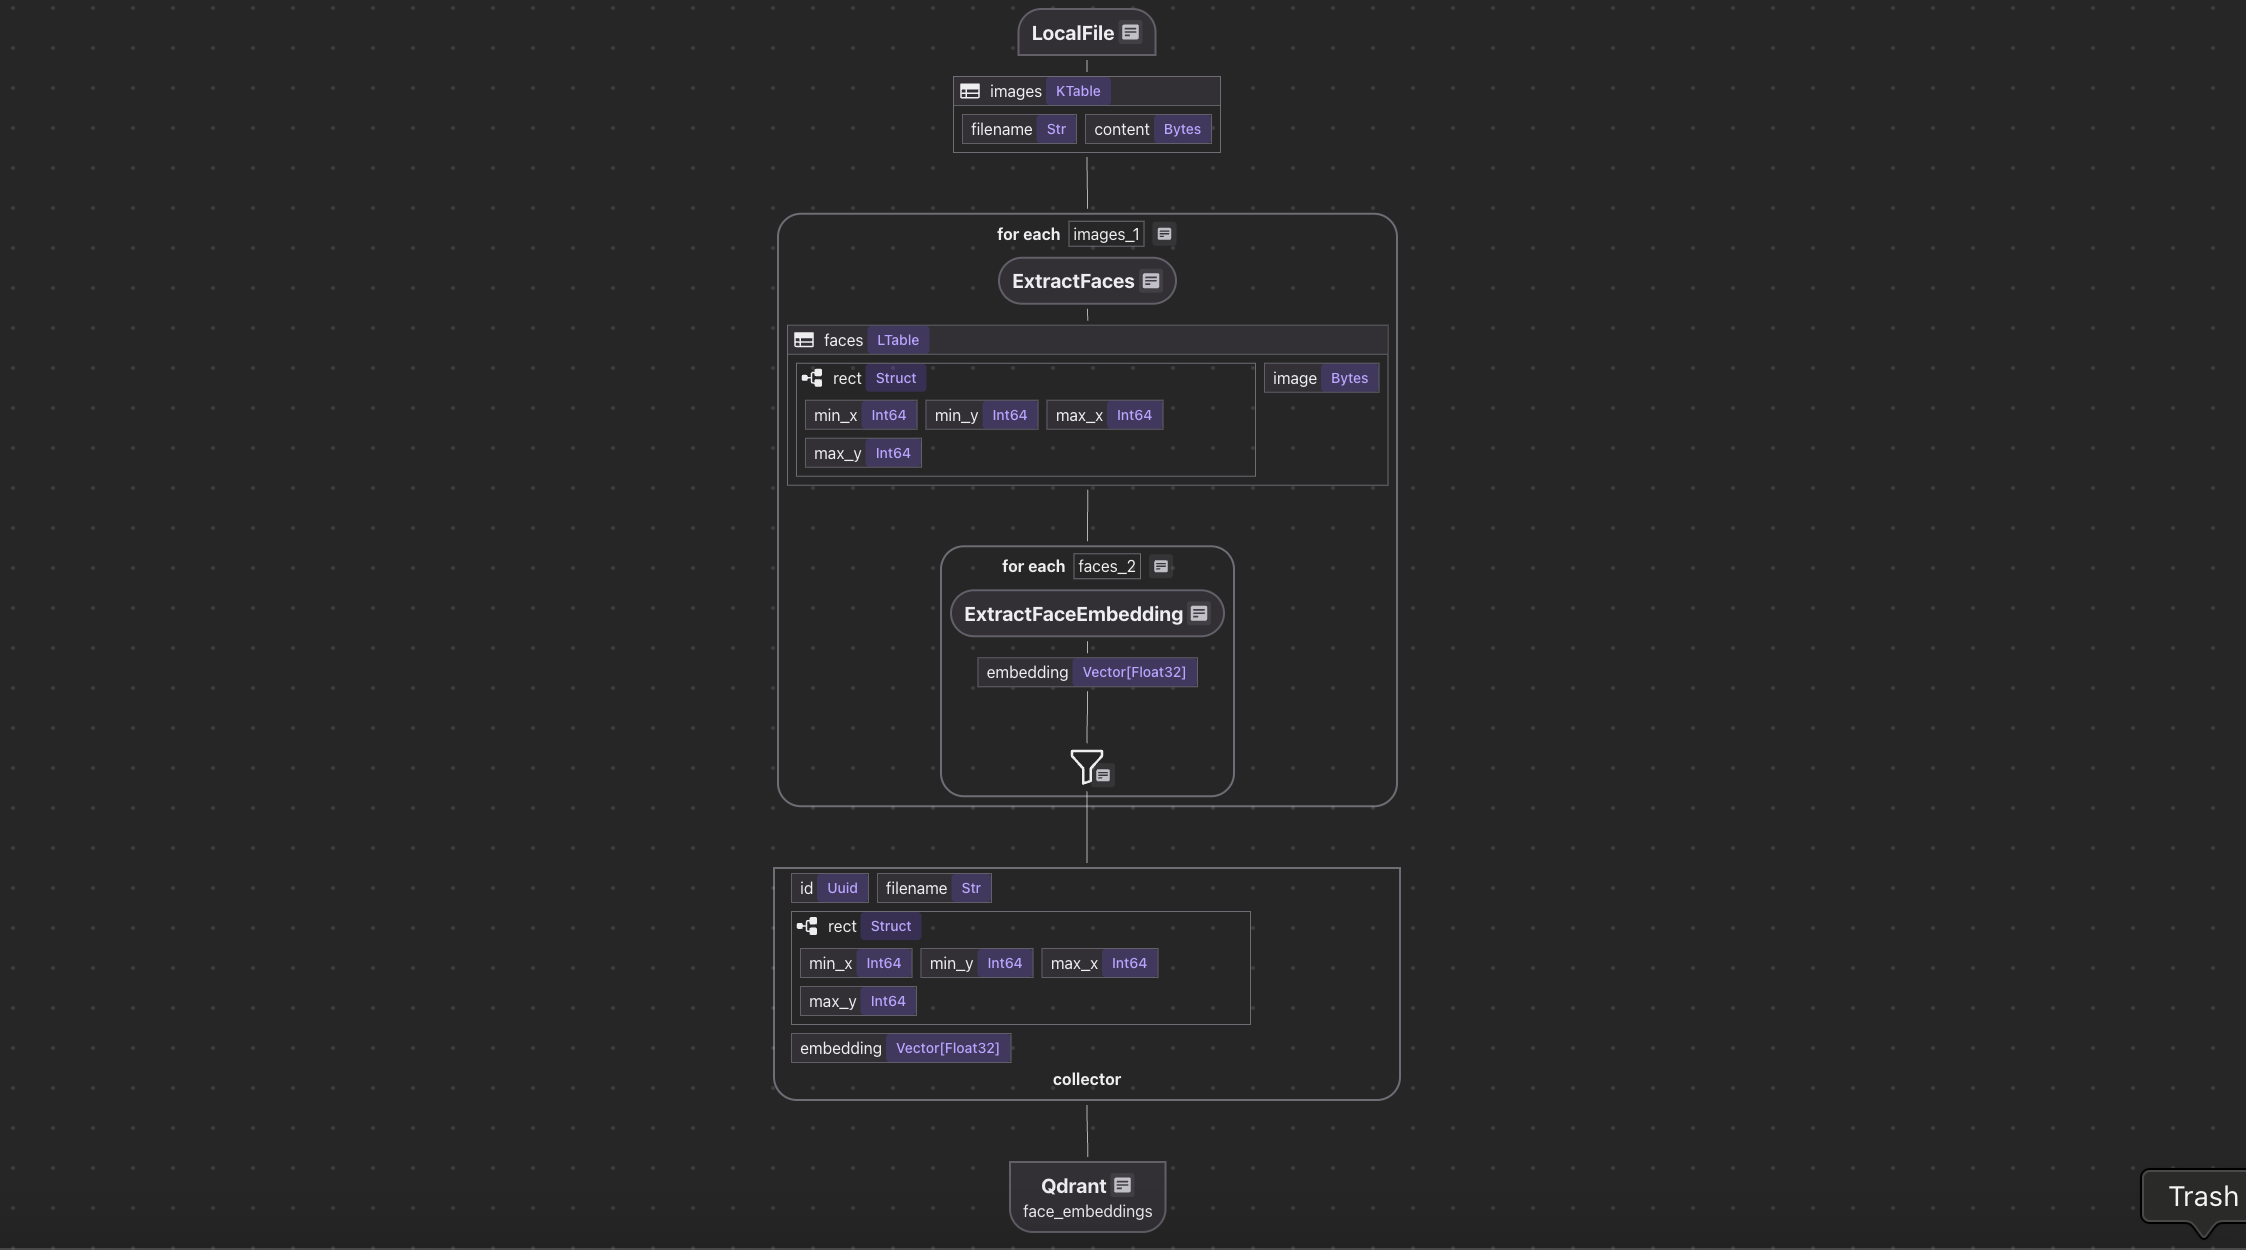
- We ingest a list of images.
- For each image, we:
- Extract faces from the image.
- Compute embeddings for each face.
- We export the following fields to a table in Postgres with PGVector:
- Filename, rect, embedding for each face.
Core components
Image ingestion
We monitor an images/ directory using the built-in LocalFile source. All newly added files are automatically processed and indexed.
python
CopyEdit
@cocoindex.flow_def(name="FaceRecognition")
def face_recognition_flow(flow_builder, data_scope):
    data_scope["images"] = flow_builder.add_source(
        cocoindex.sources.LocalFile(path="images", binary=True),
        refresh_interval=datetime.timedelta(seconds=10),
    )
This creates a table with filename and content fields. 📂

You can connect it to your S3 Buckets (with SQS integration, example) or Azure Blob store.
Detect and extract faces
We use the face_recognition library under the hood, powered by dlib’s CNN-based face detector. Since the model is slow on large images, we downscale wide images before detection.
@cocoindex.op.function(
    cache=True,
    behavior_version=1,
    gpu=True,
    arg_relationship=(cocoindex.op.ArgRelationship.RECTS_BASE_IMAGE, "content"),
)
def extract_faces(content: bytes) -> list[FaceBase]:
    orig_img = Image.open(io.BytesIO(content)).convert("RGB")

    # The model is too slow on large images, so we resize them if too large.
    if orig_img.width > MAX_IMAGE_WIDTH:
        ratio = orig_img.width * 1.0 / MAX_IMAGE_WIDTH
        img = orig_img.resize(
            (MAX_IMAGE_WIDTH, int(orig_img.height / ratio)),
            resample=Image.Resampling.BICUBIC,
        )
    else:
        ratio = 1.0
        img = orig_img

    # Extract face locations.
    locs = face_recognition.face_locations(np.array(img), model="cnn")

    faces: list[FaceBase] = []
    for min_y, max_x, max_y, min_x in locs:
        rect = ImageRect(
            min_x=int(min_x * ratio),
            min_y=int(min_y * ratio),
            max_x=int(max_x * ratio),
            max_y=int(max_y * ratio),
        )

        # Crop the face and save it as a PNG.
        buf = io.BytesIO()
        orig_img.crop((rect.min_x, rect.min_y, rect.max_x, rect.max_y)).save(
            buf, format="PNG"
        )
        face = buf.getvalue()
        faces.append(FaceBase(rect, face))

    return faces
We transform the image content:
with data_scope["images"].row() as image:
    image["faces"] = image["content"].transform(extract_faces)
After this step, each image has a list of detected faces and bounding boxes.
Each detected face is cropped from the original image and stored as a PNG.

Sample Extraction:
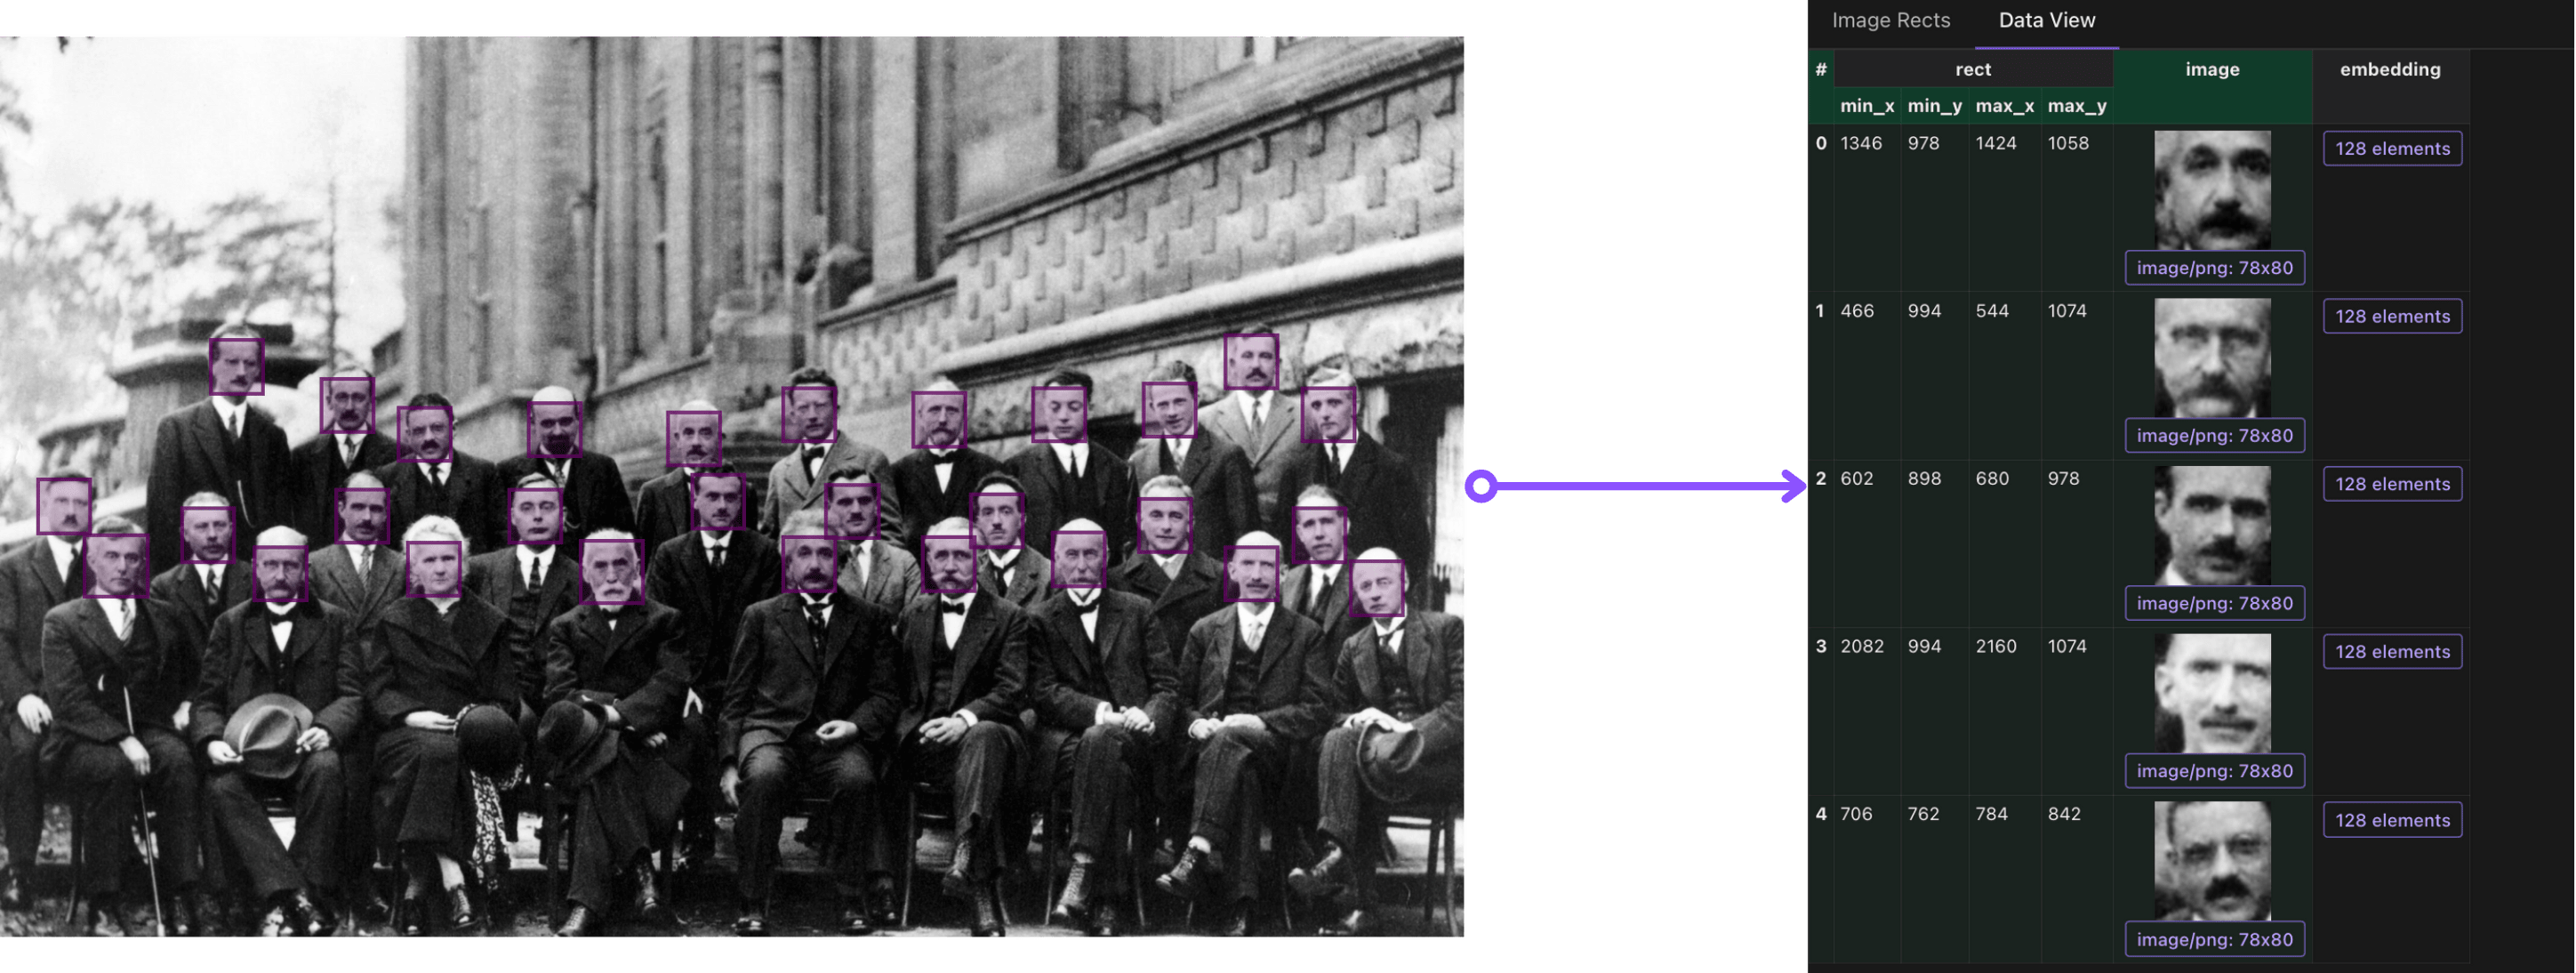
Sample Extraction:

Compute face embeddings
We encode each cropped face using the same library. This generates a 128-dimensional vector representation per face.
@cocoindex.op.function(cache=True, behavior_version=1, gpu=True)
def extract_face_embedding(
    face: bytes,
) -> cocoindex.Vector[cocoindex.Float32, typing.Literal[128]]:
    """Extract the embedding of a face."""
    img = Image.open(io.BytesIO(face)).convert("RGB")
    embedding = face_recognition.face_encodings(
        np.array(img),
        known_face_locations=[(0, img.width - 1, img.height - 1, 0)],
    )[0]
    return embedding
We plug the embedding function into the flow:
with image["faces"].row() as face:
    face["embedding"] = face["image"].transform(extract_face_embedding)
After this step, we have embeddings ready to be indexed!
Collect and export embeddings
We now collect structured data for each face: filename, bounding box, and embedding.
face_embeddings = data_scope.add_collector()

face_embeddings.collect(
    id=cocoindex.GeneratedField.UUID,
    filename=image["filename"],
    rect=face["rect"],
    embedding=face["embedding"],
)
We export to a Qdrant collection:
face_embeddings.export(
    QDRANT_COLLECTION,
    cocoindex.targets.Qdrant(
        collection_name=QDRANT_COLLECTION
    ),
    primary_key_fields=["id"],
)
Now you can run cosine similarity queries over facial vectors.
CocoIndex supports 1-line switch with other vector databases like Postgres.
Query the index
You can now build facial search apps or dashboards. For example:
- Given a new face embedding, find the most similar faces
- Find all face images that appear in a set of photos
- Cluster embeddings to group visually similar people
For querying embeddings, check out Image Search project.
If you’d like to see a full example on the query path with image match, give it a shout at our group.
Support us
We’re constantly adding more examples and improving our runtime. If you found this helpful, please ⭐ star CocoIndex on GitHub and share it with others.
Thanks for reading!
Let us know what pipelines you’re building — we’d love to feature them.