19 posts tagged with "Examples"

CocoIndex examples and implementation guides

View All Tags

Bring your own data: Index any data with Custom Sources

· 7 min read
Linghua Jin
CocoIndex Maintainer

Bring your own data: Index any data with Custom Sources

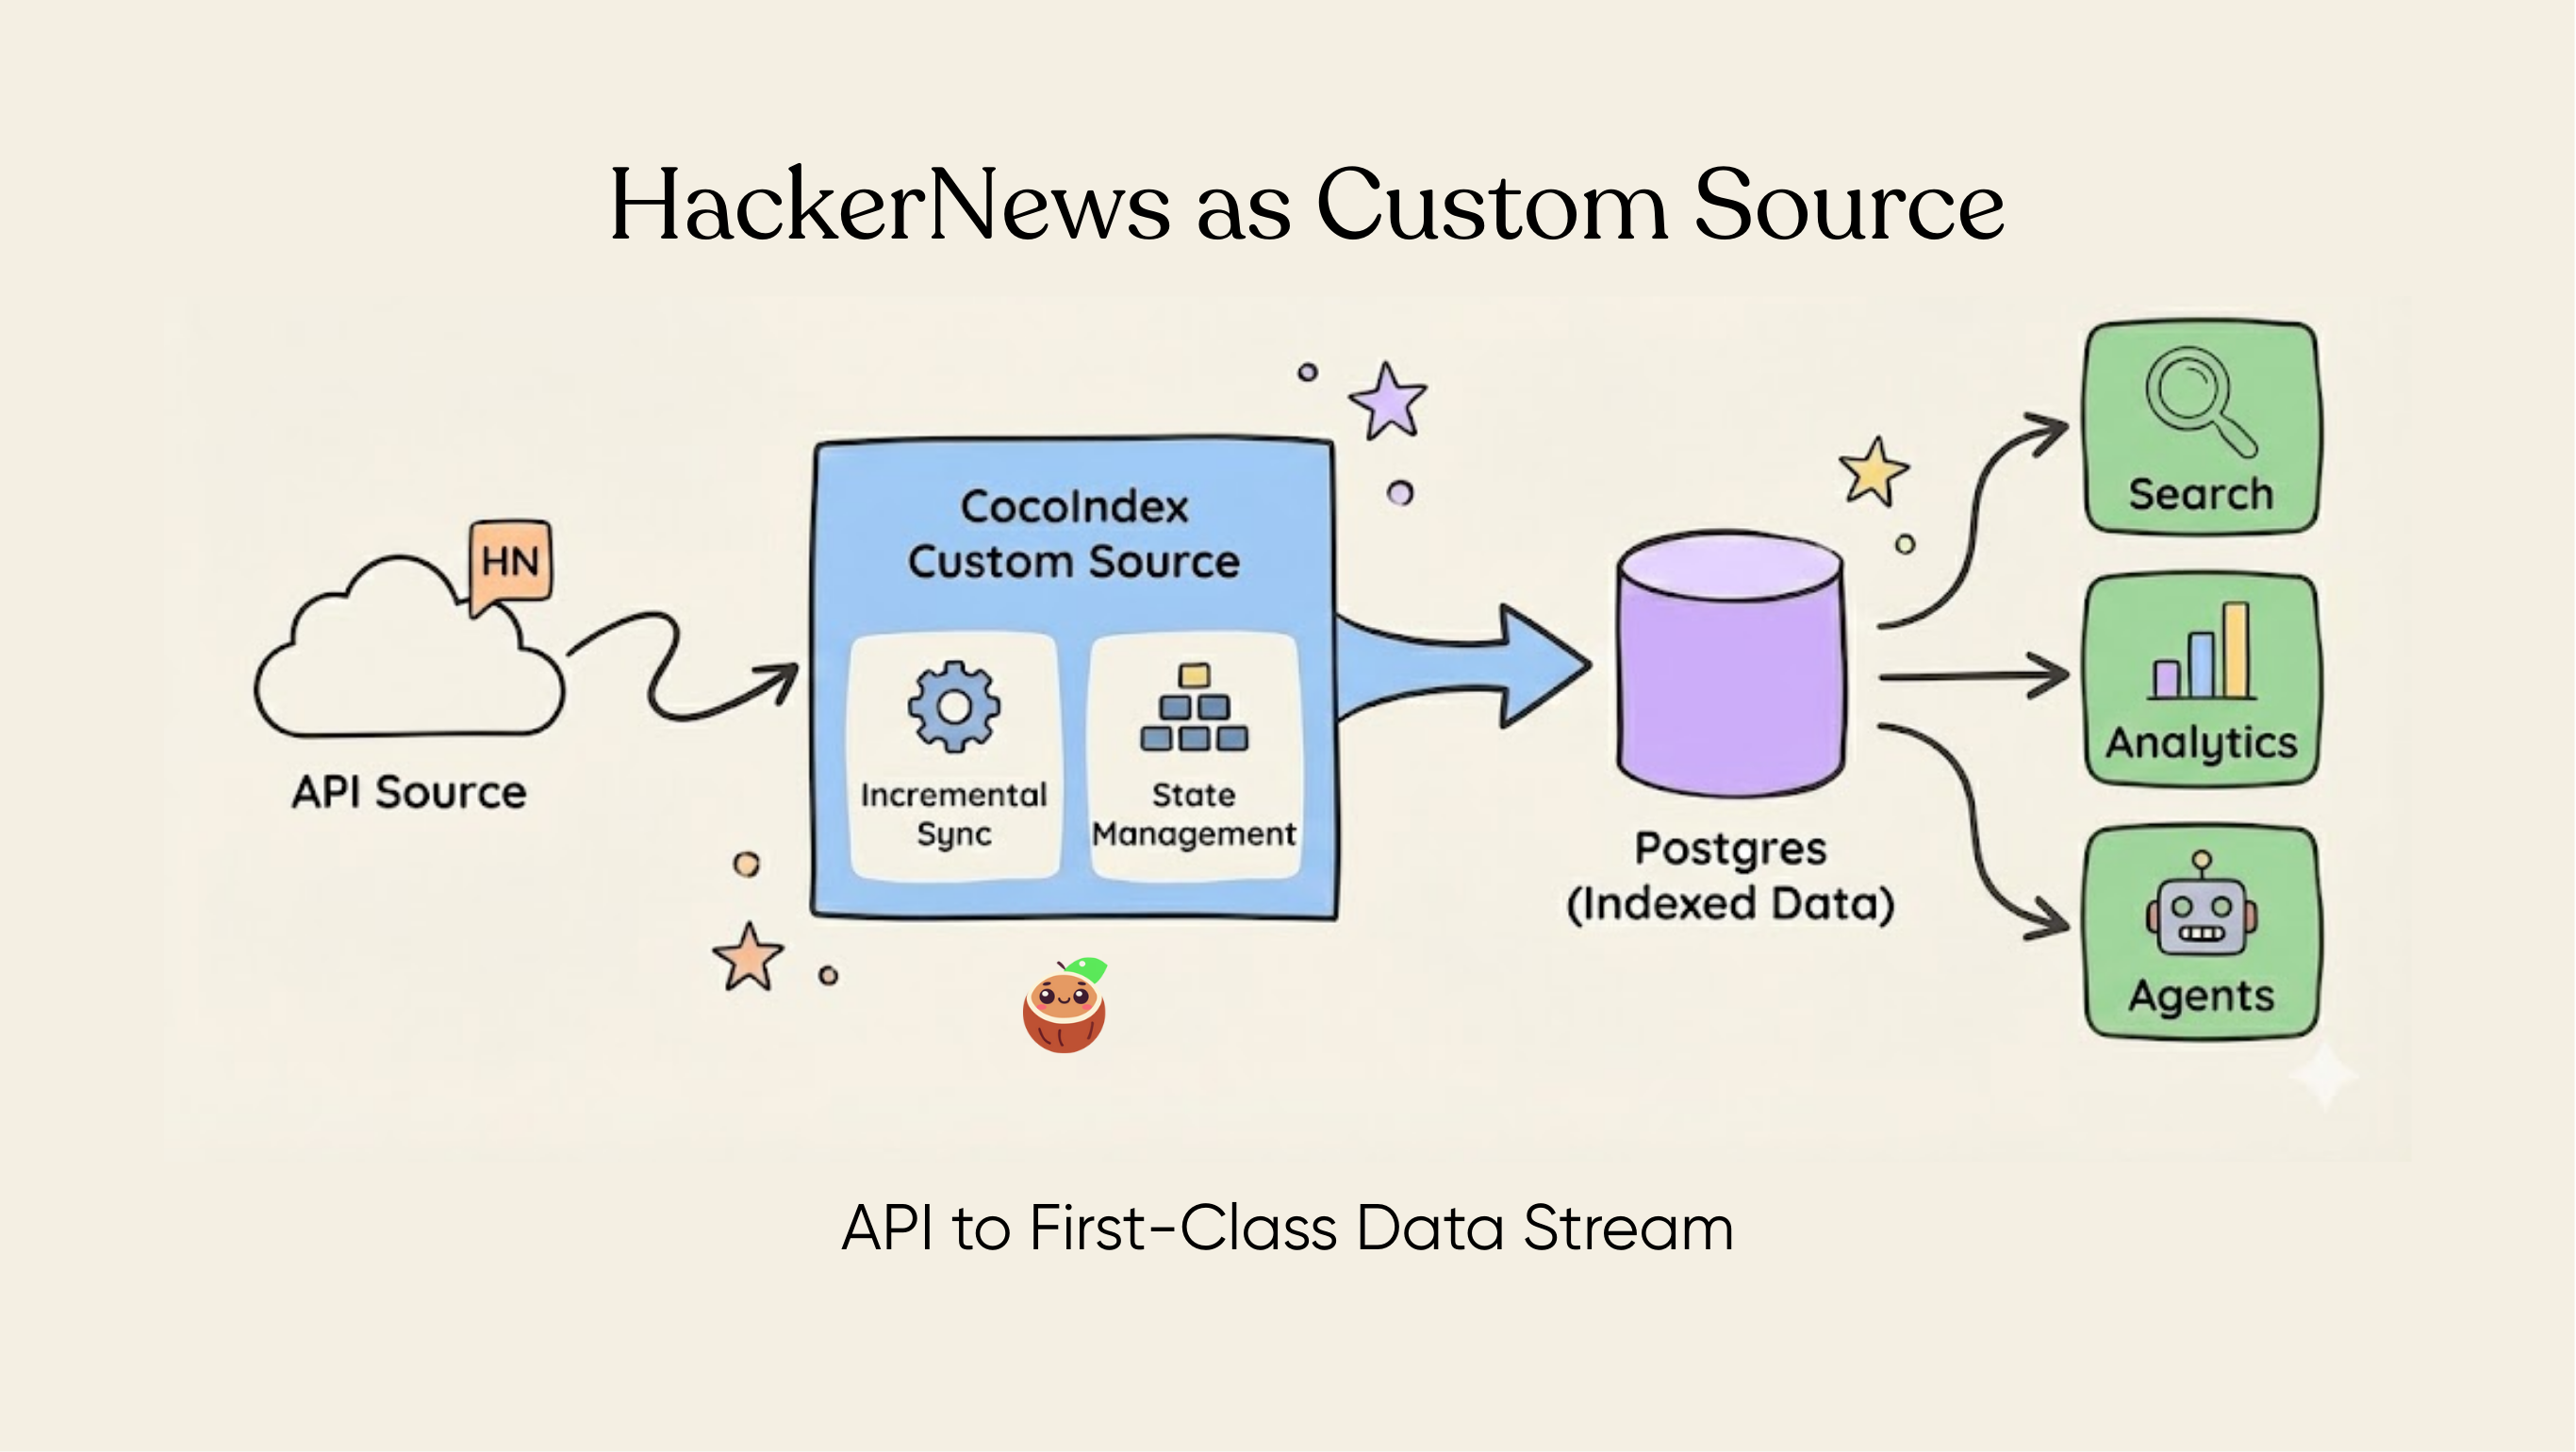
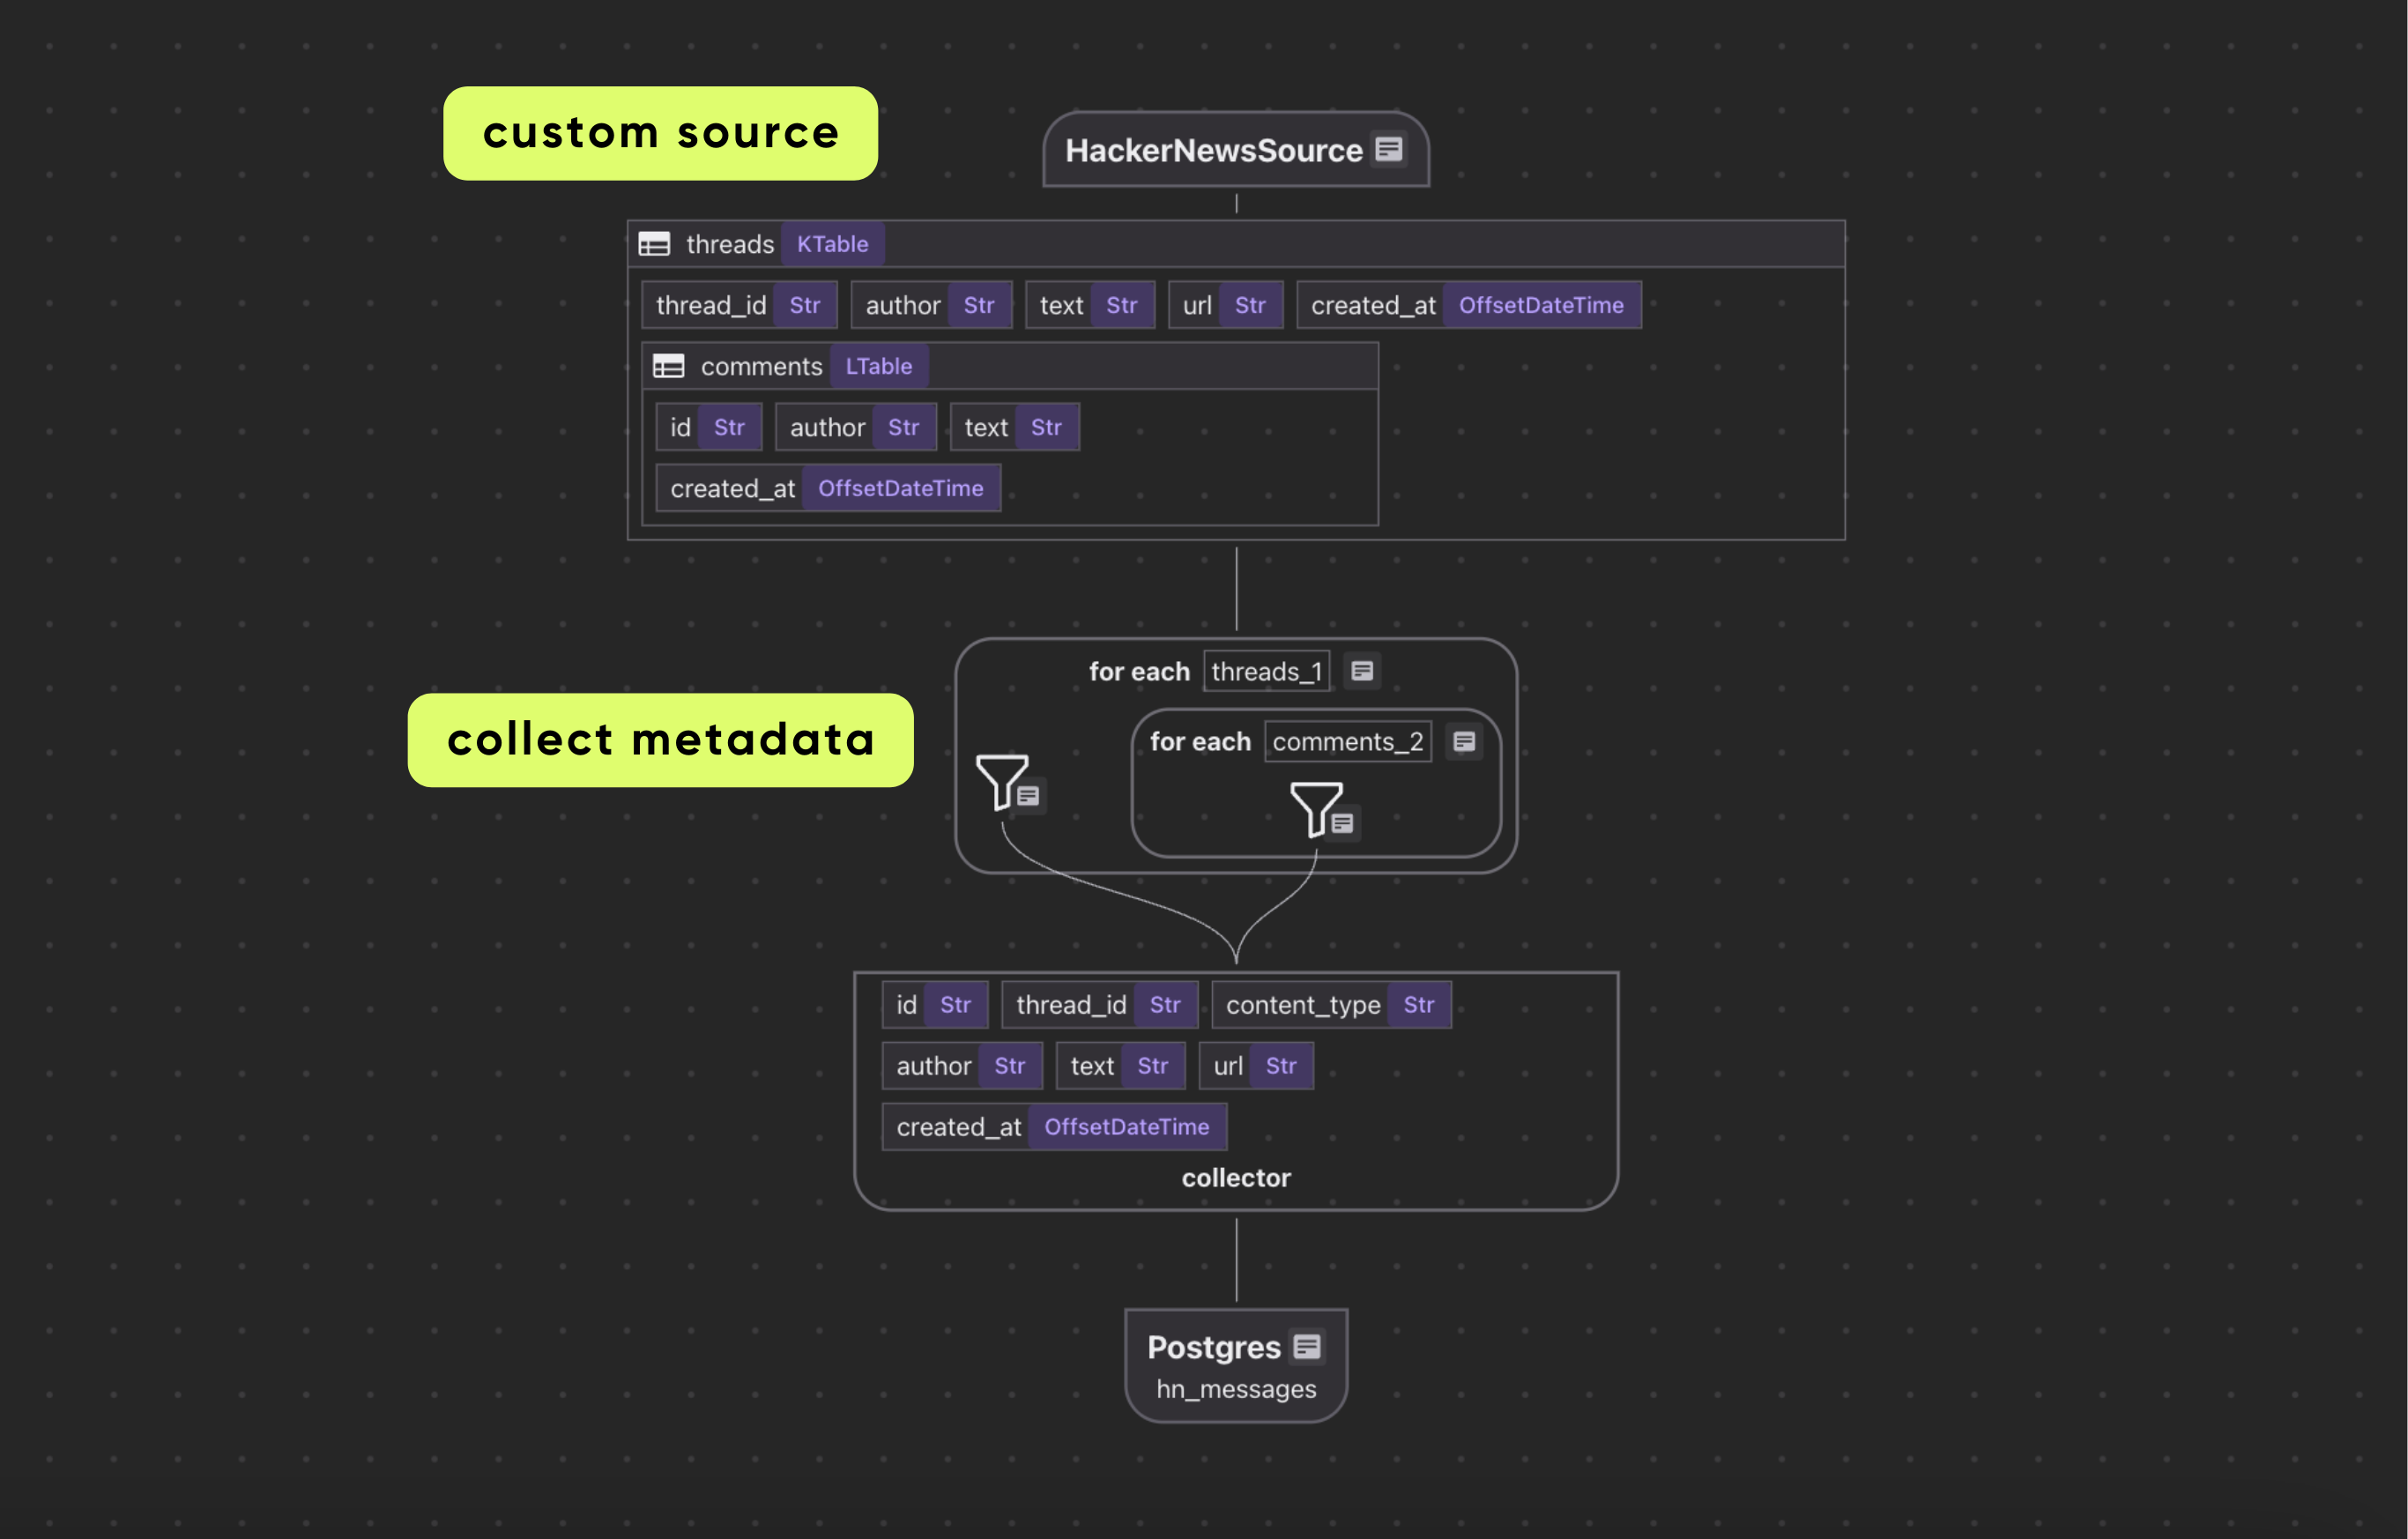
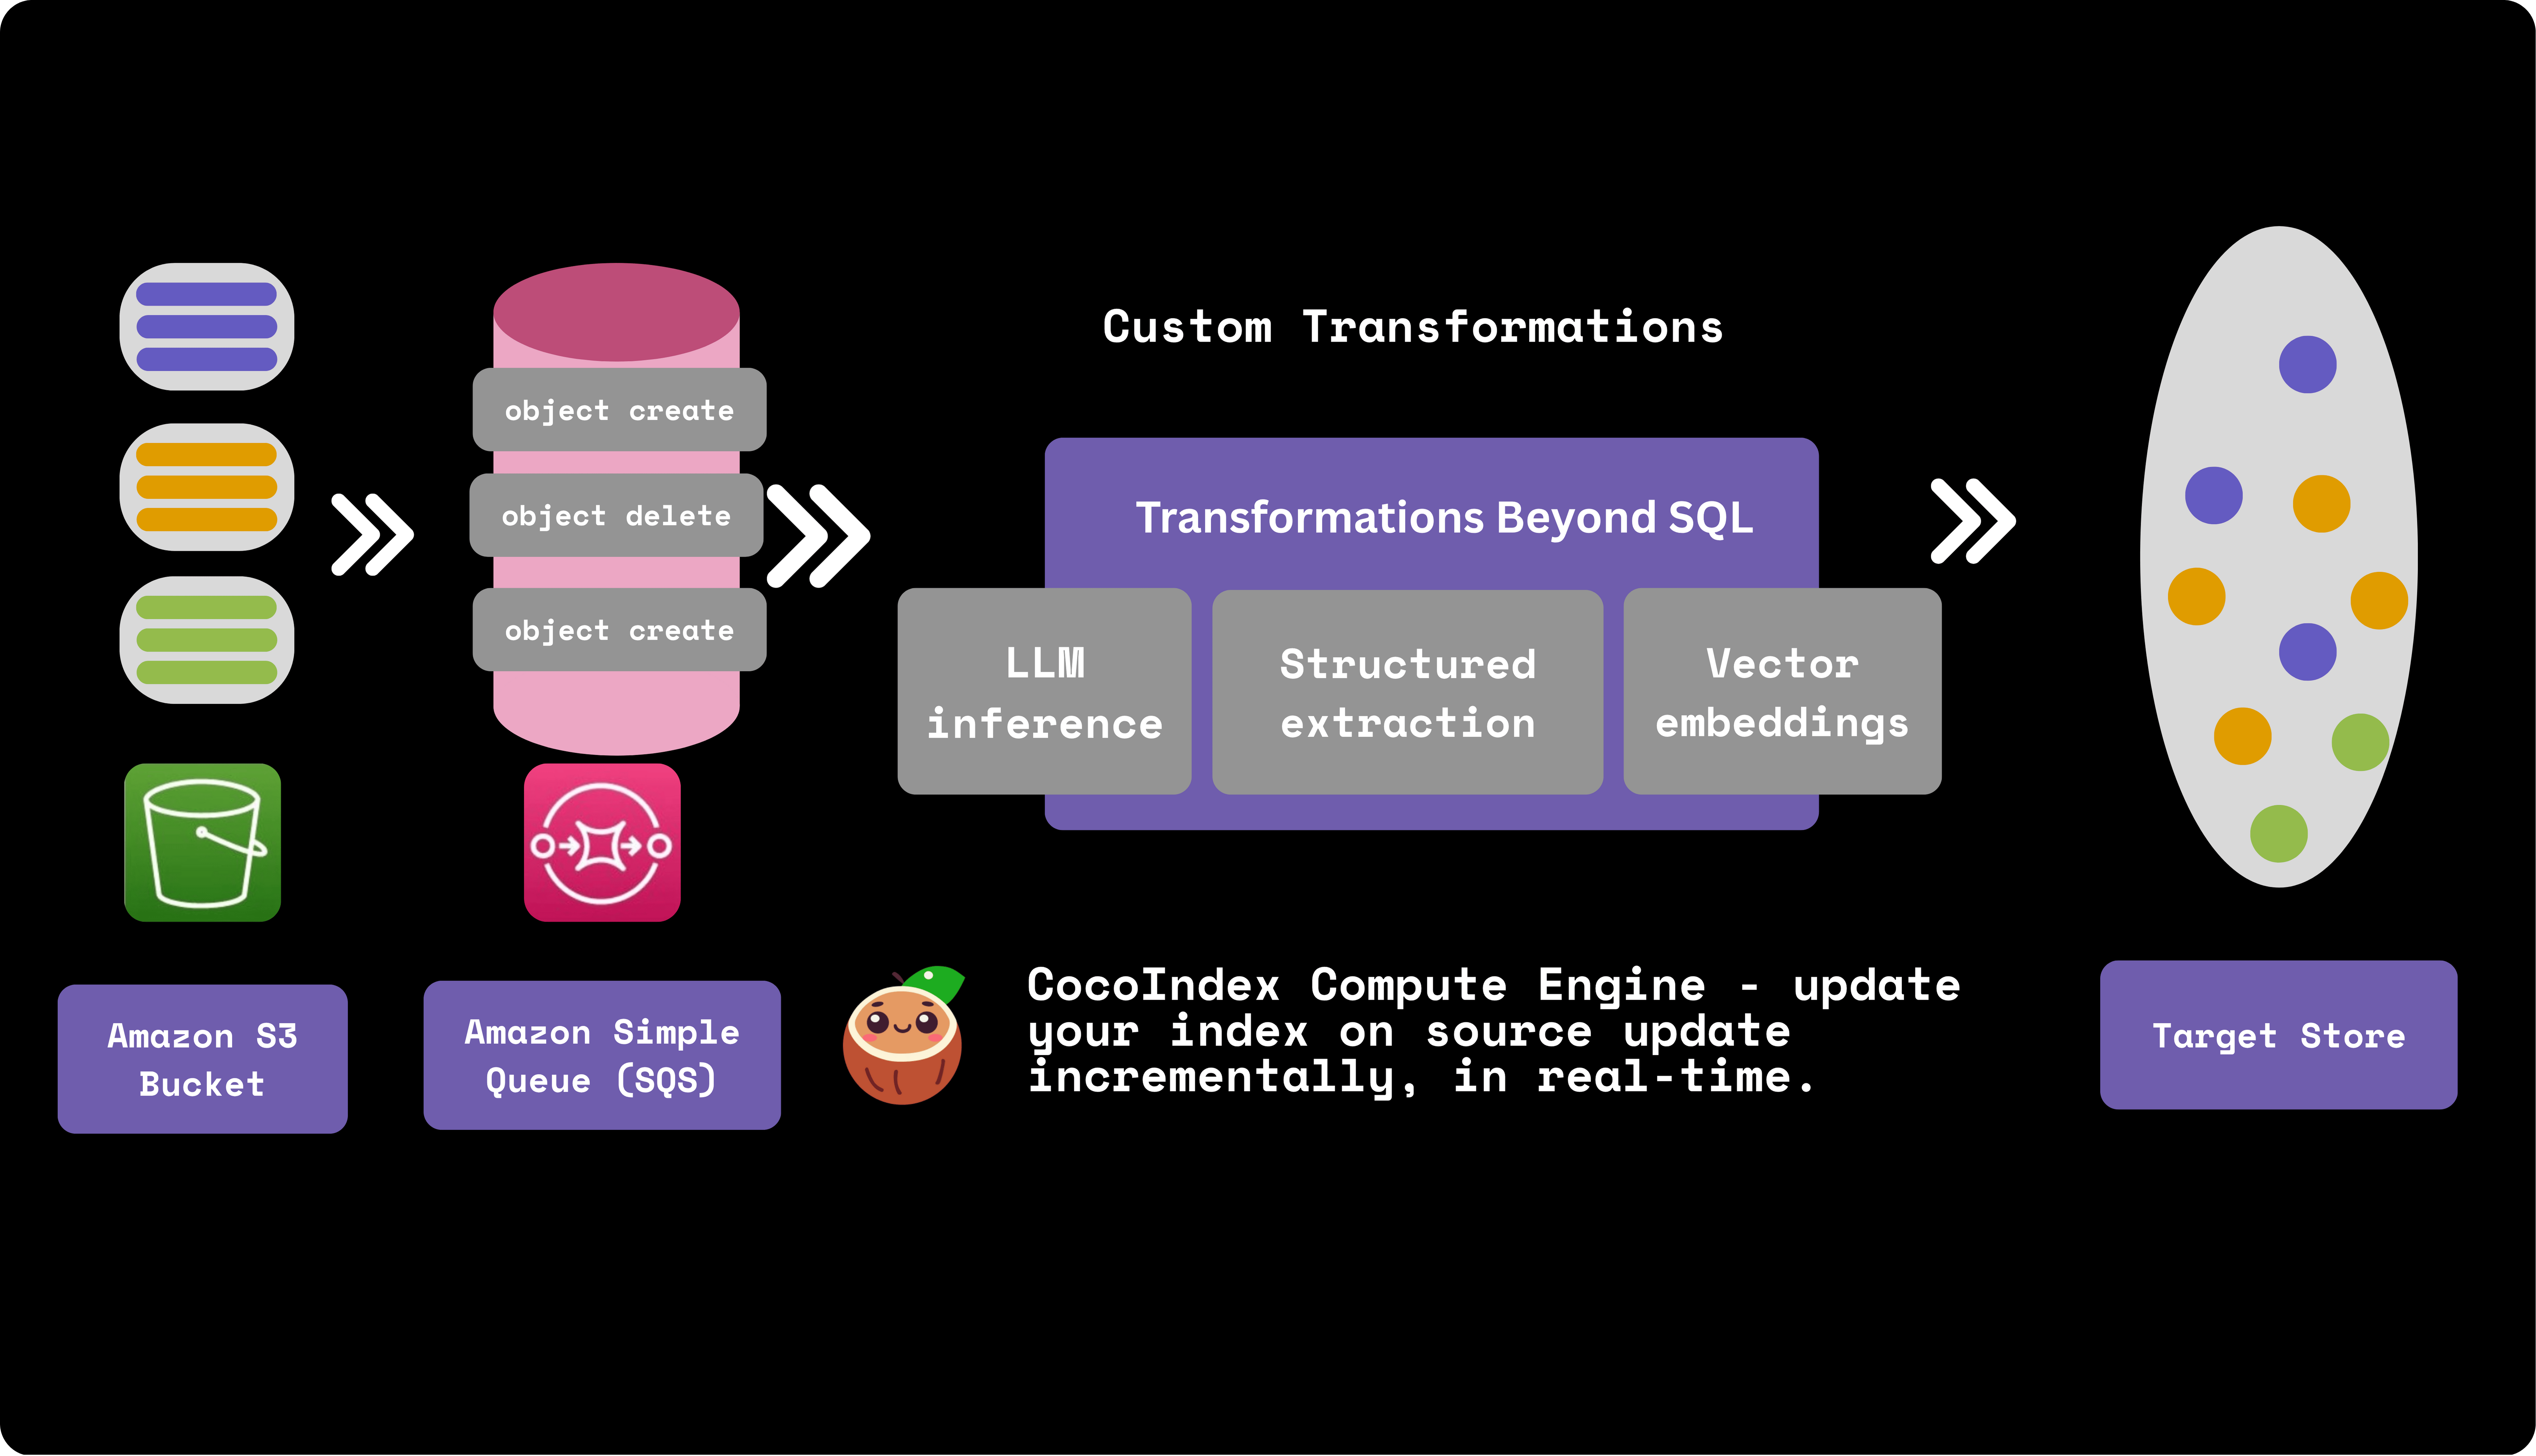
We’re excited to announce Custom Sources — a new capability in CocoIndex that lets you read data from any system you want. Whether it’s APIs, databases, file systems, cloud storage, or other external services, CocoIndex can now ingest data incrementally, track changes efficiently, and integrate seamlessly into your flows.

After this change, users for CocoIndex are not bounded by any connectors, targets or some prebuilt libraries. You can use CocoIndex for anything, and enjoy the robust incremental computing to build fresh knowledge for AI.

Custom sources are the perfect complement to custom targets, giving you full control over both ends of your data pipelines.

🚀 Get started with custom sources by following the documentation now.

Why not build another thousands of connectors?

Well, we could, and in fact, expanding our connector library is on the roadmap. However, enterprise software doesn’t just need more connectors. The challenge isn’t simply plugging into APIs — data is often siloed behind complex systems, inconsistent schemas, and fragile integrations. Building connectors alone doesn’t solve the underlying problems of reliability, observability, and incremental updates. What enterprises truly need is a robust infrastructure that can handle ever-changing datasets, reconcile differences across systems, and ensure data flows are durable, efficient, and error-resilient. That’s where we focus: not just connecting, but orchestrating data with intelligence and resilience.

Assemble Data Pipelines with Flexibility

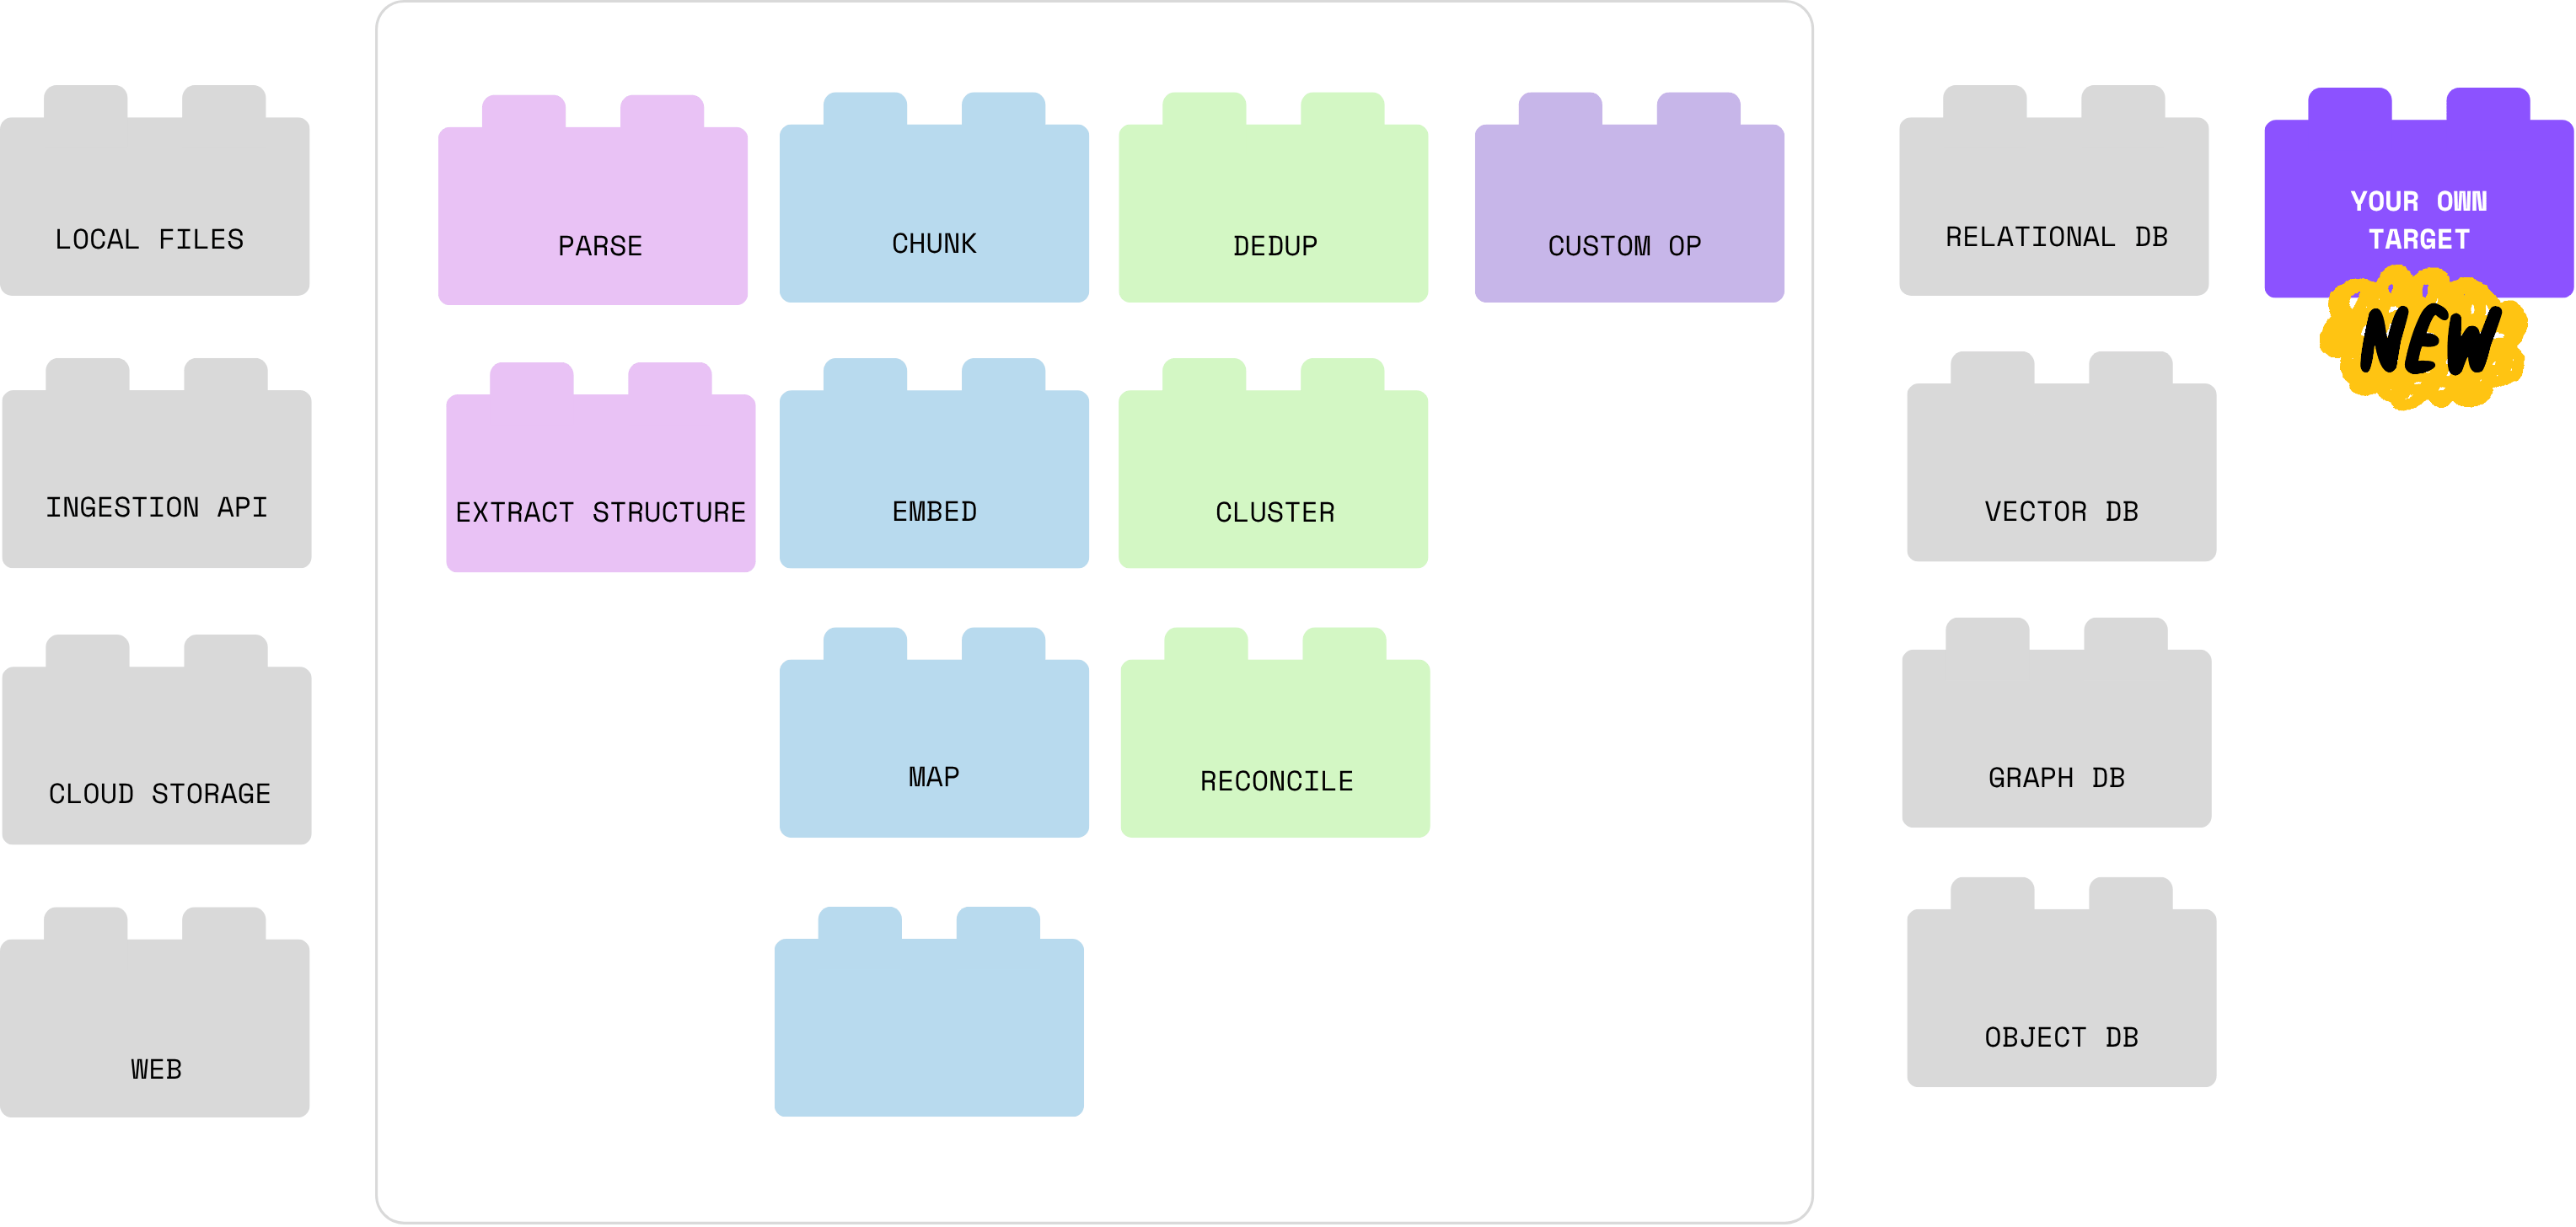
CocoIndex flows were designed to be modular, composable, and declarative. With custom sources, you can now bring your own “building blocks” into the system, allowing you to read from internal tools, legacy systems, or any external service—even if there’s no pre-built connector.

In addition, CocoIndex also offers:

  • Custom Targets – send data wherever you need, from local files to databases to proprietary systems, with full support for incremental updates and flow tracking.
  • Custom Transformations – implement domain-specific transformations within your flows.
  • Tons of Native Building Blocks – hundreds of sources, targets, and transformations are already included, letting you swap components in a single line of code.

All with standard interface lets you rapidly assemble AI-ready data pipelines. You can mix and match sources, transformations, and targets to build end-to-end workflows that are incremental, traceable, and explainable.

blocks

What’s a Custom Source?

A custom source defines how CocoIndex reads data from an external system.

Custom sources are defined by two components:

  • source spec that configures the behavior and connection parameters for the source.
  • source connector that handles the actual data reading operations. It provides the following required methods:
    • create(): Create a connector instance from the source spec.
    • list(): List all available data items. Return keys.
    • get_value(): Get the full content for a specific data item by given key.

1. Source Spec

The source spec defines configuration parameters for your custom source. It's similar to a dataclass.

class CustomSource(cocoindex.op.SourceSpec):
"""
Custom source for my external system.
"""
param1: str
param2: int | None = None

2. Source Connector

The source connector implements the logic for reading data. For now we don’t expose the API to get change stream from source yet - for simplicity. As long as the source provides an ordinal in list(), it’s usually efficient enough for us to detect changes by refresh-interval-based live update. We’ll add change stream support soon, and reach out to us if you need this!

Data access methods

It handles the actual reading operations - discovering available data and retrieving specific content.

Here’s a typical skeleton of a custom source connector:

@cocoindex.op.source_connector(
spec_cls=CustomSource,
key_type=DataKeyType,
value_type=DataValueType
)
class CustomSourceConnector:
@staticmethod
async def create(spec: CustomSource) -> "CustomSourceConnector":
"""Initialize connection, authenticate, and return connector instance."""
...

async def list(self, options: SourceReadOptions) -> AsyncIterator[PartialSourceRow[DataKeyType, DataValueType]]:
"""List available data items with optional metadata (ordinal, content)."""
...

async def get_value(self, key: DataKeyType, options: SourceReadOptions) -> PartialSourceRowData[DataValueType]:
"""Retrieve full content for a specific data item."""
...

def provides_ordinal(self) -> bool:
"""Optional: Return True if the source provides timestamps or version numbers."""
return False

1. create(spec)Initialize your connector

  • Sets up the connection to your data source using the configuration in your SourceSpec.
  • Common uses: authenticate with an API, connect to a database, or validate settings.
  • Can be implemented synchronously or asynchronously depending on your system.

2. list(options?)Discover all available items

  • Returns all data items from the source along with optional metadata.
  • CocoIndex can request only the fields it needs — timestamps, content, or fingerprints — so your connector fetches just enough to be efficient.
  • Helps CocoIndex track which items have changed without fetching everything repeatedly.

3. get_value(key, options?)Fetch full content

  • Retrieves the complete data for a given item.
  • Returns content along with optional metadata like timestamps or content fingerprints.
  • Works with incremental updates, so only changed items are processed.

4. provides_ordinal()Optional hint for efficient updates

  • Returns true if your source provides timestamps or version numbers.
  • Allows CocoIndex to skip unchanged items and process only updates, saving time and compute.

These methods together make it easy to integrate any data source — APIs, databases, file systems, or internal tools — into CocoIndex flows while supporting incremental, AI-ready pipelines.

Data Types: Understanding How CocoIndex Reads Data

When you create a custom source in CocoIndex, your data is structured so the system can track changes efficiently and process updates incrementally.

  • SourceReadOptions – CocoIndex tells the connector what to fetch. This could include timestamps or version numbers for change tracking, content fingerprints to detect updates, and full data content when needed.
  • PartialSourceRow – represents a single item from your source, combining a key (what uniquely identifies the item) and data (its content and optional metadata).
  • PartialSourceRowData – holds the actual content along with metadata like timestamps, version numbers, or content fingerprints. This allows CocoIndex to process only what has changed, saving time and compute.
  • Key & Value Types – define what identifies an item (keys) and what information it contains (values). Keys can be simple IDs or more complex multi-field structures. Values hold the actual content fields, such as title, text, author, or creation date.

With this approach, CocoIndex can discover data, track changes, and fetch updates efficiently, making your custom sources fully compatible with incremental, AI-ready pipelines.

For full documentation on the data methods and dataTypes please see here.

💡 Design Choice: Simplicity, Modularity, and Incrementally

CocoIndex’s source design follows a clear separation of intent and execution:

  • Declarative configuration (SourceSpec) defines what the source is.
  • Operational logic (SourceConnector) defines how to read it.

This split makes each source:

  • Composable — easily reused across flows and teams.
  • Incremental-first — optimized to reprocess only what changes.
  • Extensible — new systems can plug in without touching the core engine.

By standardizing around this pattern, CocoIndex achieves a balance between developer flexibility and system reliability — empowering teams to integrate any system seamlessly into their AI-native data workflows.

Why Custom Sources?

  • Connect internal systems: Read from proprietary APIs or legacy databases.
  • Stream incremental updates: Efficiently track changes and update flows.
  • Full flexibility: Combine with custom targets to handle any workflow end-to-end.

With Custom Sources, CocoIndex empowers you to ingest any data, track changes efficiently, and plug it directly into your pipelines—no matter how unique your systems are.

⭐ Star CocoIndex on GitHub and share with your community if you find it useful!

Automated invoice processing with AI, Snowflake and CocoIndex - with incremental processing

· 17 min read
Dhilip Subramanian
Data & AI Practitioner, CocoIndex Community Contributor

cover

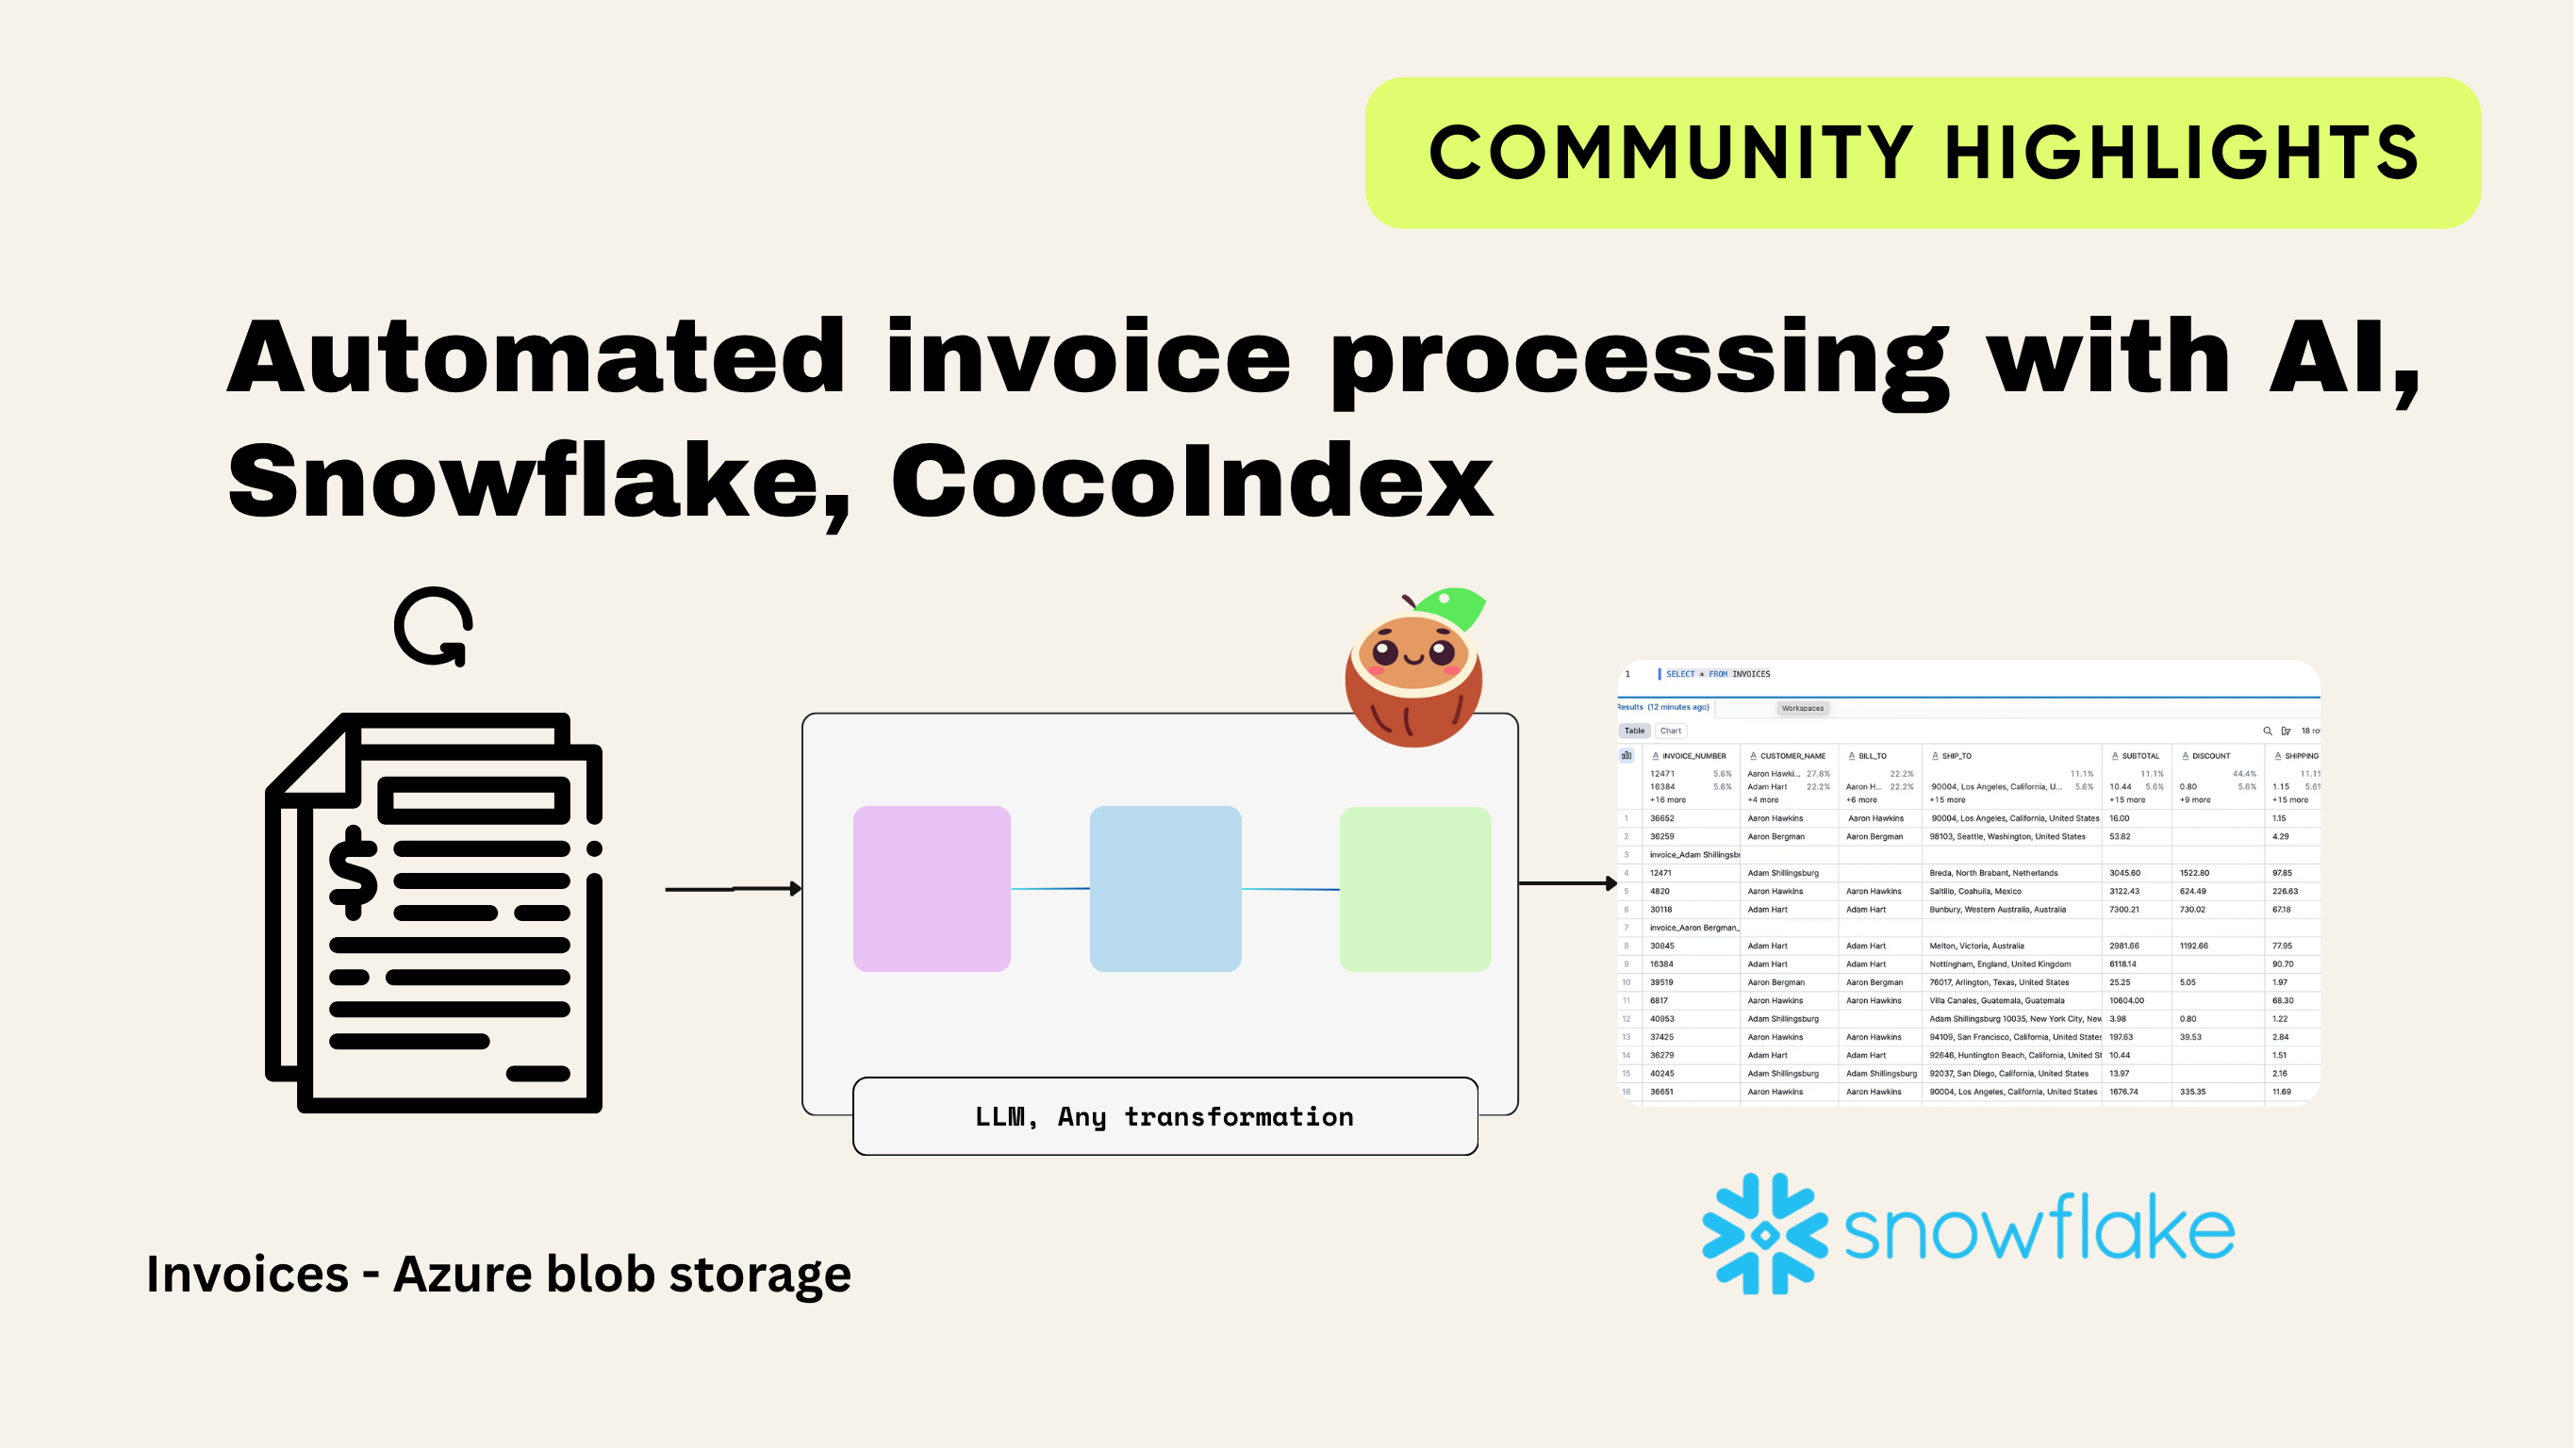
I recently worked with a clothing manufacturer who wanted to simplify their invoice process. Every day, they receive around 20–22 supplier invoices in PDF format. All these invoices are stored in Azure Blob Storage. The finance team used to open each PDF manually and copy the details into their system. This took a lot of time and effort. On top of that, they already had a backlog of 8,000 old invoices waiting to be processed.

At first, I built a flow using n8n. This solution read the invoices from Azure Blob Storage, used Mistral AI to pull out the fields from each PDF, and then loaded the results into Snowflake. The setup worked fine for a while. But as the number of invoices grew, the workflow started to break. Debugging errors inside a no-code tool like n8n became harder and harder. That’s when I decided to switch to a coding solution.

I came across CocoIndex, an open-source ETL framework designed to transform data for AI, with support for real-time incremental processing. It allowed me to build a pipeline that was both reliable and scalable for this use case.

In this blog, I will walk you through how I built the pipeline using the CocoIndex framework.

What is CocoIndex?

CocoIndex is an open-source tool that helps move data from one place to another in a smart and structured way. In technical terms, this is called ETL (Extract, Transform, Load). But in simple words, you can think of it as a smart conveyor belt in a factory.

  • On one end of the belt, you place the raw material (PDF invoices).
  • As the belt moves, the items pass through different stations (transformations). Some stations clean the data, others format it, and some even use AI as inspectors to read and label information.
  • At the end of the belt, the finished product is neatly packed into boxes (your Snowflake database).

smart conveyor belt

And here’s the best part: CocoIndex is smart. It remembers what it has already processed. That means if you add a new invoice tomorrow, it won’t redo all the old ones. It will just pick up the new files and process only those. This is called incremental processing, and it saves a huge amount of time and cost.

How CocoIndex Works with AI

CocoIndex isn’t just about moving data, it works with AI models during the transformation step.

Here’s how:

  1. It reads the text from your PDF or file.
  2. It sends the text to an AI model with clear instructions: “Pull out the invoice number, date, totals, customer name, and items.”
  3. The AI acts like a smart inspector, turning unstructured text into neat rows and columns.
  4. CocoIndex then loads that structured output into Snowflake.
  5. Thanks to incremental updates, only new files trigger AI calls, saving cost and avoiding duplicate work.

Why choose CocoIndex?

  • Open-source: Free to use and supported by a growing community.
  • AI-friendly: Works smoothly with large language models (LLMs).
  • Incremental: Only processes new or changed data, not everything every time.
  • Transparent: Lets you trace how each piece of data was transformed.
  • Fast & Reliable: Built with Rust under the hood for high performance.

In my client project, suppliers uploaded about 20 to 22 invoices every day into Azure Blob Storage. We first did a full load of around 8,000 old invoices, and after that, the pipeline ran in incremental mode, only picking up the new daily invoices. The setup worked efficiently, and since CocoIndex is open source, we deployed the pipeline with Azure Functions to automate the process.

For this blog, I found a GitHub repository that contains sample invoice PDFs, and I used those files to build and test this use case. Used local machine to run this use case.

Building the Pipeline

For this use case, I followed the ELT approach (Extract, Load, Transform). This means:

  • Extract invoices from Azure Blob Storage,
  • Load them into Snowflake, and
  • Later perform the Transformations inside Snowflake.

In this blog, focussed only on the Extract and Load steps, getting the invoice data out of Blob Storage and into Snowflake.

All the PDF invoices are loaded into Azure Blob Storage, then CocoIndex uses an LLM to extract the data from the PDFs and load it into Snowflake.

flow

Before writing a code, we need to setup a Postgres database, CocoIndex needs a small database in the background to keep track of what has already been processed (Incremental processing). This database acts like a logbook, it remembers which invoices were read, what data was extracted, and whether something has changed. Basically it keeps saving the metadata.

You can install Postgres in different ways: directly on your computer, with Docker, or through VS Code extensions. For this use case, I set it up directly inside VS Code.

  • Open VS Code.
  • Install the PostgreSQL extension from the marketplace.
  • Add a new connection with these details:
Host: localhost
Port: 5432
Database: cocoindex
User: cocoindex
Password: cocoindex

This lets you browse and query the database inside VS Code.

Connecting to Azure Blob Storage

The next step is to integrate Azure Blob Storage, since our invoices are uploaded there by suppliers. To connect, we use the Azure CLI (Command Line Interface).

First, check if Azure CLI is installed:

az --version

If not installed, install it:

az login

Now you can list all the invoices in your container by providing the account name and container name:

az storage blob list \
--account-name your_account_name \
--container-name invoice \
--auth-mode login

This will prompt you to log in and then show all the blobs (files) inside the invoice container.

invoice container

Setting up the .env File

We first create a .env file to store the credentials for OpenAI, Postgres, Snowflake, and Azure Blob Storage. This keeps all secrets in one place and out of the main code.

# OpenAI
OPENAI_API_KEY=sk-*********************

# CocoIndex engine (Postgres)
COCOINDEX_DATABASE_URL=postgresql://user:password@localhost:5432/cocoindex

# Azure Blob
AZURE_ACCOUNT_NAME=your_account_name
AZURE_CONTAINER=invoice
AZURE_SAS_TOKEN=sv=**************************
AZURE_PREFIX=

# Snowflake
SNOWFLAKE_USER=your_username
SNOWFLAKE_PASSWORD=***************
SNOWFLAKE_ACCOUNT=your_account_id
SNOWFLAKE_WAREHOUSE=COMPUTE_WH
SNOWFLAKE_DATABASE=INVOICE
SNOWFLAKE_SCHEMA=DBO
SNOWFLAKE_TABLE=INVOICES

Creating main.py

We start by importing the necessary libraries.

import os
import dataclasses
import tempfile
import warnings
import json
from typing import Optional, List

from dotenv import load_dotenv
import cocoindex
from markitdown import MarkItDown
import snowflake.connector

dataclasses is used to create structured “blueprints” for invoices and their line items, so all data follows the same format. MarkItDown converts PDF files into Markdown (plain text with structure). This makes it easier for AI to read invoices, since tables and headings are kept in order.

We now load all the secrets (API keys, database credentials, etc.) from the .env file.

# Load environment variables
load_dotenv()
print(”DEBUG: .env loaded”)

# Azure
AZURE_ACCOUNT_NAME = os.getenv(”AZURE_ACCOUNT_NAME”) # e.g. trucktechbi
AZURE_CONTAINER = os.getenv(”AZURE_CONTAINER”) # e.g. invoice

# OpenAI
os.environ[”OPENAI_API_KEY”] = os.getenv(”OPENAI_API_KEY”)

# CocoIndex internal DB (Postgres)
os.environ[”COCOINDEX_DATABASE_URL”] = os.getenv(”COCOINDEX_DATABASE_URL”)

# Snowflake
SF_USER = os.getenv(”SNOWFLAKE_USER”)
SF_PASSWORD = os.getenv(”SNOWFLAKE_PASSWORD”)
SF_ACCOUNT = os.getenv(”SNOWFLAKE_ACCOUNT”)
SF_WAREHOUSE = os.getenv(”SNOWFLAKE_WAREHOUSE”)
SF_DATABASE = os.getenv(”SNOWFLAKE_DATABASE”)
SF_SCHEMA = os.getenv(”SNOWFLAKE_SCHEMA”)
SF_TABLE = os.getenv(”SNOWFLAKE_TABLE”)

The line load_dotenv() reads all values from the .env file. os.getenv(”...”) fetches each secret (like account names, passwords, API keys).

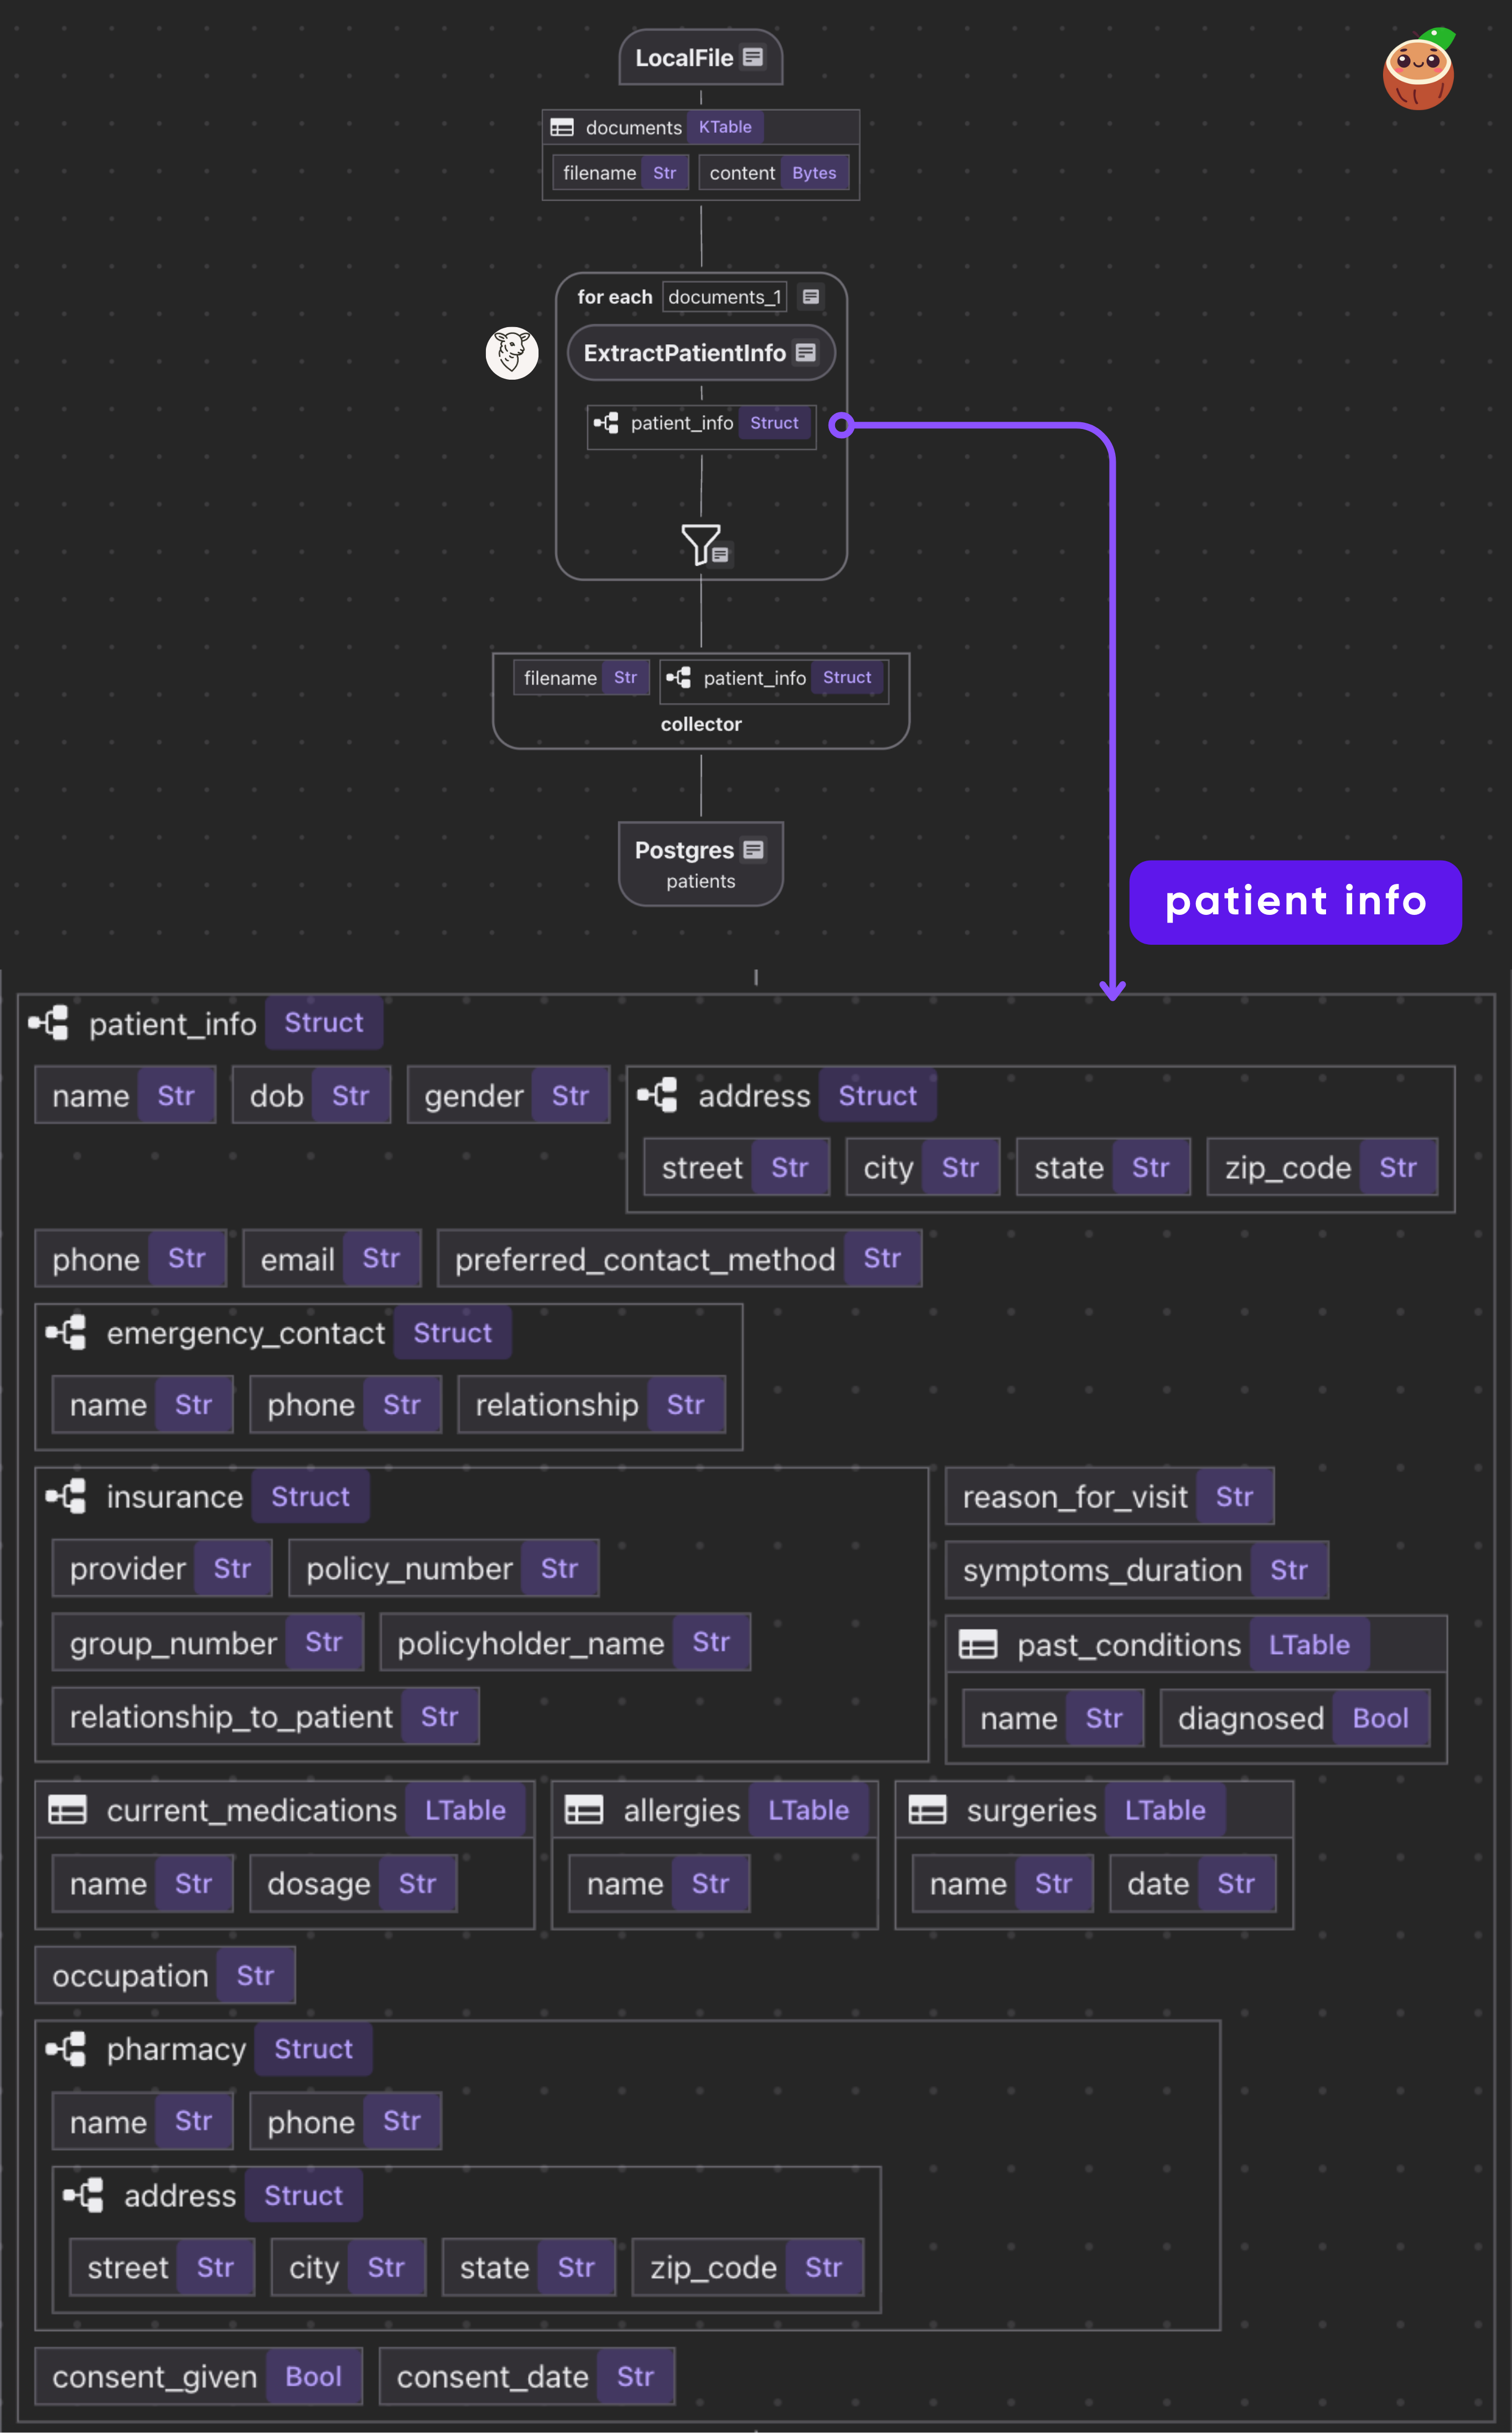
We are extracting the following fields from each invoice. Below is a sample invoice (from the GitHub repo) showing the data mapping. Each highlighted area represents a field we want to capture and store in Snowflake: Invoice Number, Date, Customer Name, Bill To, Ship To, Subtotal, Discount, Shipping, Total, Balance Due, Order ID, Ship Mode, Notes, Terms, Line Items (Product Name, Quantity, Rate, Amount, SKU, Category)

This mapping ensures that every important piece of information from the invoice PDF is extracted in a structured format.

Invoice Extraction

Next, we create two dataclasses (simple templates for storing information in a structured way).

  • LineItem holds product details such as description, quantity, rate, amount, SKU, and category.
  • Invoice holds the overall invoice details (number, date, customer, totals, etc.) and also includes a list of line items.

Inside the Invoice dataclass, we also include clear instructions (a “prompt”) that guide the AI on how to extract data consistently. For example:

  • Always return numbers without currency symbols (e.g., 58.11, not $58.11).
  • If a field is missing, return an empty string (”“).
  • Never swap values between fields.

Keep line_items as a structured list of objects.

This built-in prompt acts like documentation for the schema. When the AI processes each invoice, it uses these rules to reliably map the PDF data into the right fields for Snowflake.

# Dataclasses

@dataclasses.dataclass
class LineItem:
description: Optional[str] = None
quantity: Optional[str] = None
rate: Optional[str] = None
amount: Optional[str] = None
sku: Optional[str] = None
category: Optional[str] = None

@dataclasses.dataclass
class Invoice:
“”“
Represents a supplier invoice with extracted fields.

- invoice_number → The invoice number (e.g.36259). If not found,
return “”.
- date → Invoice date (e.g. “Mar 06 2012).
- customer_name → Person or company name under “Bill To”. Do not
include address.
- bill_to → Full “Bill To” block including address if present.
- ship_to → Full “Ship To” block including address if present.
- subtotal → Subtotal amount (numeric, no currency symbols).
- discount → Any discount listed (numeric, no % sign).
- shipping → Shipping/handling amount (numeric).
- total → Total amount (numeric).
- balance_due → Balance Due amount (numeric).
- order_id → Purchase order or Order ID (e.g. “CA-2012-AB10015140-
40974).
- ship_mode → The shipping method (e.g. “First Class”).
- notes → Free-text notes (e.g. “Thanks for your business!”).
- terms → Payment terms (if present).
- line_items → Extract each invoice table row:
- description → Item/Product name (e.g. “Newell 330).
- quantity → Numeric quantity.
- rate → Unit price (numeric).
- amount → Line total (numeric).
- sku → Product ID if listed (e.g. “OFF-AR-5309).
- category → Category/sub-category (e.g. “Art, Office
Supplies”).

Rules:
- Always return numbers as plain numeric text (e.g.58.11, not
“$58.11).
- If a field is missing in the PDF, return “” (empty string).
- Never swap fields between columns.
- Keep line_items as an array of structured objects.
“”“
invoice_number: Optional[str] = None
date: Optional[str] = None
customer_name: Optional[str] = None
bill_to: Optional[str] = None
ship_to: Optional[str] = None
subtotal: Optional[str] = None
discount: Optional[str] = None
shipping: Optional[str] = None
total: Optional[str] = None
balance_due: Optional[str] = None
order_id: Optional[str] = None
ship_mode: Optional[str] = None
notes: Optional[str] = None
terms: Optional[str] = None
line_items: Optional[List[LineItem]] = None

Next is PDF Markdown. This part of the code converts invoice PDFs into plain text using the MarkItDown library. Since AI models can’t easily read raw PDFs, we first turn them into Markdown, a lightweight text format that keeps structure like headings and tables. The code briefly saves the PDF content into a temporary file, passes it to MarkItDown for conversion, and then deletes the file. The result is clean, structured text that’s ready for AI to extract the invoice fields.


# PDF → Markdown

class ToMarkdown(cocoindex.op.FunctionSpec):
“”“Convert PDF bytes to markdown/text using MarkItDown.”“”

@cocoindex.op.executor_class(gpu=False, cache=True, behavior_version=1)
class ToMarkdownExecutor:
spec: ToMarkdown
_converter: MarkItDown

def prepare(self) -> None:
self._converter = MarkItDown()

def __call__(self, content: bytes, filename: str) -> str:
suffix = os.path.splitext(filename)[1]
with tempfile.NamedTemporaryFile(delete=True, suffix=suffix) as tmp:
tmp.write(content)
tmp.flush()
result = self._converter.convert(tmp.name)
return result.text_content or “”

After converting the invoice into structured data, now needs to get the invoice number. This small function does exactly that:

  • It looks inside the Invoice object.
  • If an invoice_number exists, it returns it.
  • If it’s missing or something goes wrong, it safely returns an empty string instead of breaking the pipeline.

This code block is important because the invoice number acts like a unique ID, so we later use it as the primary key in Snowflake to avoid duplicates.

#Extract invoice_number from Invoice object

class GetInvoiceNumber(cocoindex.op.FunctionSpec):

@cocoindex.op.executor_class(gpu=False, cache=True, behavior_version=1)
class GetInvoiceNumberExecutor:
spec: GetInvoiceNumber

def __call__(self, inv: Invoice) -> str:
try:
return inv.invoice_number or “”
except Exception:
return “”

The next step is to load the extracted invoice data into Snowflake. For this, I created a target table called INVOICES in Snowflake.

Since this is just the raw load step (no transformations yet), all columns are stored as VARCHAR. This way, the data goes in exactly as it is extracted, and we can do the transformation inside the Snowflake.

CREATE OR REPLACE TABLE INVOICES (
INVOICE_NUMBER VARCHAR(50),
CUSTOMER_NAME VARCHAR(255),
BILL_TO VARCHAR(500),
SHIP_TO VARCHAR(500),
SUBTOTAL VARCHAR(50),
DISCOUNT VARCHAR(50),
SHIPPING VARCHAR(50),
TOTAL VARCHAR(50),
BALANCE_DUE VARCHAR(50),
ORDER_ID VARCHAR(50),
SHIP_MODE VARCHAR(100),
NOTES VARCHAR(1000),
TERMS VARCHAR(500),
LINE_ITEMS VARCHAR(2000),
CREATED_AT VARCHAR(50),
FILENAME VARCHAR(255),
DATE VARCHAR(50)
);

the below code blocks uses the credentials (user, password, account, warehouse, database, schema, table) from the .env file.

It then uses a MERGE command. This is important because:

  • If an invoice already exists (with the same invoice number), the row is updated with the latest data.
  • If it’s a new invoice, the row is inserted as a new record.
  • Line items are stored as a JSON array, so each invoice can contain multiple products.
  • CREATED_AT timestamp is also added, so we know when the data was last loaded.

This ensures the Snowflake table is always clean, no duplicates, and always up to date with the latest invoices.

# Snowflake Target

class SnowflakeTarget(cocoindex.op.TargetSpec):
user: str
password: str
account: str
warehouse: str
database: str
schema: str
table: str

@cocoindex.op.target_connector(spec_cls=SnowflakeTarget)
class SnowflakeTargetConnector:
@staticmethod
def get_persistent_key(spec: SnowflakeTarget, target_name: str) -> str:
return f”{spec.account}/{spec.database}/{spec.schema}/{spec.table}

@staticmethod
def describe(key: str) -> str:
return f”Snowflake table {key}

@staticmethod
def apply_setup_change(key, previous, current) -> None:
return

@staticmethod
def mutate(*all_mutations: tuple[SnowflakeTarget, dict[str, dict | None]]) -> None:
for spec, mutations in all_mutations:
if not mutations:
continue
fqn = f’{spec.database}.{spec.schema}.{spec.table}
conn = snowflake.connector.connect(
user=spec.user,
password=spec.password,
account=spec.account,
warehouse=spec.warehouse,
database=spec.database,
schema=spec.schema,
)
try:
cur = conn.cursor()
cur.execute(f’USE WAREHOUSE “{spec.warehouse}”’)
for filename_key, value in mutations.items():
if value is None:
continue
filename = value.get(”filename”, filename_key)
inv_data = value[”invoice”]

if isinstance(inv_data, dict):
inv_dict = inv_data
line_items = inv_dict.get(”line_items”, []) or []
else:
inv_dict = dataclasses.asdict(inv_data)
line_items = inv_data.line_items or []

inv_num = value.get(”invoice_number”) or inv_dict.get(”invoice_number”) or filename

line_items_json = json.dumps(
[dataclasses.asdict(li) if not isinstance(li, dict) else li for li in line_items],
ensure_ascii=False
)

cur.execute(f”“”
MERGE INTO {fqn} t
USING (
SELECT
%s AS INVOICE_NUMBER, %s AS DATE, %s AS
CUSTOMER_NAME, %s AS BILL_TO, %s AS
SHIP_TO, %s AS SUBTOTAL, %s AS DISCOUNT,
%s AS SHIPPING, %s AS TOTAL, %s AS
BALANCE_DUE, %s AS ORDER_ID, %s AS
SHIP_MODE, %s AS NOTES, %s AS TERMS,
PARSE_JSON(%s) AS LINE_ITEMS, %s AS
FILENAME, CURRENT_TIMESTAMP AS
CREATED_AT ) s
ON t.INVOICE_NUMBER = s.INVOICE_NUMBER
WHEN MATCHED THEN UPDATE SET
DATE=s.DATE, CUSTOMER_NAME=s.CUSTOMER_NAME,
BILL_TO=s.BILL_TO, SHIP_TO=s.SHIP_TO,
SUBTOTAL=s.SUBTOTAL, DISCOUNT=s.DISCOUNT,
SHIPPING=s.SHIPPING, TOTAL=s.TOTAL,
BALANCE_DUE=s.BALANCE_DUE, ORDER_ID=s.ORDER_ID,
SHIP_MODE=s.SHIP_MODE, NOTES=s.NOTES,
TERMS=s.TERMS, LINE_ITEMS=s.LINE_ITEMS,
FILENAME=s.FILENAME,CREATED_AT=CURRENT_TIMESTAMP
WHEN NOT MATCHED THEN INSERT (
INVOICE_NUMBER, DATE, CUSTOMER_NAME, BILL_TO,
SHIP_TO,SUBTOTAL, DISCOUNT, SHIPPING, TOTAL,
BALANCE_DUE,ORDER_ID, SHIP_MODE, NOTES, TERMS,
LINE_ITEMS, FILENAME
) VALUES (
s.INVOICE_NUMBER, s.DATE, s.CUSTOMER_NAME,
s.BILL_TO, s.SHIP_TO, s.SUBTOTAL,
s.DISCOUNT, s.SHIPPING, s.TOTAL,
s.BALANCE_DUE, s.ORDER_ID, s.SHIP_MODE,
s.NOTES, s.TERMS, s.LINE_ITEMS, s.FILENAME
)
“”“, (
inv_num,
inv_dict.get(”date”),
inv_dict.get(”customer_name”),
inv_dict.get(”bill_to”),
inv_dict.get(”ship_to”),
inv_dict.get(”subtotal”),
inv_dict.get(”discount”),
inv_dict.get(”shipping”),
inv_dict.get(”total”),
inv_dict.get(”balance_due”),
inv_dict.get(”order_id”),
inv_dict.get(”ship_mode”),
inv_dict.get(”notes”),
inv_dict.get(”terms”),
line_items_json,
filename,
))
finally:
try: cur.close()
except: pass
conn.close()

Building the Flow

Now we build the flow, this defines how invoices move from Azure Blob Storage all the way into Snowflake.

1. Source (Input)

The flow starts by connecting to Azure Blob Storage and reading all the invoice PDFs from the container.

2. Convert PDFs to Text

Each PDF is run through the ToMarkdown step, which converts it into structured text that the AI can understand.

3. AI Extraction (with schema prompt)

The extracted text is then processed by OpenAI through CocoIndex. Instead of hardcoding all the rules here, the AI now follows the Invoice dataclass docstring, which contains clear instructions for how to map fields (like invoice number, date, totals, and line items). This built-in schema acts like a guide, ensuring the AI always:

  • Extracts fields in the correct format.
  • Returns numbers without symbols.
  • Leaves fields empty (”“) if data is missing.
  • Keeps line items structured.

This way, the AI outputs consistent, clean data that fits directly into Snowflake.

4. Invoice Number Check

A helper function (GetInvoiceNumber) ensures each invoice has a proper ID. This ID is used as the primary key to keep data unique.

5. Collector

All invoices are grouped together and prepared for export.

6. Export to Snowflake

Finally, the invoices are loaded into the Snowflake table (INVOICES). If an invoice already exists, it’s updated; if it’s new, it’s inserted.

@cocoindex.flow_def(name=”InvoiceExtraction”)
def invoice_flow(flow_builder: cocoindex.FlowBuilder, data_scope: cocoindex.DataScope) -> None:
azure_source_params = {
“account_name”: AZURE_ACCOUNT_NAME,
“container_name”: AZURE_CONTAINER,
“binary”: True,
“included_patterns”: [*.pdf”],
}

data_scope[”documents”] = flow_builder.add_source(
cocoindex.sources.AzureBlob(**azure_source_params)
)
invoices = data_scope.add_collector()
with data_scope[”documents”].row() as doc:
doc[”markdown”] = doc[”content”].transform(ToMarkdown(), filename=doc[”filename”])
doc[”invoice”] = doc[”markdown”].transform(
cocoindex.functions.ExtractByLlm(
llm_spec=cocoindex.LlmSpec(api_type=cocoindex.LlmApiType.OPENAI, model=”gpt-4o”),
output_type=Invoice,
instruction=”Extract the invoice into the Invoice schema as documented.
)
)
doc[”invoice_number”] = doc[”invoice”].transform(GetInvoiceNumber())
invoices.collect(filename=doc[”filename”], invoice=doc[”invoice”], invoice_number=doc[”invoice_number”])

invoices.export(
“SnowflakeInvoices”,
SnowflakeTarget(
user=SF_USER,
password=SF_PASSWORD,
account=SF_ACCOUNT,
warehouse=SF_WAREHOUSE,
database=SF_DATABASE,
schema=SF_SCHEMA,
table=SF_TABLE,
),
primary_key_fields=[”invoice_number”],
)

Running the Pipeline

The last code block to run the flow

  1. It prints which Azure Blob container is being used.
  2. invoice_flow.setup() prepares the pipeline — checking sources (Azure), the target (Snowflake), and making sure everything is ready.
  3. invoice_flow.update() runs the flow. It reads new invoices from Azure, extracts the fields with AI, and loads them into Snowflake.
  4. Finally, it prints a summary (Update stats) showing how many records were inserted or updated.
if __name__ == “__main__”:
print(f”Reading directly from Azure Blob container:
{AZURE_CONTAINER})
invoice_flow.setup(report_to_stdout=True)
stats = invoice_flow.update(reexport_targets=False)
print(”Update stats:, stats)

Best thing about CocoIndex is it supports real-time incremental processing, it only processes and exports new or changed files since the last run.

if reexport_targets = False (the default)

  • Only new or updated invoices are exported to Snowflake. Old ones are skipped.

if reexport_targets = True

  • It forces all invoices (new + old) to be re-exported into Snowflake, even if they haven’t changed.

So you use True if you want a full refresh, and False if you just want the incremental updates.

Snowflake

Now the pipeline loads all invoices from Azure Blob Storage into the INVOICES table in Snowflake without doing any transformations. This blog focuses only on the Extract and Load steps. Transformations can be done inside the Snowflake.

Challenges

Since this pipeline uses AI to extract data from invoices, it’s not always perfect. Evaluation is a real challenge. When I tested with original client data, many fields were mismatched at first. By refining the prompt, I was able to improve accuracy. For this blog’s demo data the results were more reliable, but with messy or inconsistent invoices, AI can still make mistakes or “hallucinate.” Structured PDFs are usually easier to handle.

It’s important to note that CocoIndex itself is not a parser. It’s a framework and incremental engine that allows you to plug in any AI model or custom logic. For parsing invoices, you can choose the tool that works best for your use case. For example, I used OpenAI here, but tools like Google Document AI or other specialized invoice parsers could also be a good fit. In some cases, fine-tuning a model for your own domain may give the best results.

For more information on CocoIndex, please check the documentation.

Thanks for reading

Fast iterate your indexing strategy - trace back from query to data

· 4 min read
Linghua Jin
CocoIndex Maintainer

cover

We are launching a major feature in both CocoIndex and CocoInsight to help users fast iterate with the indexing strategy, and trace back all the way to the data — to make the transformation experience more seamlessly integrated with the end goal.

We deeply care about making the overall experience seamless. With the new launch, you can define query handlers, so that you can easily run queries in tools like CocoInsight.

CocoInsight

Does my data transformation creates meaningful index for retrieval?

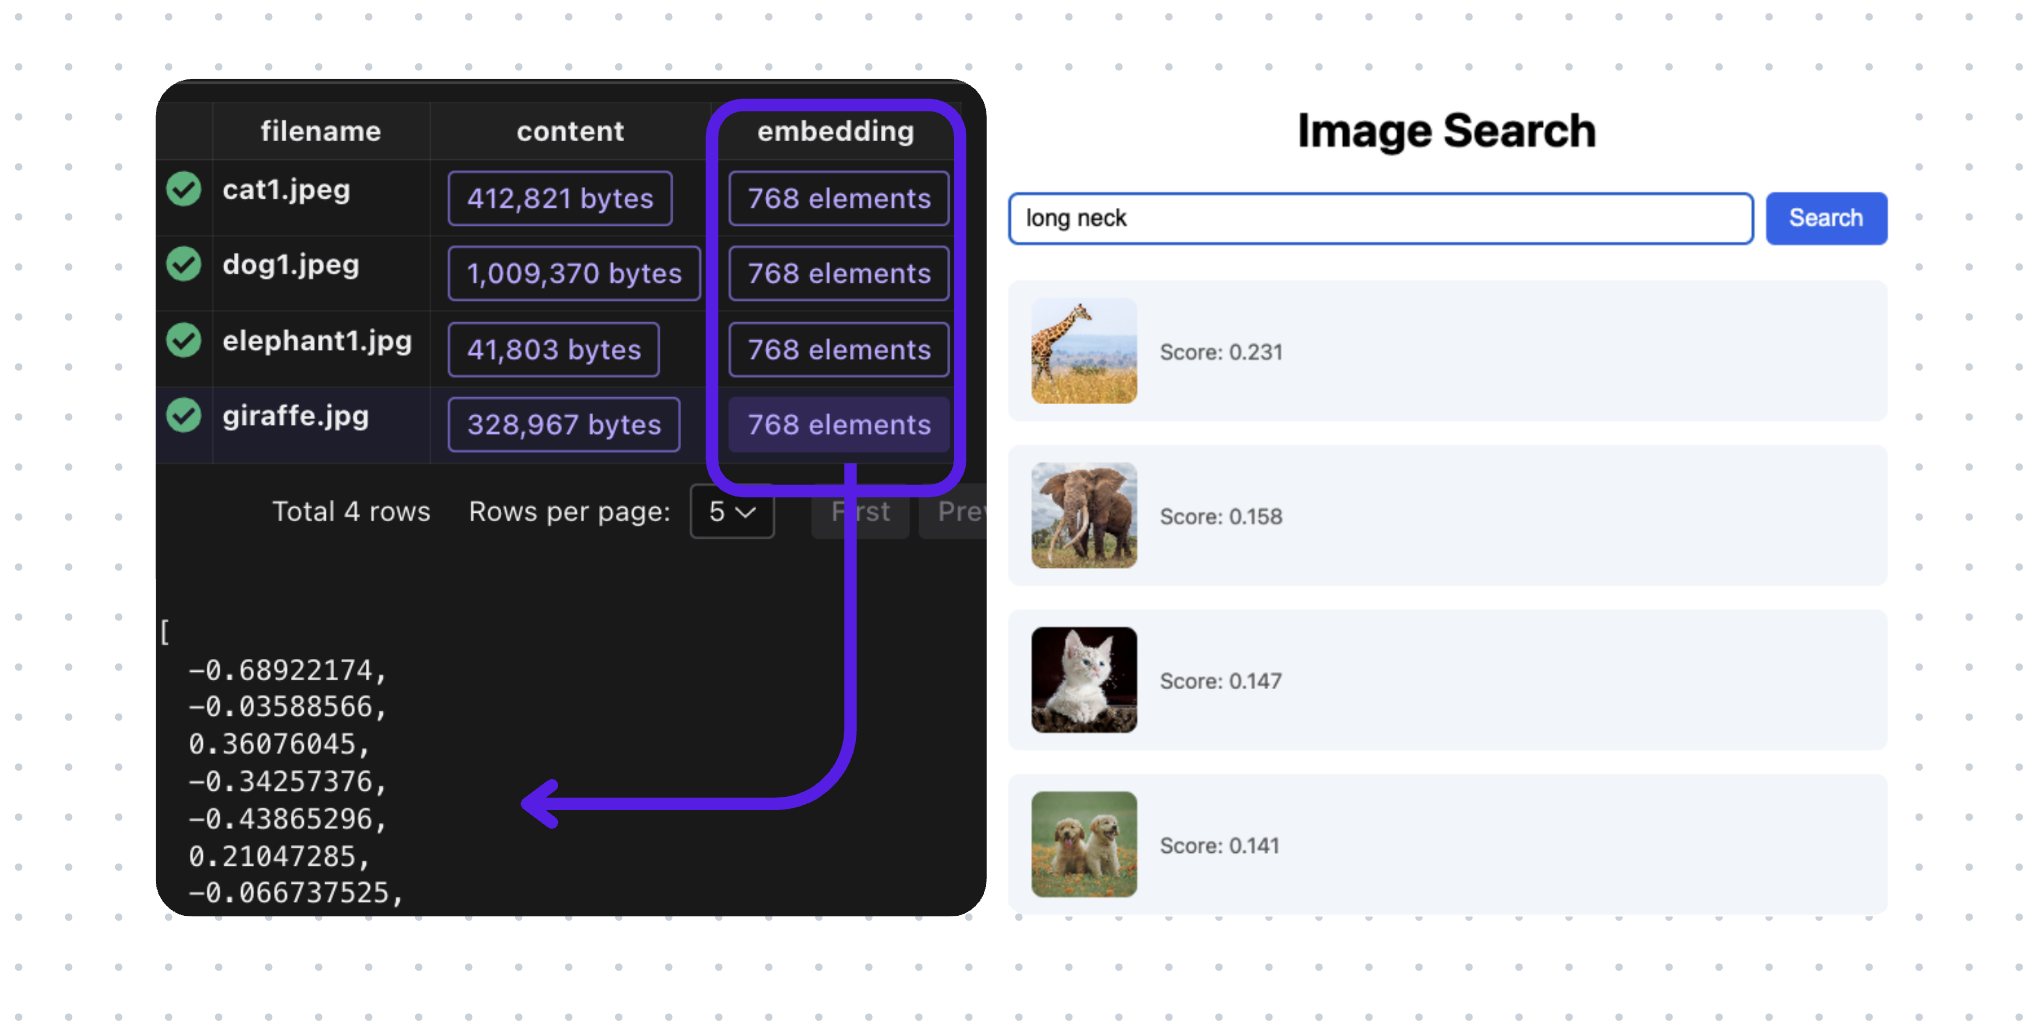
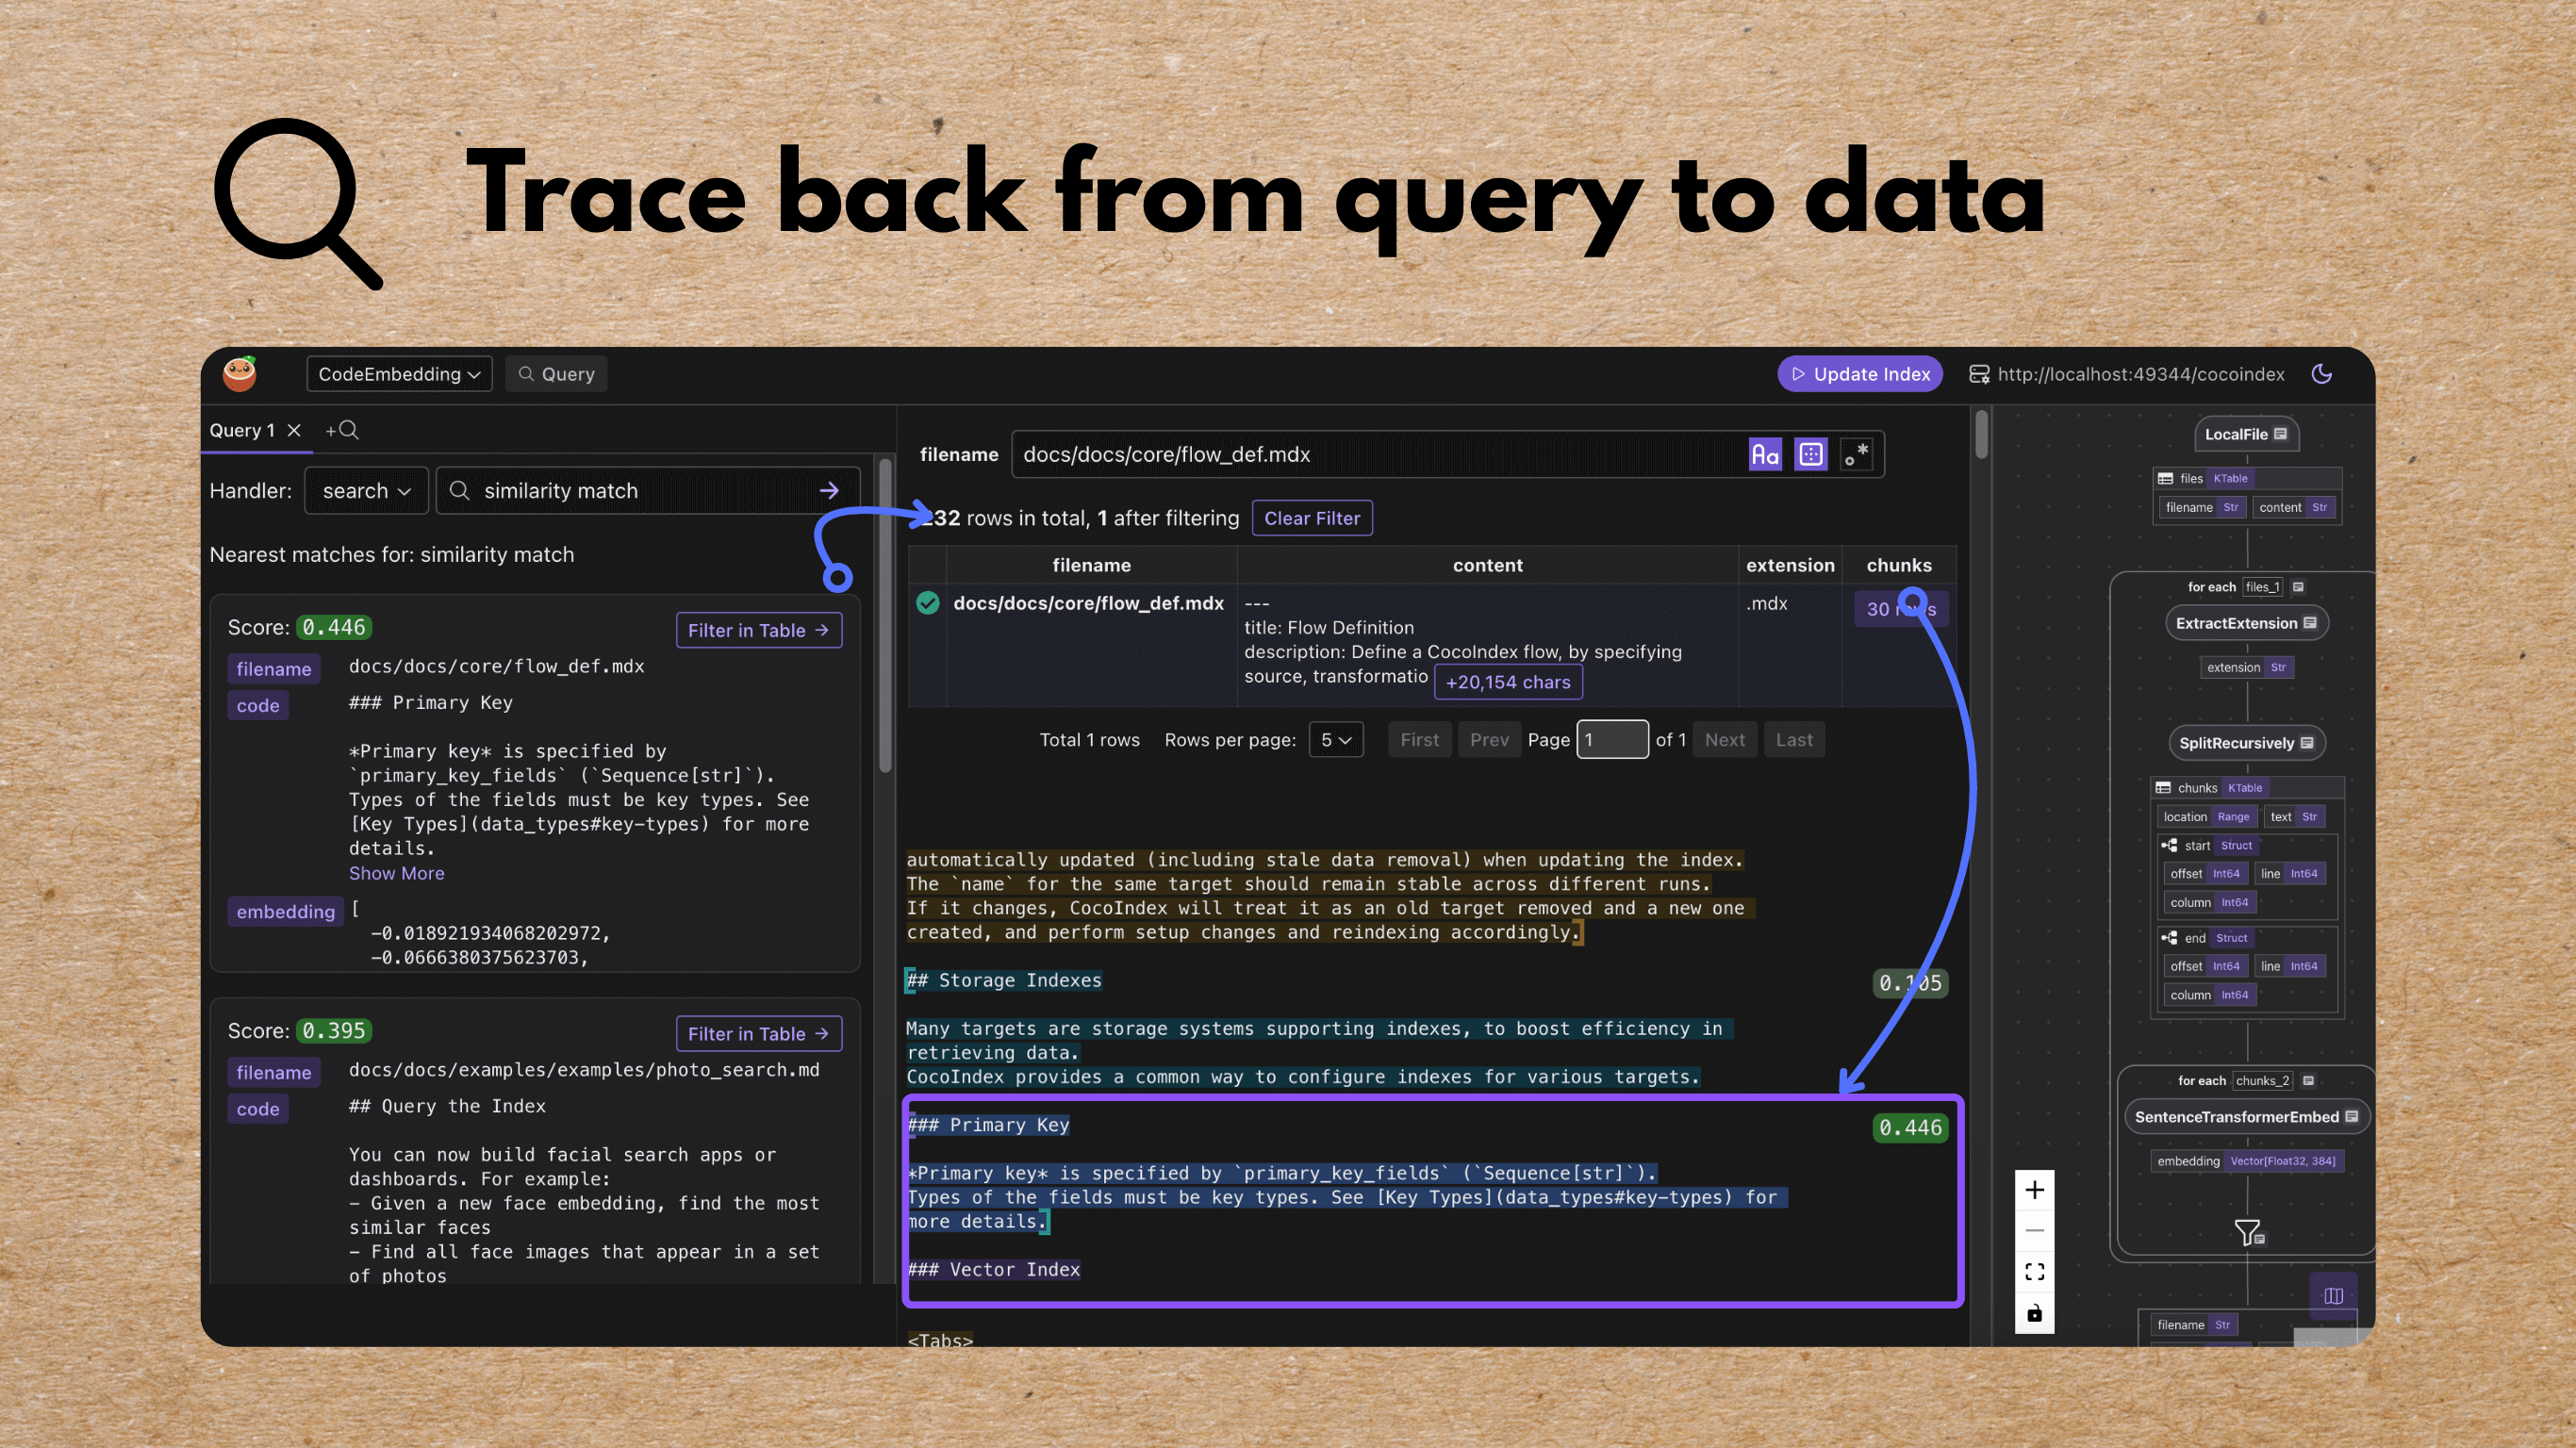
In CocoInsight, we’ve added a Query mode. You can enable this by adding a CocoIndex Query Handler. You can quickly query index, and view the collected information for any entity.

CocoInsight Query Mode

The result is directly linked and can be traced back step by step to how data is generated on the indexing path.

Where are the results coming from?

For example, this snippet comes from the file docs/docs/core/flow_def.mdx . The file was split into 30 chunks after transformation.
trace back data

Why is my chunk / snippet not showing in the search result?

When you perform a query, on the ranking path, you’d usually have a scoring mechanism. On the CocoInsight, you can quickly find any files you have in your mind, and for any chunks, you can scan the scoring in the same context.

missing chunks

This gives you a powerful toolset with direct insight to end to end data transformation, to quickly iterate data indexing strategy without any headaches of building any additional UI or tools.

Integrate Query Logic with CocoIndex

Query Handler

To run queries in CocoInsight, you need to define query handlers. You can use any libraries or frameworks of your choice to perform queries.

You can read more in the documentation about Query Handler.

Query handlers let you expose a simple function that takes a query string and returns structured results. They are discoverable by tools like CocoInsight so you can query your indexes without building your own UI.

For example:

# Declaring it as a query handler, so that you can easily run queries in CocoInsight.
@code_embedding_flow.query_handler(
result_fields=cocoindex.QueryHandlerResultFields(
embedding=["embedding"], score="score"
)
)
def search(query: str) -> cocoindex.QueryOutput:
# Get the table name, for the export target in the code_embedding_flow above.
table_name = cocoindex.utils.get_target_default_name(
code_embedding_flow, "code_embeddings"
)
# Evaluate the transform flow defined below with the input query, to get the embedding.
query_vector = code_to_embedding.eval(query)
# Run the query and get the results.
with connection_pool().connection() as conn:
register_vector(conn)
with conn.cursor() as cur:
cur.execute(
f"""
SELECT filename, code, embedding, embedding <=> %s AS distance, start, "end"
FROM {table_name} ORDER BY distance LIMIT %s
""",
(query_vector, TOP_K),
)
return cocoindex.QueryOutput(
query_info=cocoindex.QueryInfo(
embedding=query_vector,
similarity_metric=cocoindex.VectorSimilarityMetric.COSINE_SIMILARITY,
),
results=[
{
"filename": row[0],
"code": row[1],
"embedding": row[2],
"score": 1.0 - row[3],
"start": row[4],
"end": row[5],
}
for row in cur.fetchall()
],
)

This code defines a query handler that:

  1. Turns the input query into an embedding vector. code_to_embedding is a shared transformation flow between Query and Index path, see detailed explanation below.
  2. Searches a database of code embeddings using cosine similarity.
  3. Returns the top matching code snippets with their filename, code, embedding, score, and positions.

Sharing Logic Between Indexing and Query

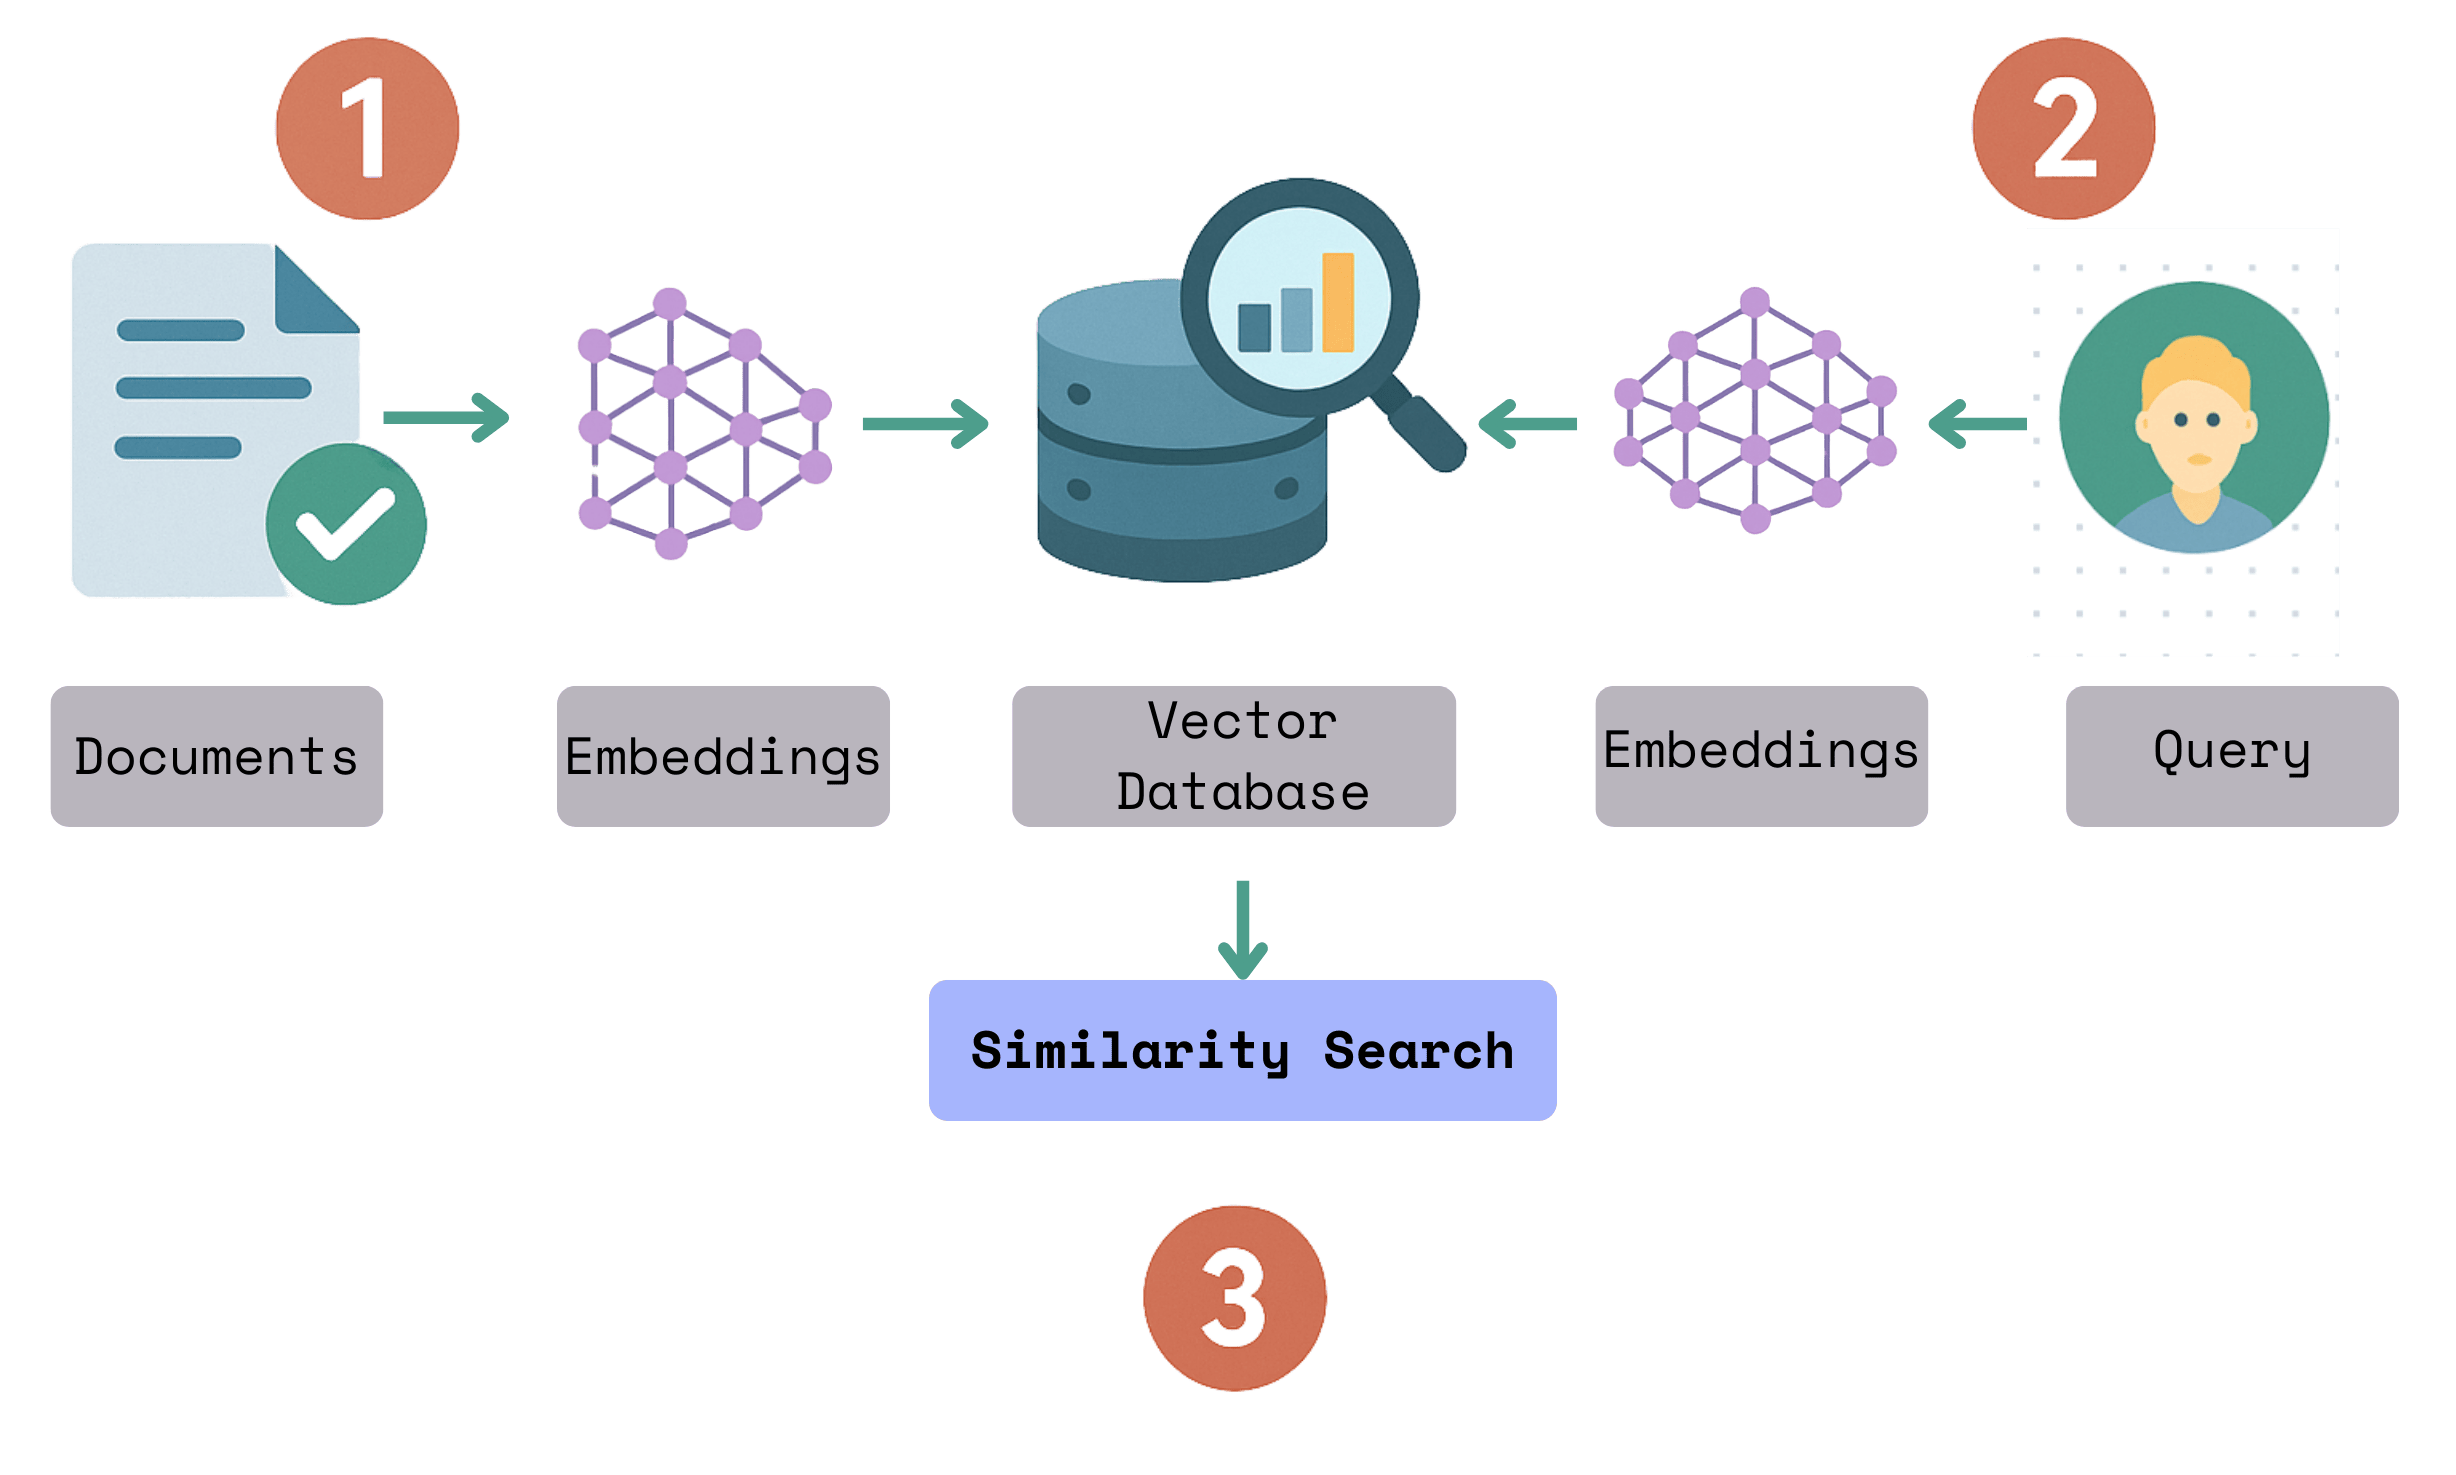
Sometimes, transformation logic needs to be shared between indexing and querying, e.g. when we build a vector index and query against it, the embedding computation needs to be consistent between indexing and querying.

You can find the documentation about Transformation Flow.

You can use @cocoindex.transform_flow() to define shared logic. For example

@cocoindex.transform_flow()
def text_to_embedding(text: cocoindex.DataSlice[str]) -> cocoindex.DataSlice[NDArray[np.float32]]:
return text.transform(
cocoindex.functions.SentenceTransformerEmbed(
model="sentence-transformers/all-MiniLM-L6-v2"))

In your indexing flow, you can directly call it

with doc["chunks"].row() as chunk:
chunk["embedding"] = text_to_embedding(chunk["text"])

In your query logic, you can call the eval() method with a specific value

def search(query: str) -> cocoindex.QueryOutput:
# Evaluate the transform flow defined below with the input query, to get the embedding.
query_vector = code_to_embedding.eval(query)

Examples

Beyond Vector Index

We use vector index in this blog. CocoIndex is a powerful data transformation framework that is beyond vector index. You can use it to build vector index, knowledge graph, structured extraction and transformation and any custom logic towards your need on efficient retrieval from fresh data.

Support Us

We’re constantly adding more examples and improving our runtime. ⭐ Star CocoIndex on GitHub and share the love ❤️ !

And let us know what are you building with CocoIndex — we’d love to feature them.

Incrementally Transform Structured + Unstructured Data from Postgres with AI

· 7 min read
Linghua Jin
CocoIndex Maintainer

PostgreSQL Product Indexing Flow

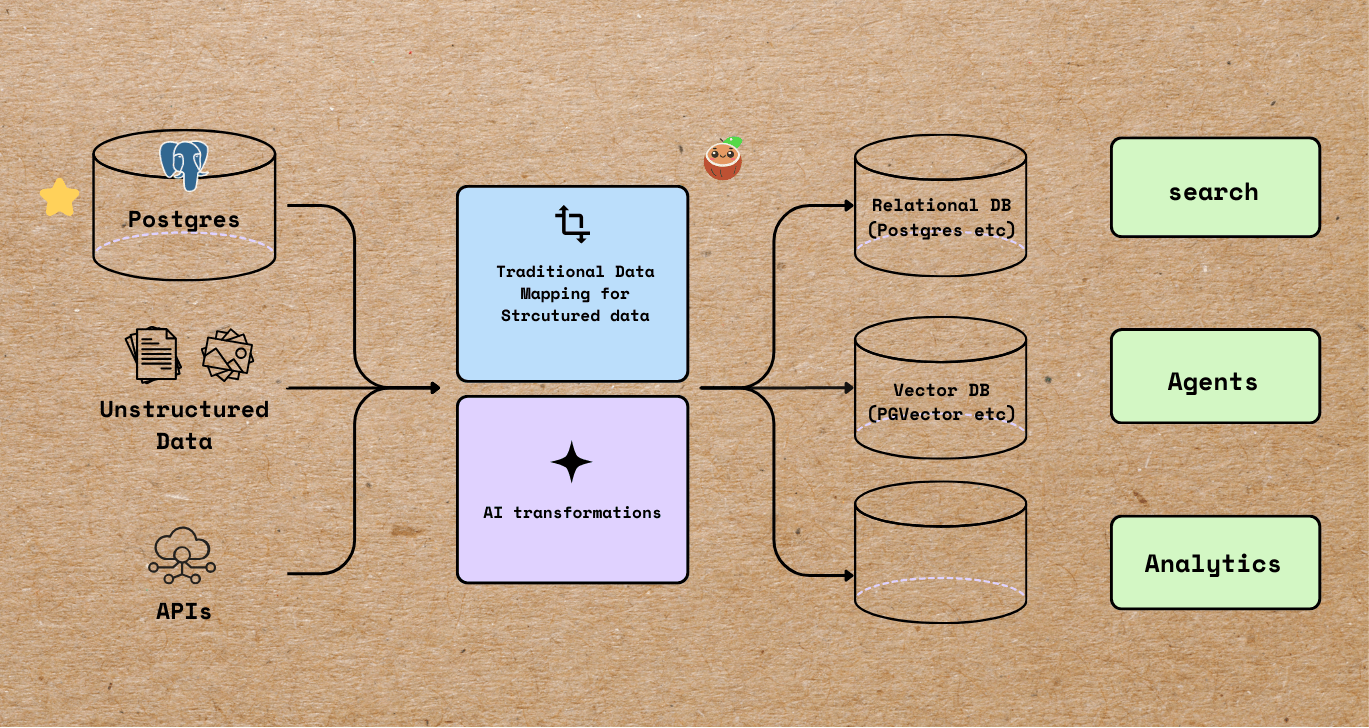
CocoIndex is one framework for building incremental data flows across structured and unstructured sources.

In CocoIndex, AI steps -- like generating embeddings -- are just transforms in the same flow as your other types of transformations, e.g. data mappings, calculations, etc.

Why One Framework for Structured + Unstructured?

  • One mental model: Treat files, APIs, and databases uniformly; AI steps are ordinary ops.
  • Incremental by default: Use an ordinal column to sync only changes; no fragile glue jobs.
  • Consistency: Embeddings are always derived from the exact transformed row state.
  • Operational simplicity: One deployment, one lineage view, fewer moving parts.

This blog introduces the new PostgreSQL source and shows how to take data from PostgreSQL table as source, transform with both AI models and non-AI calculations, and write them into a new PostgreSQL table for semantic + structured search.

If this helps you, ⭐ Star CocoIndex GitHub!

The Example: PostgreSQL Product Indexing Flow

PostgreSQL Product Indexing Flow

Our example demonstrates

  • Reading data from a PostgreSQL table source_products.
  • Computing additional fields (total_value, full_description).
  • Generating embeddings for semantic search.
  • Storing the results in another PostgreSQL table with a vector index using pgvector

This example is open sourced - examples/postgres_source.

Connect to source

flow_builder.add_source reads rows from source_products.

@cocoindex.flow_def(name="PostgresProductIndexing")
def postgres_product_indexing_flow(flow_builder: cocoindex.FlowBuilder, data_scope: cocoindex.DataScope) -> None:

data_scope["products"] = flow_builder.add_source(
cocoindex.sources.Postgres(
table_name="source_products",
# Optional. Use the default CocoIndex database if not specified.
database=cocoindex.add_transient_auth_entry(
cocoindex.DatabaseConnectionSpec(
url=os.environ["SOURCE_DATABASE_URL"],
)
),
# Optional.
ordinal_column="modified_time",
notification=cocoindex.sources.PostgresNotification(),
),
)

This step adds source data from PostgreSQL table source_products to the flow as a KTable.

Add PostgreSQL Source

  • Incremental Sync: When new or updated rows are found, only those rows are run through the pipeline, so downstream indexes and search results reflect the latest data while unchanged rows are untouched.

  • ordinal_column is recommended for change detection so the pipeline processes what's changed.

  • notification: when present, enable change capture based on Postgres LISTEN/NOTIFY.

Check Postgres source for more details.

If you use the Postgres database hosted by Supabase, please click Connect on your project dashboard and find the URL there. Check DatabaseConnectionSpec for more details.

Simple Data Mapping / Transformation

Create a simple transformation to calculate the total price.

@cocoindex.op.function()
def calculate_total_value(price: float, amount: int) -> float:
"""Compute total value for each product."""
return price * amount

Plug into the flow:

with data_scope["products"].row() as product:
# Compute total value
product["total_value"] = flow_builder.transform(
calculate_total_value,
product["price"],
product["amount"],
)

Calculate Total Value

Data Transformation & AI Transformation

Create a custom function creates a full_description field by combining the product’s category, name, and description.
@cocoindex.op.function()
def make_full_description(category: str, name: str, description: str) -> str:
"""Create a detailed product description for embedding."
return f"Category: {category}\nName: {name}\n\n{description}"

Embeddings often perform better with more context. By combining fields into a single text string, we ensure that the semantic meaning of the product is captured fully.

Now plug into the flow:

with data_scope["products"].row() as product:
#.. other transformations

# Compute full description
product["full_description"] = flow_builder.transform(
make_full_description,
product["product_category"],
product["product_name"],
product["description"],
)

# Generate embeddings
product["embedding"] = product["full_description"].transform(
cocoindex.functions.SentenceTransformerEmbed(
model="sentence-transformers/all-MiniLM-L6-v2"
)
)

# Collect data
indexed_product.collect(
product_category=product["product_category"],
product_name=product["product_name"],
description=product["description"],
price=product["price"],
amount=product["amount"],
total_value=product["total_value"],
embedding=product["embedding"],
)

This takes each product row, and does the following:

  1. builds a rich description.
    Make Full Description

  2. turns it into an embedding

    Embed Full Description

  3. collects the embedding along with structured fields (category, name, price, etc.).

    Collect Embedding

Export

indexed_product.export(
"output",
cocoindex.targets.Postgres(),
primary_key_fields=["product_category", "product_name"],
vector_indexes=[
cocoindex.VectorIndexDef(
field_name="embedding",
metric=cocoindex.VectorSimilarityMetric.COSINE_SIMILARITY,
)
],
)

All transformed rows are collected and exported to a new PostgreSQL table with a vector index, ready for semantic search.

Field lineage

When the transform flow starts to getting complex, it's hard to understand how each field is derived. CocoIndex provides a way to visualize the lineage of each field, to make it easier to trace and troubleshoot field origins and downstream dependencies.

For example, the following image shows the lineage of the embedding field, you can click from the final output backward all the way to the source fields, step by step.

Field Lineage

Running the Pipeline

  1. Set up dependencies:

    pip install -e .
  2. Create the source table with sample data:

    psql "postgres://cocoindex:cocoindex@localhost/cocoindex" -f ./prepare_source_data.sql
  3. Setup tables and update the index:

    cocoindex update --setup main
  4. Run CocoInsight:

    cocoindex server -ci main

    You can walk through the project step by step in CocoInsight to see exactly how each field is constructed and what happens behind the scenes. It connects to your local CocoIndex server, with zero pipeline data retention.

Continuous Updating

For continuous updating when the source changes, add -L:

cocoindex server -ci -L main

Check live updates for more details.

Search and Query the Index

Query

Runs a semantic similarity search over the indexed products table, returning the top matches for a given query.

def search(pool: ConnectionPool, query: str, top_k: int = 5) -> list[dict[str, Any]]:
# Get the table name, for the export target in the text_embedding_flow above.
table_name = cocoindex.utils.get_target_default_name(
postgres_product_indexing_flow, "output"
)
# Evaluate the transform flow defined above with the input query, to get the embedding.
query_vector = text_to_embedding.eval(query)
# Run the query and get the results.
with pool.connection() as conn:
register_vector(conn)
with conn.cursor(row_factory=dict_row) as cur:
cur.execute(
f"""
SELECT
product_category,
product_name,
description,
amount,
total_value,
(embedding <=> %s) AS distance
FROM {table_name}
ORDER BY distance ASC
LIMIT %s
""",
(query_vector, top_k),
)
return cur.fetchall()

This function

  • Converts the query text into an embedding (query_vector).
  • Compares it with each product’s stored embedding (embedding) using vector distance.
  • Returns the closest matches, including both metadata and the similarity score (distance).

Create an command-line interactive loop

def _main() -> None:
# Initialize the database connection pool.
pool = ConnectionPool(os.environ["COCOINDEX_DATABASE_URL"])
# Run queries in a loop to demonstrate the query capabilities.
while True:
query = input("Enter search query (or Enter to quit): ")
if query == "":
break
# Run the query function with the database connection pool and the query.
results = search(pool, query)
print("\nSearch results:")
for result in results:
score = 1.0 - result["distance"]
print(
f"[{score:.3f}] {result['product_category']} | {result['product_name']} | {result['amount']} | {result['total_value']}"
)
print(f" {result['description']}")
print("---")
print()

if __name__ == "__main__":
load_dotenv()
cocoindex.init()
_main()

Run as a Service

This example runs as a service using Fast API.

Summary

This approach unlocks powerful new possibilities for businesses to build fast and consistent semantic + structured search experiences, enabling advanced recommendations, knowledge discovery, and contextual analytics from hybrid data at scale.

With a single deployment, one lineage view, and a coherent mental model, CocoIndex is a future-ready framework that drives the next generation of data- and AI-powered applications with simplicity, rigor, and operational excellence.

Support Us

We’re constantly adding more examples and improving our runtime. ⭐ Star CocoIndex on GitHub and share the love ❤️! And let us know what are you building with CocoIndex — we’d love to feature them.

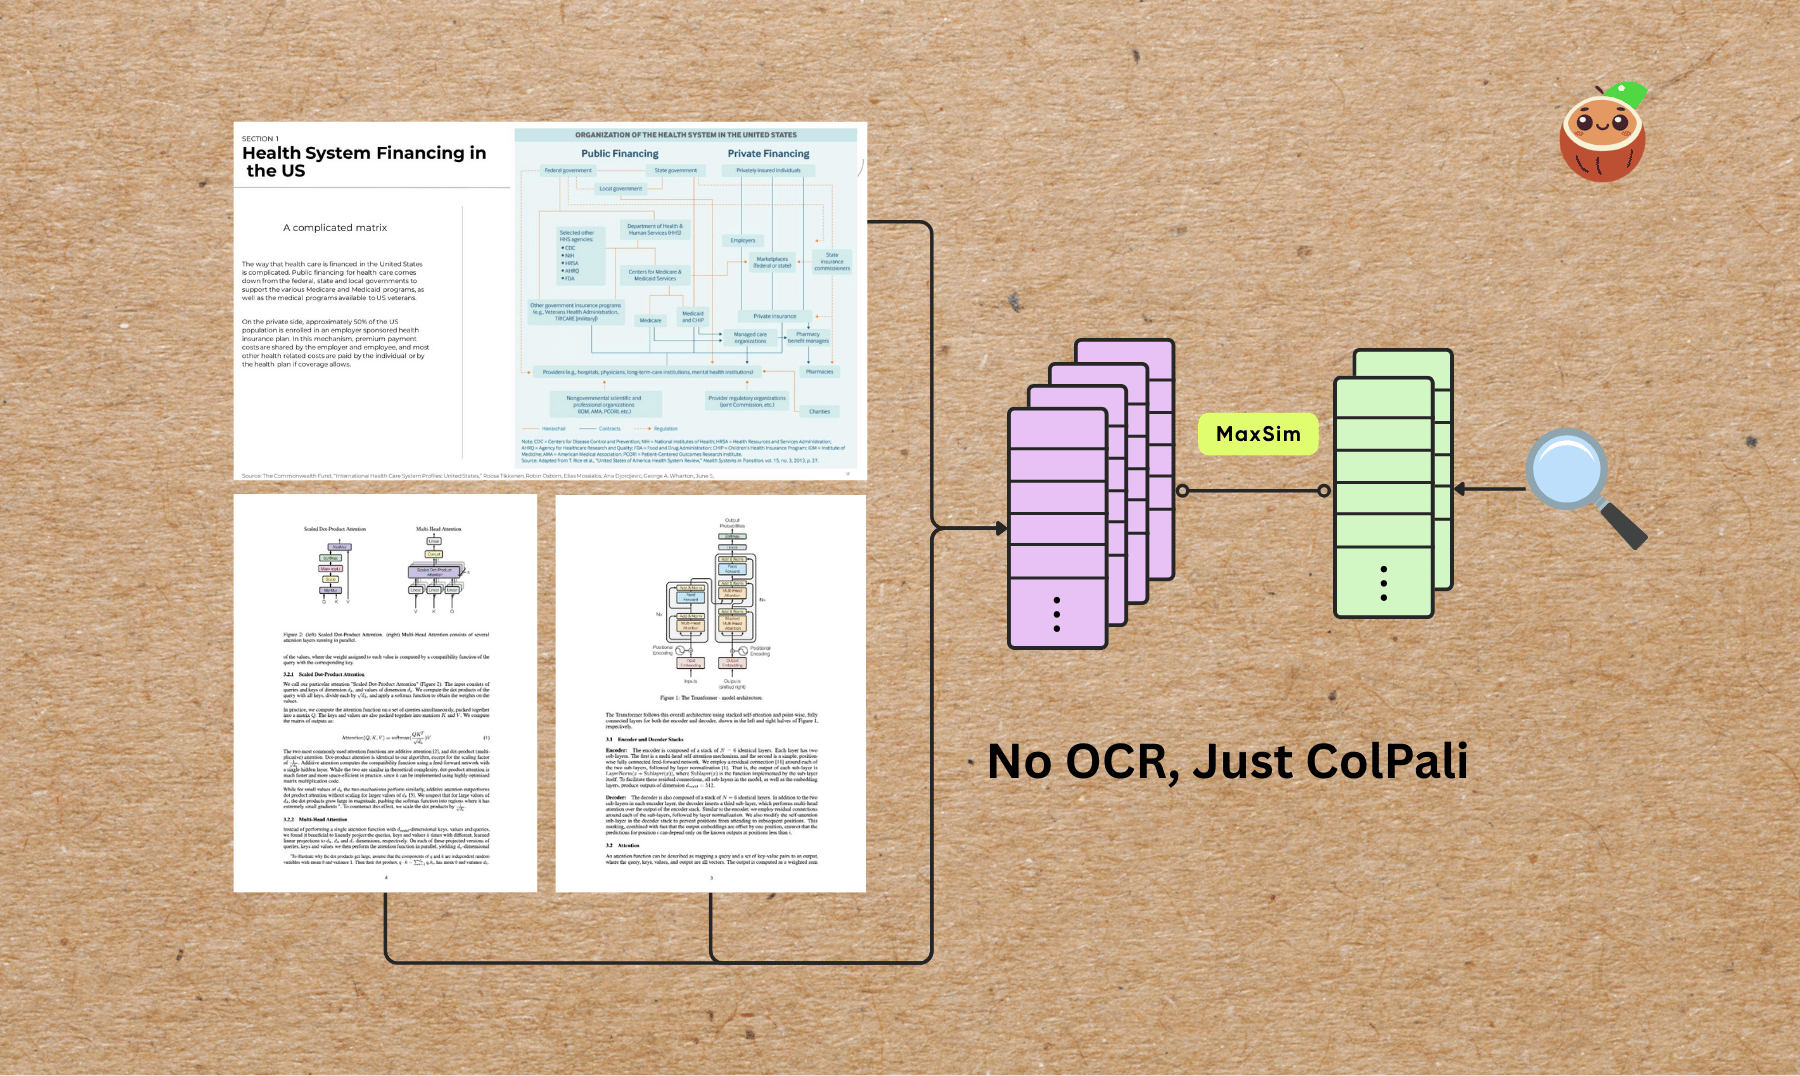
Build a Visual Document Index from multiple formats all at once - PDFs, Images, Slides - with ColPali

· 5 min read
Linghua Jin
CocoIndex Maintainer

Colpali

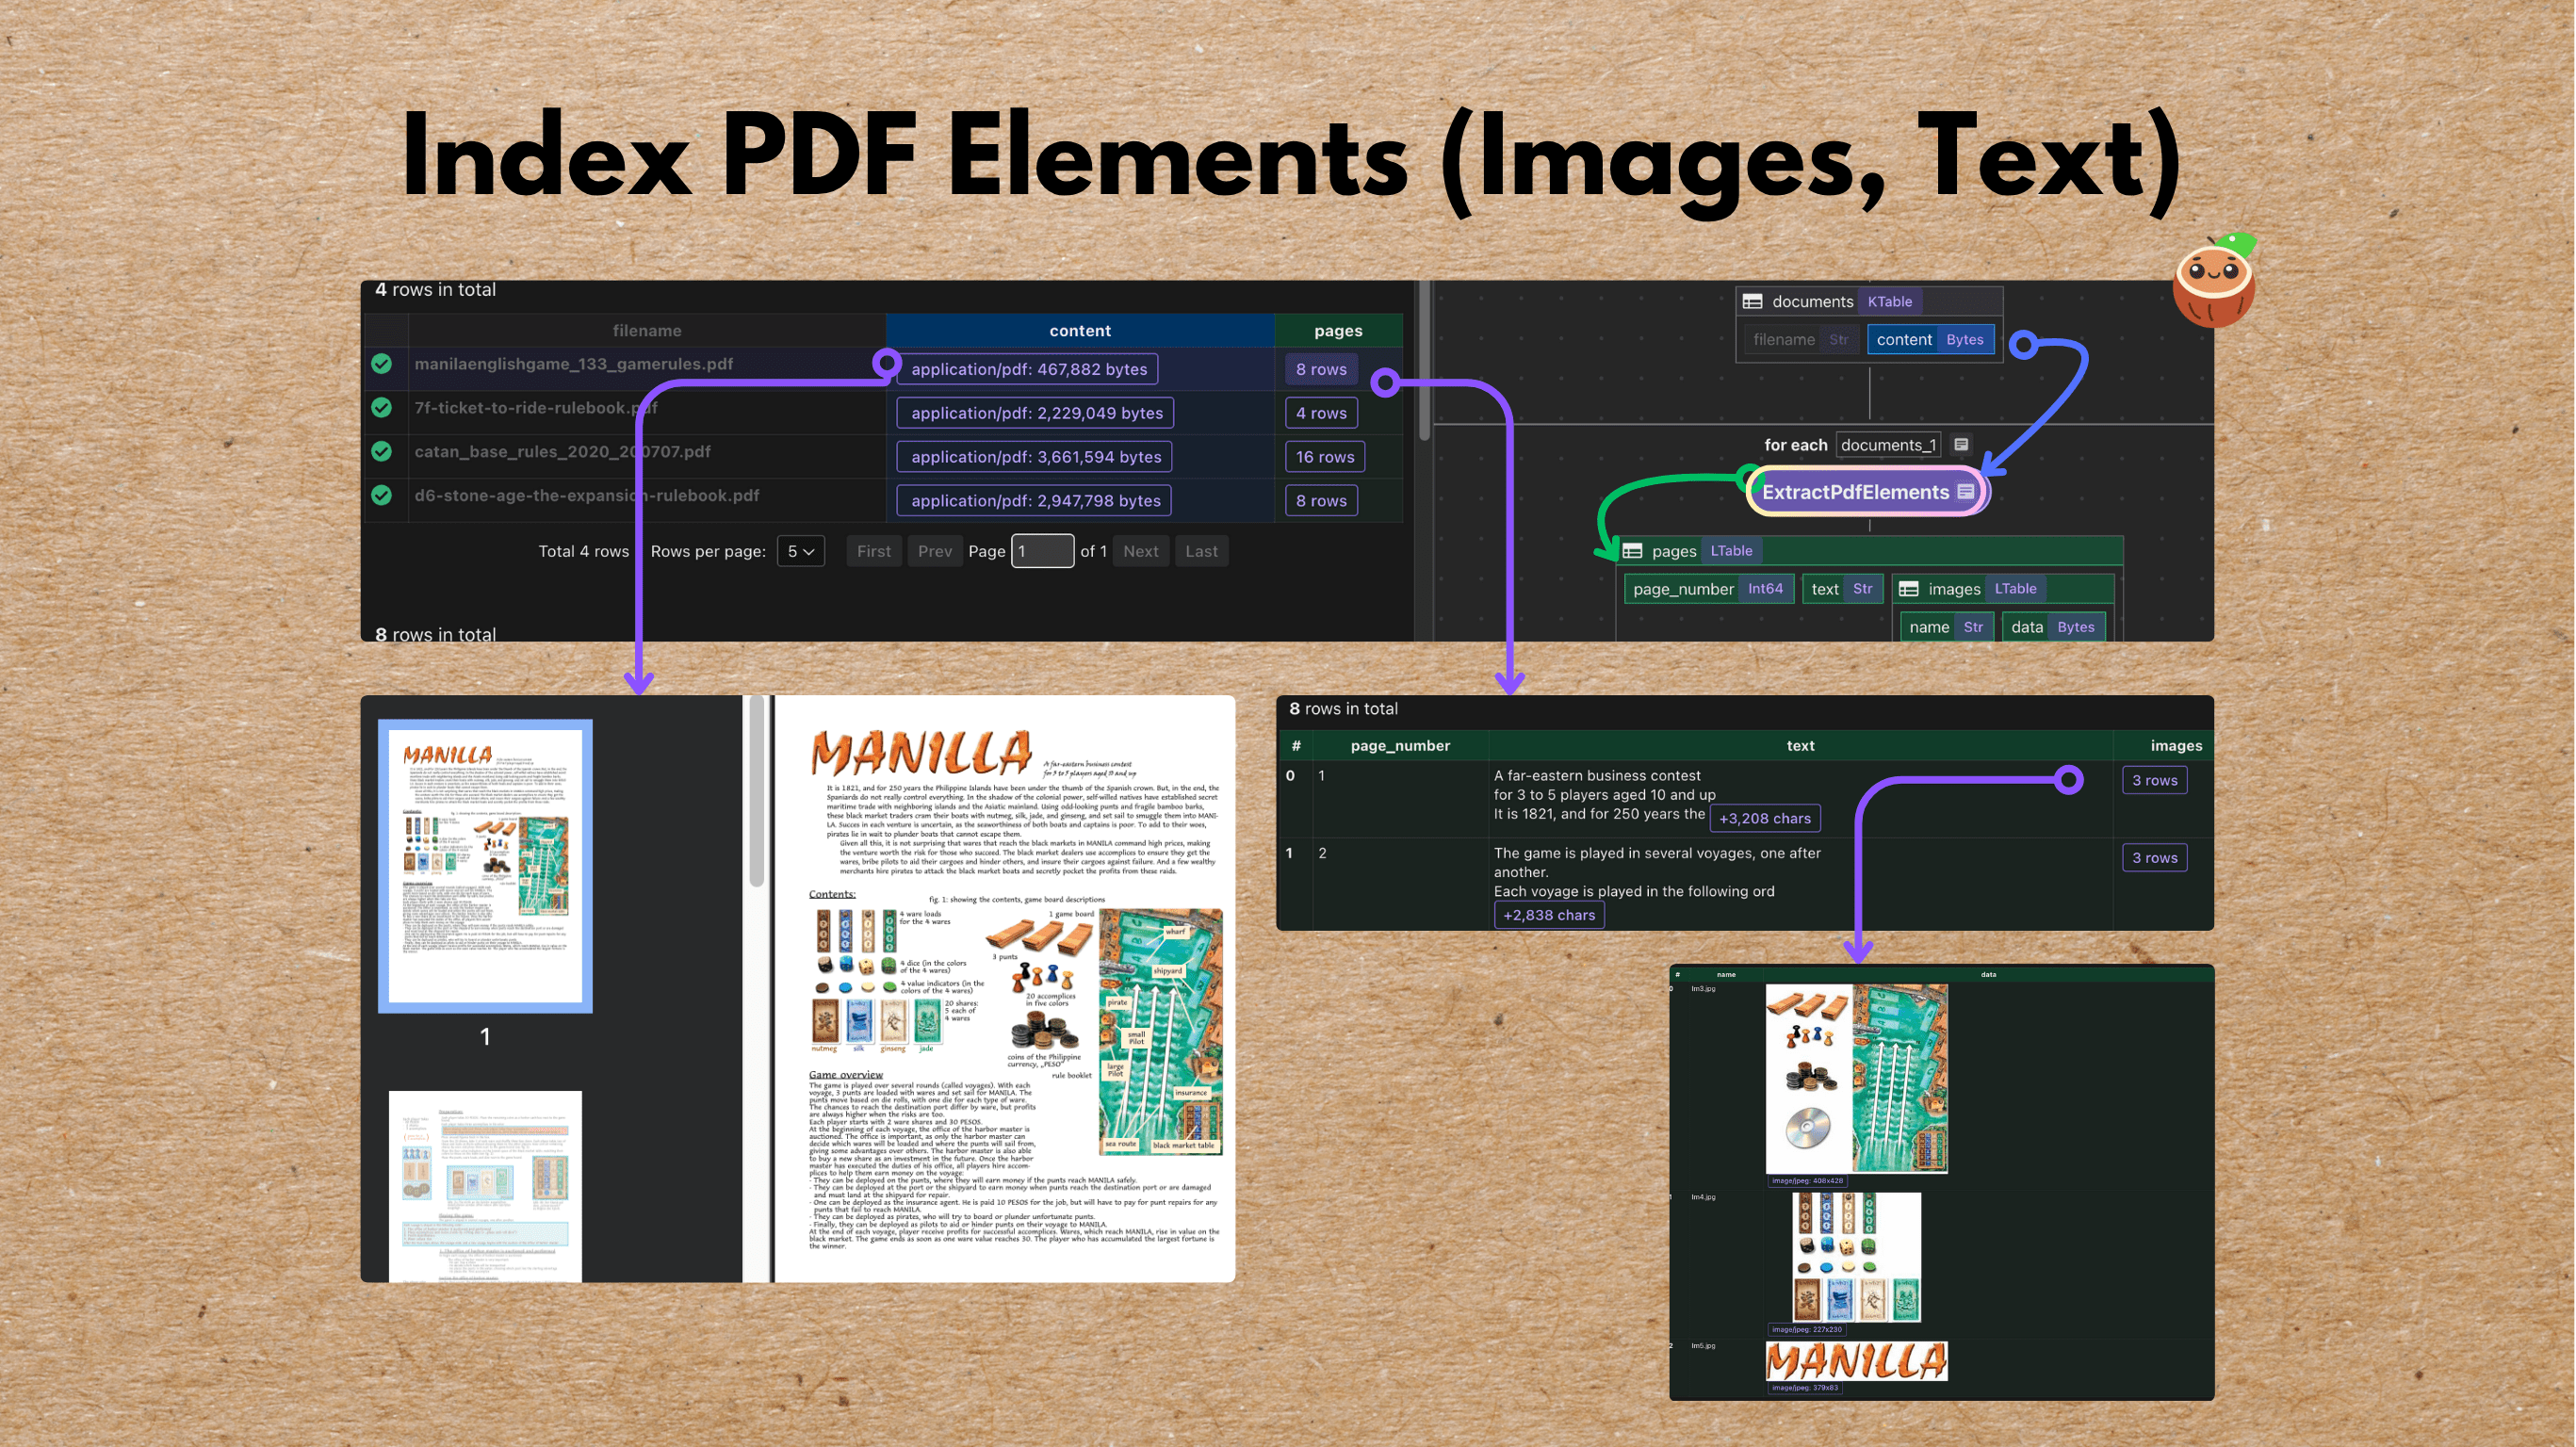
Do you have a messy collection of scanned documents, PDFs, academic papers, presentation slides, and standalone images — all mixed together with charts, tables, and figures — that you want to process into the same vector space for semantic search or to power an AI agent?

In this example, we’ll walk through how to build a visual document indexing pipeline using ColPali for embedding both PDFs and images — and then query the index using natural language.
We’ll skip OCR entirely — ColPali can directly understand document layouts, tables, and figures from images, making it perfect for semantic search across visual-heavy content.

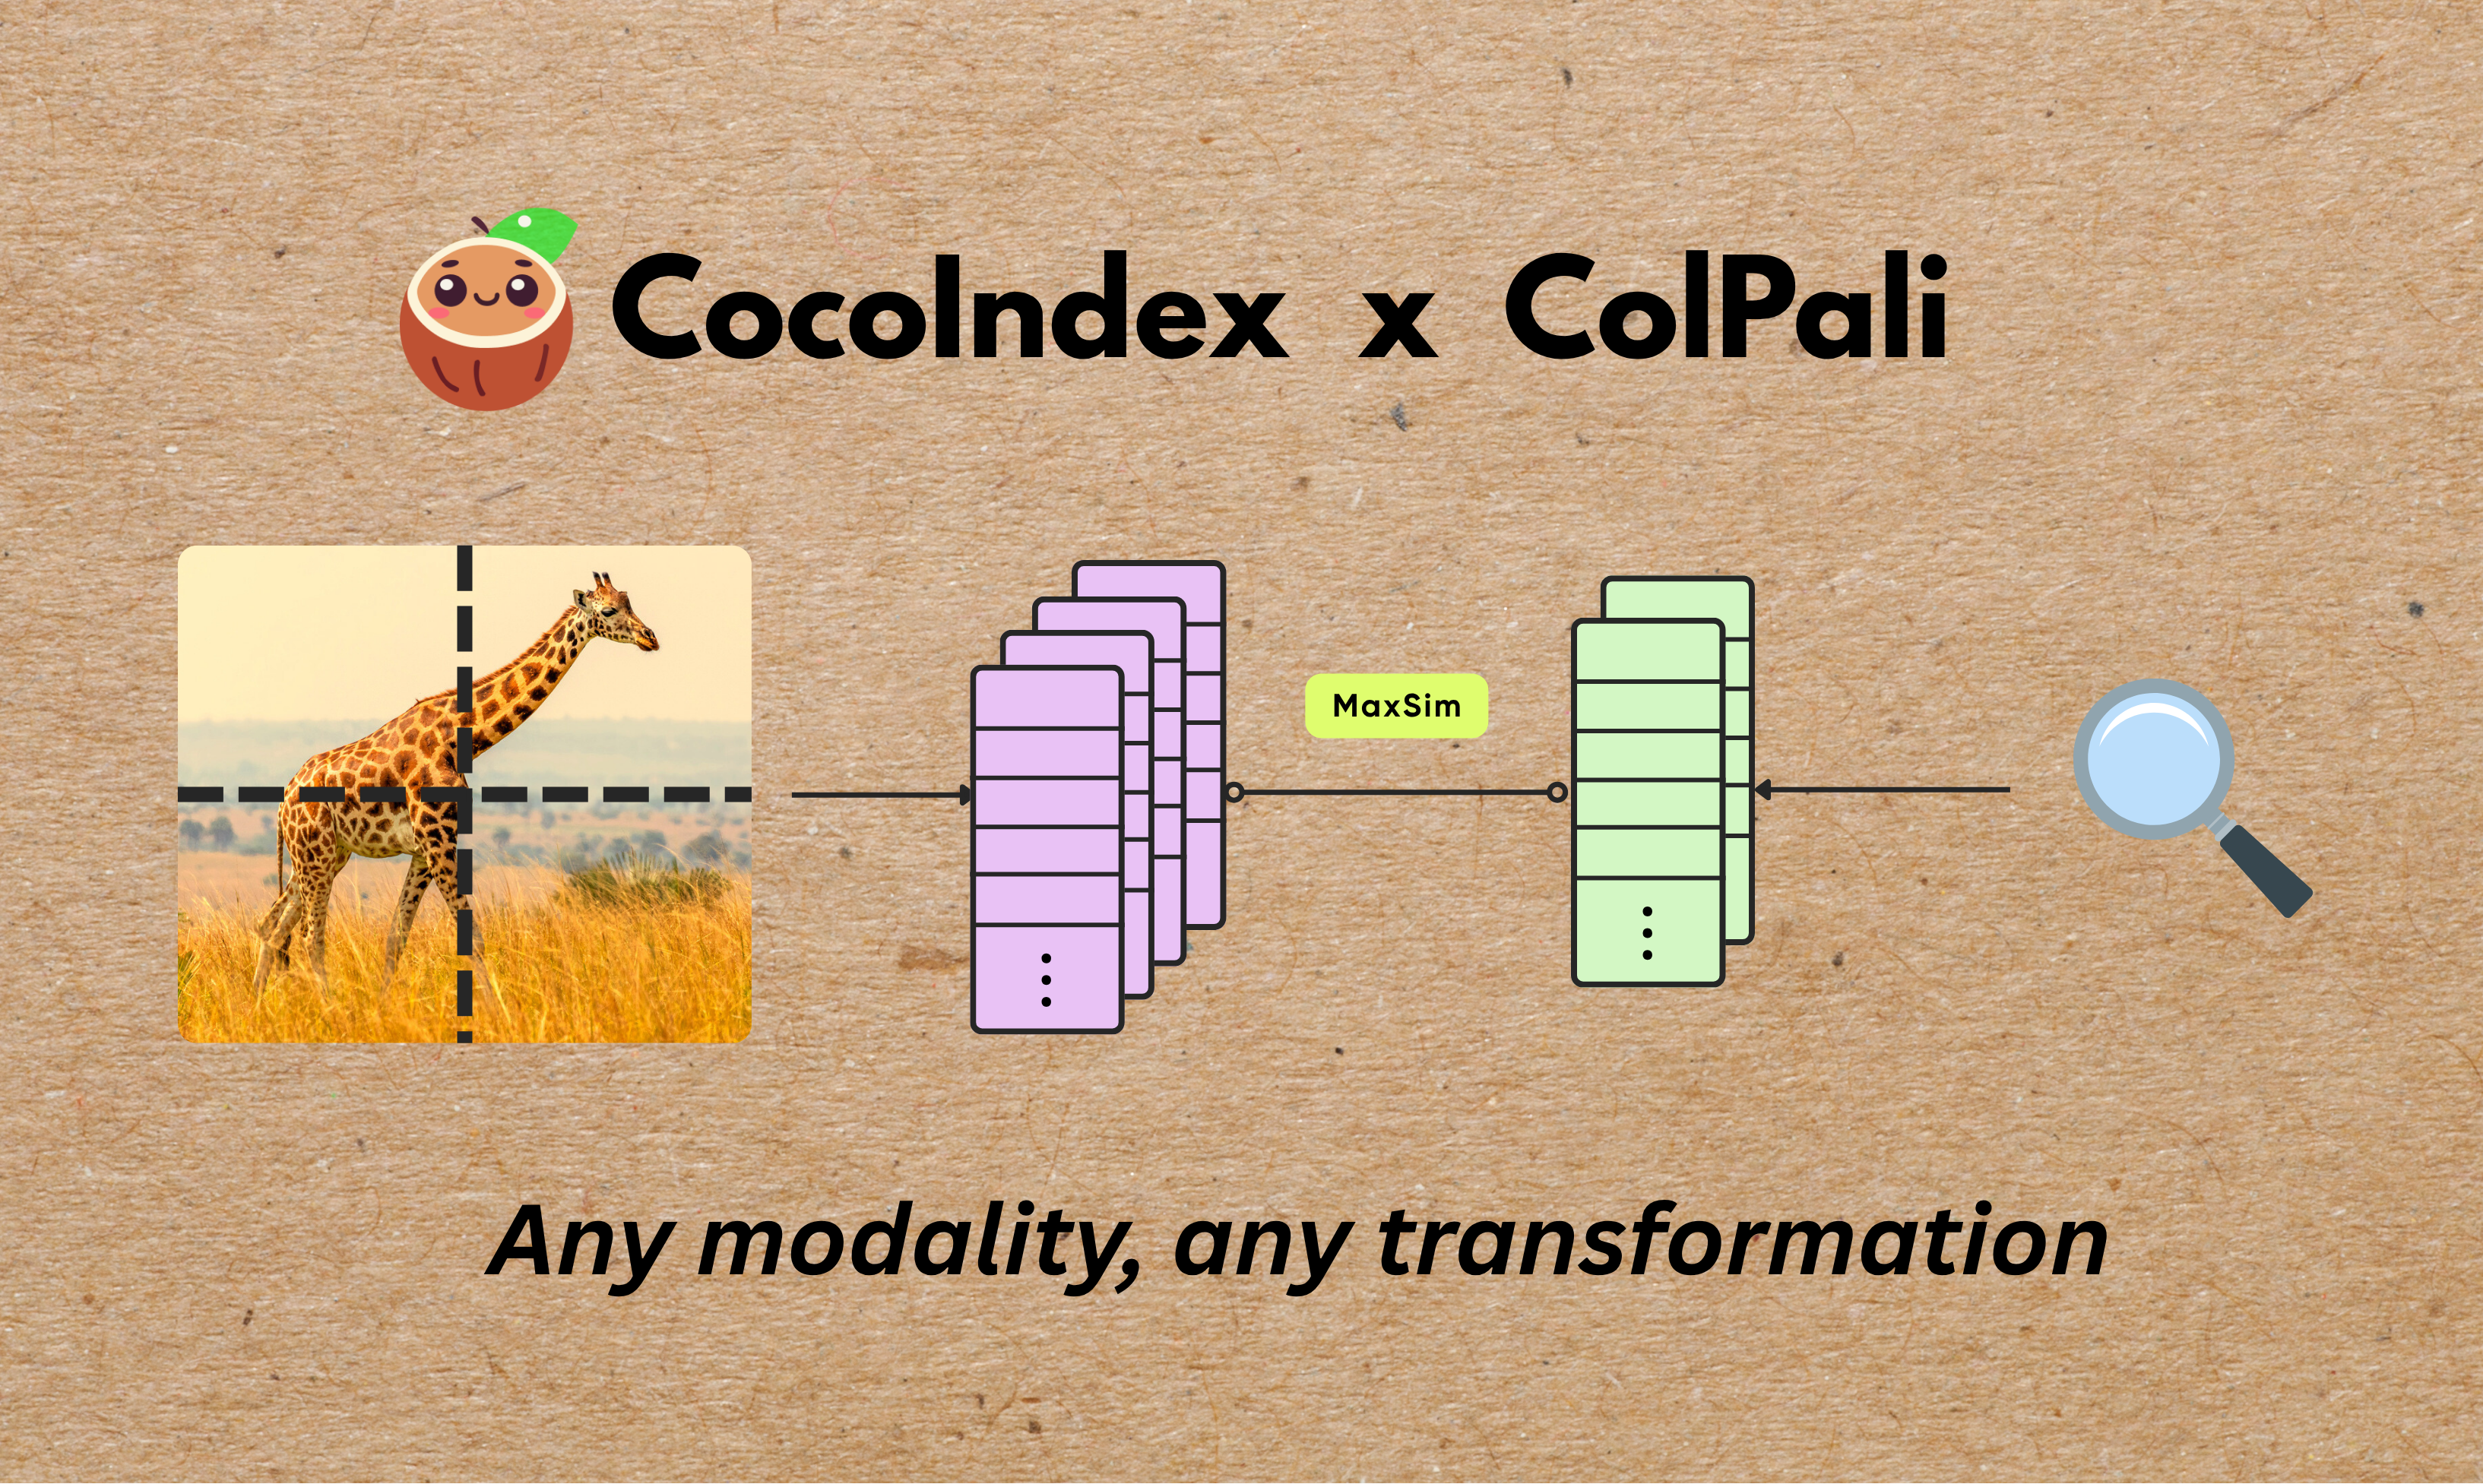
Index Images with ColPali: Multi-Modal Context Engineering

· 7 min read
Linghua Jin
CocoIndex Maintainer

Colpali

We’re excited to announce that CocoIndex now supports native integration with ColPali — enabling multi-vector, patch-level image indexing using cutting-edge multimodal models.

With just a few lines of code, you can now embed and index images with ColPali’s late-interaction architecture, fully integrated into CocoIndex’s composable flow system.

Bring your own building blocks: Export anywhere with Custom Targets

· 8 min read
Linghua Jin
CocoIndex Maintainer

Custom Targets

We’re excited to announce that CocoIndex now officially supports custom targets — giving you the power to export data to any destination, whether it's a local file, cloud storage, a REST API, or your own bespoke system.

This new capability unlocks a whole new level of flexibility for integrating CocoIndex into your pipelines and allows you to bring your own "building blocks" into our flow model.

Indexing Faces for Scalable Visual Search - Build your own Google Photo Search

· 5 min read
Linghua Jin
CocoIndex Maintainer

Face Detection

CocoIndex supports multi-modal processing natively - it could process both text and image with the same programming model and observe in the same user flow (in CocoInsight).

In this blog, we’ll walk through a comprehensive example of building a scalable face recognition pipeline using CocoIndex. We’ll show how to extract and embed faces from images, structure the data relationally, and export everything into a vector database for real-time querying.

CocoInsight can now visualize identified sections of an image based on the bounding boxes and makes it easier to understand and evaluate AI extractions - seamlessly attaching computed features in the context of unstructured visual data.

Build Real-Time Product Recommendation Engine with LLM and Graph Database

· 8 min read
Linghua Jin
CocoIndex Maintainer

Product Graph

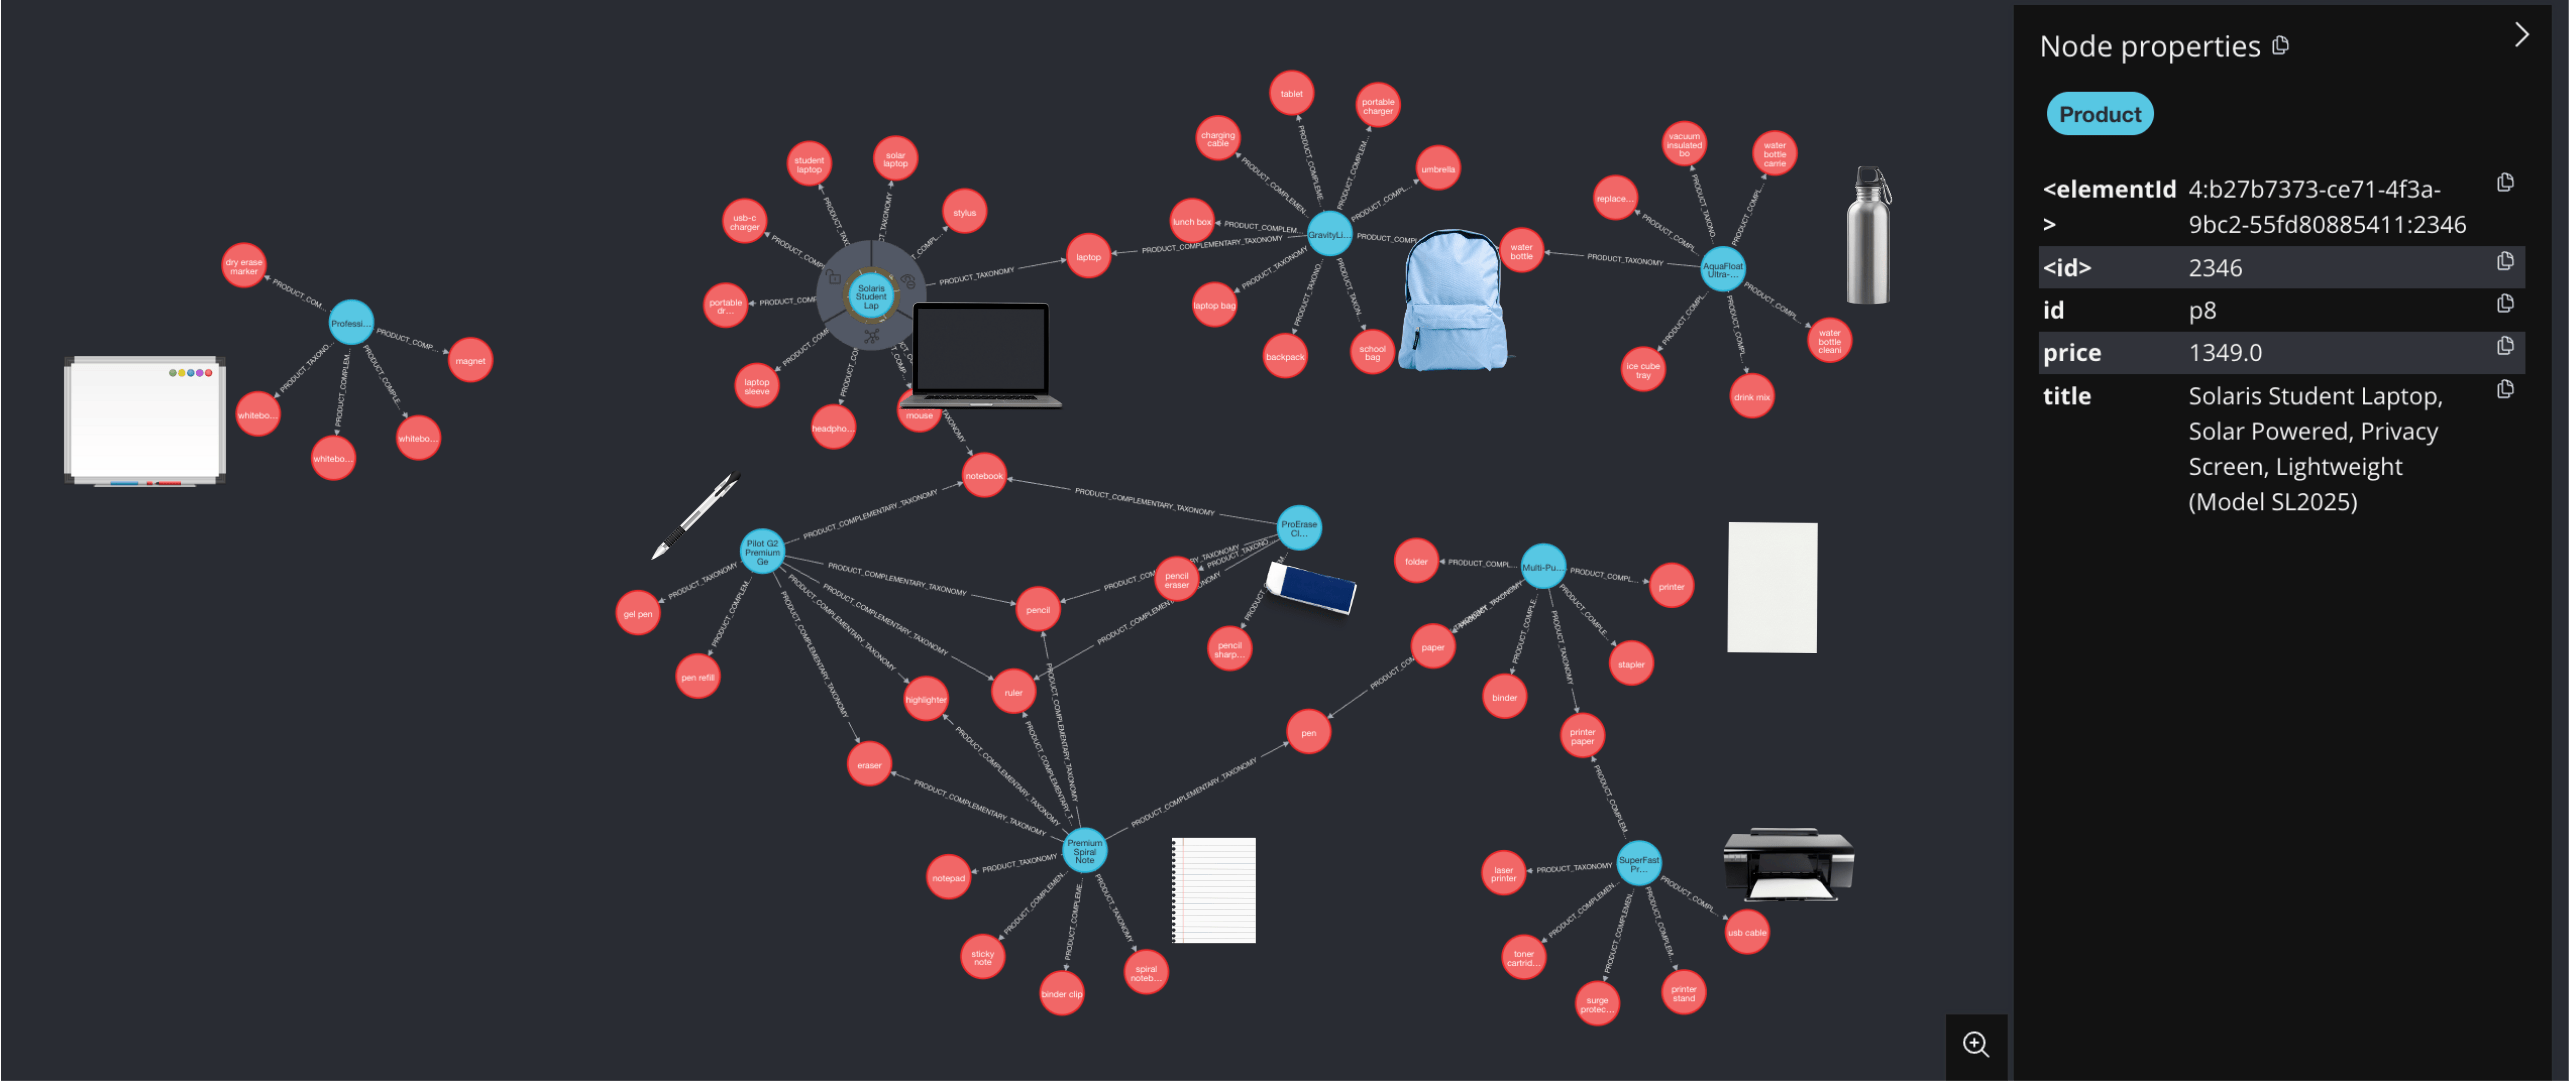
In this blog, we will build a real-time product recommendation engine with LLM and graph database. In particular, we will use LLM to understand the category (taxonomy) of a product. In addition, we will use LLM to enumerate the complementary products - users are likely to buy together with the current product (pencil and notebook). We will use Graph to explore the relationships between products that can be further used for product recommendations or labeling.

Build text embeddings from Google Drive for RAG

· 9 min read

Text Embedding from Google Drive

In this blog, we will show you how to use CocoIndex to build text embeddings from Google Drive for RAG step by step including how to setup Google Cloud Service Account for Google Drive. CocoIndex is an open source framework to build fresh indexes from your data for AI. It is designed to be easy to use and extend.